|
It should all fit together again, this time for real. The nut and the saddle are as they should, the fingerboard has been cleaned from varnish and polished, the bridge has it's little details and of course the cello is varnished. Last time when I had setup the cello I somehow got my ratios mixed up. I had made the string "nut to bridge" length 5x the "bridge to tailpiece" length. It should have been 6x. This creates the correct difference in the resonance frequencies of those pieces of string. The only thing I can adjust is the tailpiece so I brought the tailpiece closer to the bridge. The nut to bridge distance is 600 mm and the "bridge to tailpiece" length is 100 mm more or less. So the cello is (almost) finished!!! I say almost because the sound post position could still be optimised, the pegs are too long and the wolf sound eliminator is missing. But I do not plan to do any of that on my own. What a journey it has been. It started 16 months ago when I loaned the first books from the libraries and started to look for information, mostly videos, online. The build really started only in the spring of this year. I have learned a lot and done something I never thought I would do. It has also been interesting to see how everybody has been very skeptical to begin with but have slowly started to see that it is going to be not only something but an actual instrument. I am very happy with the result so far and I hope any possible issues with the sound can be fixed by tweaking the set up. 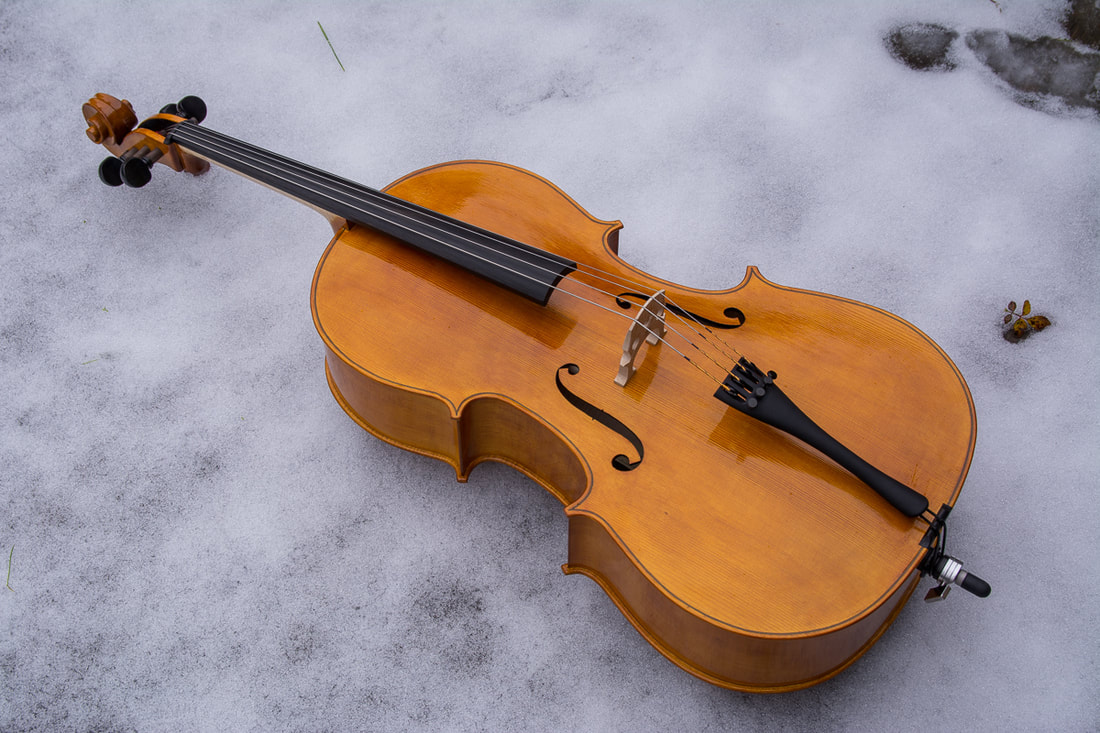
0 Comments
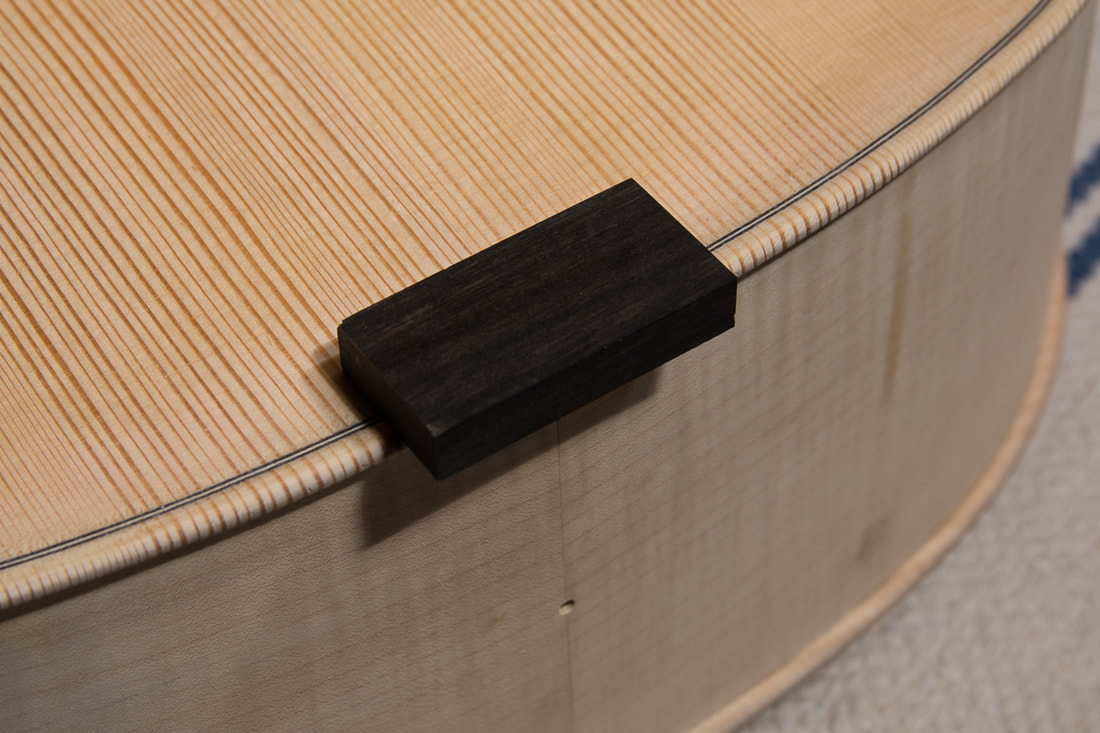
I did various small things today. First I cleaned up all the ebony parts from varnish. I started with a scraper, then used some sandpaper up to 2000 grit with some oil to get a really nice surface. I did that for the saddle and the fingerboard. Secondly I worked on the bridge. The height, thickness etc. are already finished. Maybe some work needs to be done if the cello doesn't sound right or is not good for Elias to play. In stead, I worked on the details. Some of the edges are chamfered and refined. One also tries to remove as much extra material as possible to reduce the weight and allow the bridge to vibrate more freely. Strobel in his book shows where to remove material and chamfer the bridge. I also found a really good post by Sally Mullikin on the topic, trianglestrings.com/newcellobridge. I really liked the way the width of the chamfer changes in some parts and tried to do that. I will not attempt to get the "kneecaps" as refined as she's done though. Something again for the next cello. The chamfers are quite subtle. In the photo below I have done the right side of the bridge. Not sure if you can make any sense of that. Check Sally's page for more details. 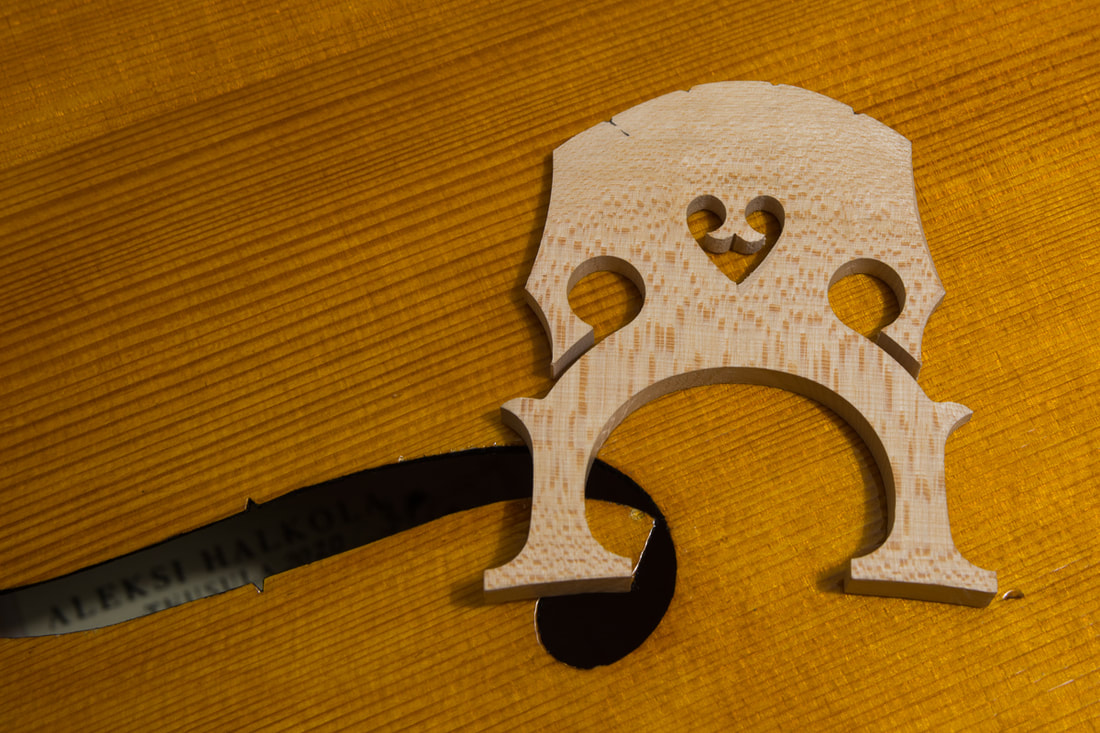 I shaped the saddle to fit its surroundings with a knife. Not much more to say about that. I did decide to do the glue up. I first glued up the neck. I really hope it all went well. It took a while to get the clamps right. And maybe the glue was too thick. It looks good now but I don't know if I can count on that. Otherwise the neck look goods. It appears centred on the body and the projected height is right. After the neck was done I also glued up the saddle. Now all its all done! One last thing to do before glueing up the neck is to put the saddle on. It could also be done afterwards but in my small workshop it is easier when the cello is still small. I had prepared a bit of left over ebony from the fingerboard already. Similarly to the neck mortice, I marked the width and depth of the saddle and then cut it out. Once the cello body was ready I could shape the saddle appropriately. |