|
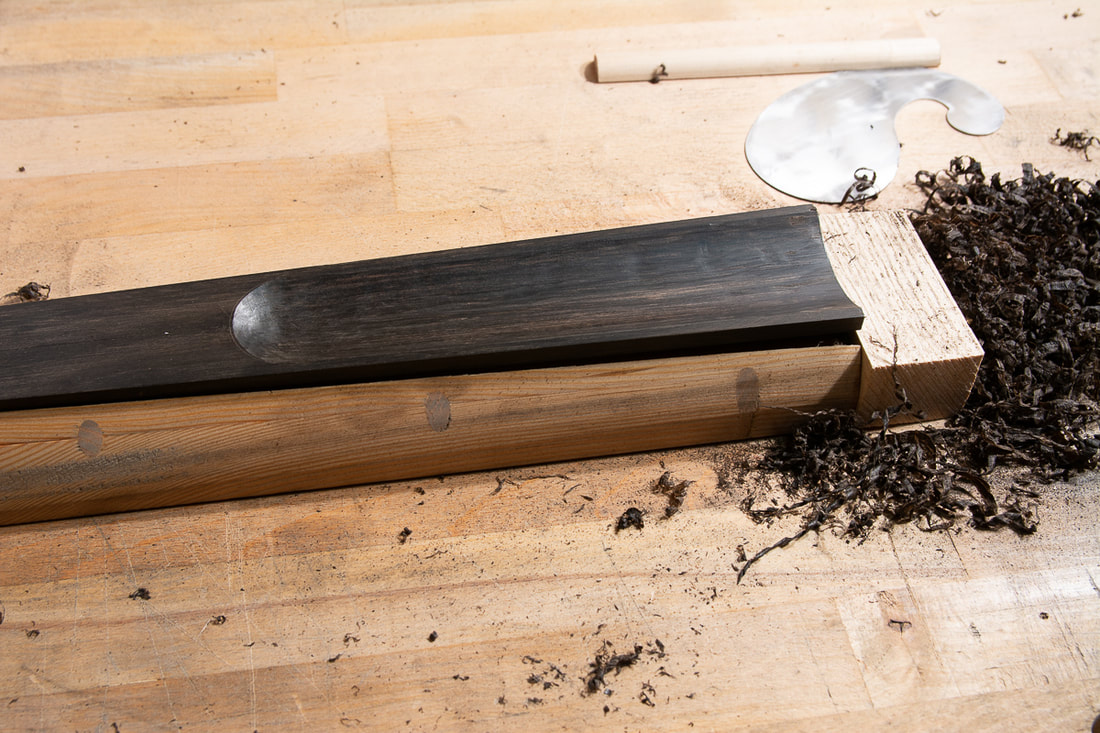
The fingerboard should be a little hollow to allow the strings to vibrate freely. Although I had made the fingerboard initially straight it has lived and was actually convex. In order to fix the fingerboard, I removed the upper nut and with a block plane set for very fine shavings I planed the fingerboard to be ~1 mm hollow in the middle. The photos below show the fingerboard before and after. I was worried that I would ruin something but this went pretty nicely. To finish off the fingerboard, I also sanded the fingerboard to be silky smooth and oiled it with fingerboard oil. In the end I still glued the nut back on its place.  
0 Comments
I visited www.howviolins.fi today. I had contacted the keeper of the shop a little while back to see if I could buy some wood for the next cello as I had forgotten to order the blocks and the linings when I bought the rest of the wood for Cello #2. I also asked if he would have a moment to give some feedback on this first cello I built so that I could learn from my mistakes and improve on the next one.
It was a pleasure to meet Guy and spend a little time with him in his shop. He gave me honest and critical feedback on the cello. He had quite a lot to say. The neck is too large/thick and doesn't quite have the right shape, the ff-holes could be larger, the arching is not consistent, the fingerboard is curved the wrong way, the sound post is all wonky... But it was not all gloom and doom. I had done many things fairly well, and he commented that is a good effort for my first instrument. That was of course nice to hear. He had 4 concrete things which could still be improved on this cello to get the most out of it. The sound post should be set properly, the bridge could be improved (though he did say that it was actually pretty good already) and the curvature of the fingerboard should be fixed and the neck needed working. I think I will attempt some of these myself. I will try to do the fingerboard. I knew already that it should be a little hollow. It had made it straight, and at the time I was too afraid to mess it up so I left it straight. It has now apparently curved the wrong way. This can cause a buzzing sound when the strings do not have enough clearance from the fingerboard. I think I will also work on the sound post. Other than being crooked it was also too tight. It will be a good exercise to try to properly fit the sound post. I maybe lost my patience last time. It is not all that easy to put the sound post in and out and know what to do with it to get a good fit. I probably gave up a too early. My plan is now to do those 2 things and then take it back to Guy and let him finish it off. I want to give it a try myself as I want to learn this stuff, but I also want to get the best sound out of the cello. It should all fit together again, this time for real. The nut and the saddle are as they should, the fingerboard has been cleaned from varnish and polished, the bridge has it's little details and of course the cello is varnished. Last time when I had setup the cello I somehow got my ratios mixed up. I had made the string "nut to bridge" length 5x the "bridge to tailpiece" length. It should have been 6x. This creates the correct difference in the resonance frequencies of those pieces of string. The only thing I can adjust is the tailpiece so I brought the tailpiece closer to the bridge. The nut to bridge distance is 600 mm and the "bridge to tailpiece" length is 100 mm more or less. So the cello is (almost) finished!!! I say almost because the sound post position could still be optimised, the pegs are too long and the wolf sound eliminator is missing. But I do not plan to do any of that on my own. What a journey it has been. It started 16 months ago when I loaned the first books from the libraries and started to look for information, mostly videos, online. The build really started only in the spring of this year. I have learned a lot and done something I never thought I would do. It has also been interesting to see how everybody has been very skeptical to begin with but have slowly started to see that it is going to be not only something but an actual instrument. I am very happy with the result so far and I hope any possible issues with the sound can be fixed by tweaking the set up. 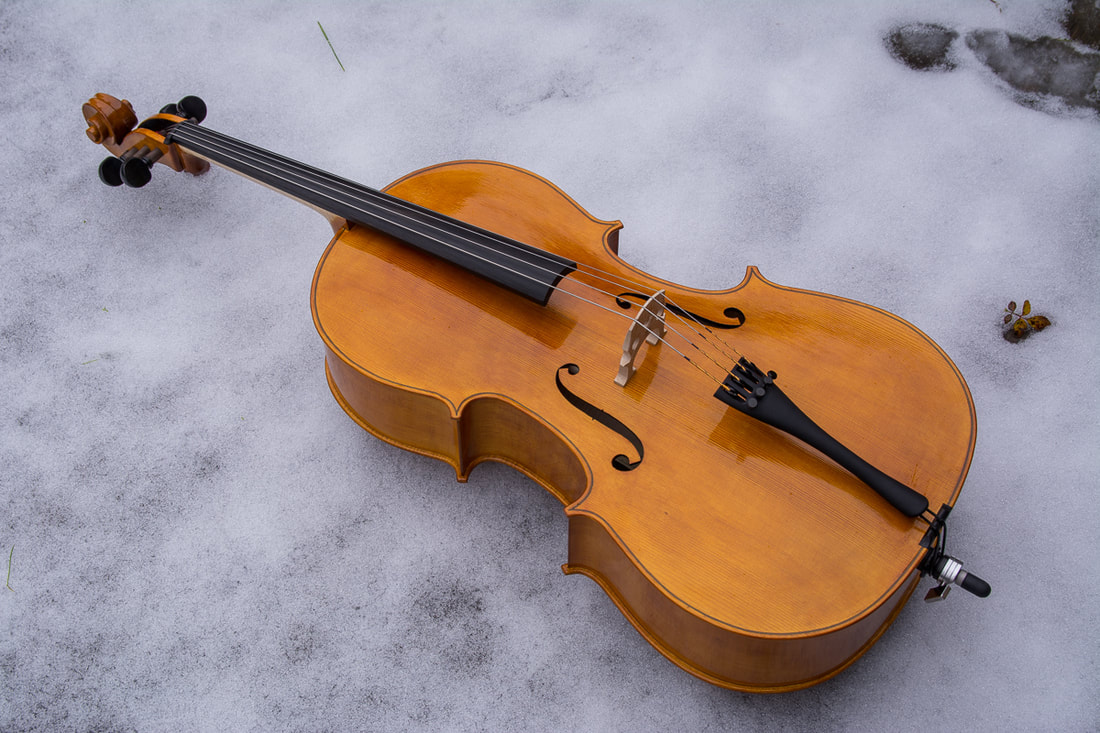 I did various small things today. First I cleaned up all the ebony parts from varnish. I started with a scraper, then used some sandpaper up to 2000 grit with some oil to get a really nice surface. I did that for the saddle and the fingerboard. Secondly I worked on the bridge. The height, thickness etc. are already finished. Maybe some work needs to be done if the cello doesn't sound right or is not good for Elias to play. In stead, I worked on the details. Some of the edges are chamfered and refined. One also tries to remove as much extra material as possible to reduce the weight and allow the bridge to vibrate more freely. Strobel in his book shows where to remove material and chamfer the bridge. I also found a really good post by Sally Mullikin on the topic, trianglestrings.com/newcellobridge. I really liked the way the width of the chamfer changes in some parts and tried to do that. I will not attempt to get the "kneecaps" as refined as she's done though. Something again for the next cello. The chamfers are quite subtle. In the photo below I have done the right side of the bridge. Not sure if you can make any sense of that. Check Sally's page for more details. 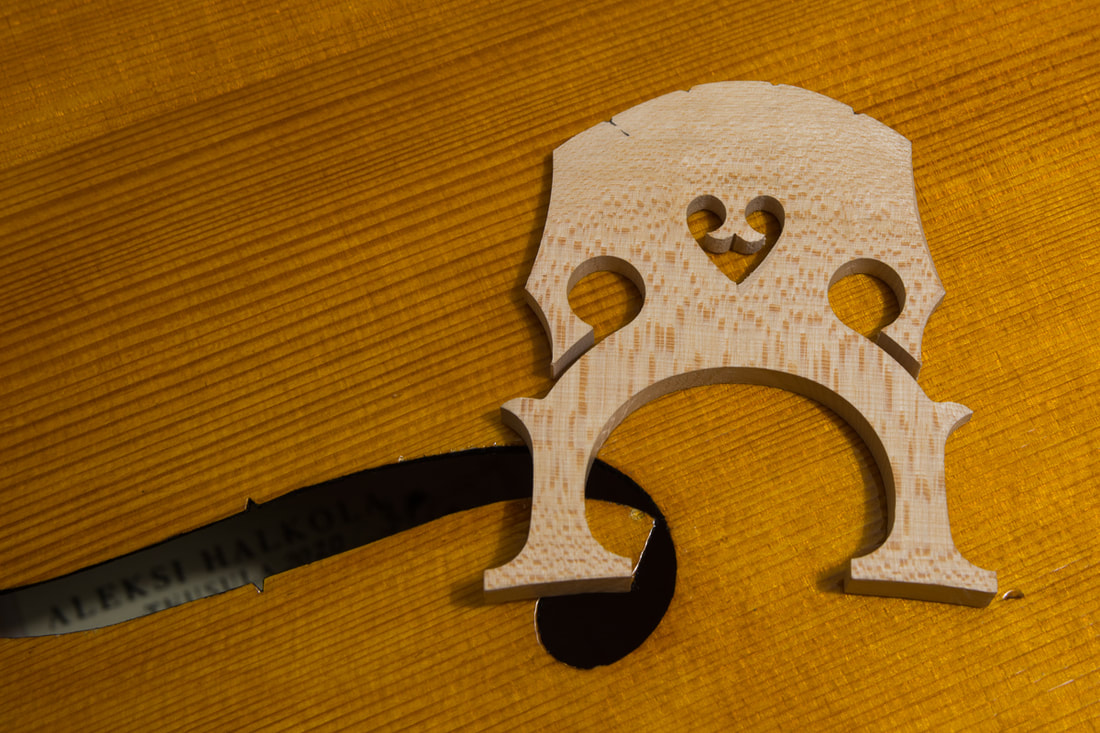 Time to put it all together again. First ip is the true fingerboard. During the varnishing a false fingerboard was glued on. I cleaned up both the neck and the fingerboard glueing surface an glued the two together using some thin glue. The fingerboard might have to come again at some point so the joint shouldn't be too strong. In principle I could also have glued on the upper nut but I thought I'l leave it for later in order not to mess up anything. In order to prepare for the varnishing, it is now time to take the fingerboard off. t was only provisionally glued with a little weak hide glue. I warmed up the spots with the glue with a heat gun and the glue just gave up. I've never done that before. But I am starting to understand why some people insist in using hide glue. It holds strongly but can be removed if the piece needs repairing. Violins and cellos but this applies equally furniture etc. I think the next time I build something other than a cello, I will also see how hide glue would work. After the fingerboard was off, I glued a false fingerboard on. It protects the edges and surface of the neck, and also ensures the neck stays flat and true. Once the glue has set I will once more go over the whole cello and make sure the surface finish is nice. That is done mostly with a sharp scraper to leave a nice crisp appearance. Sandpaper used only sparingly where appropriate. 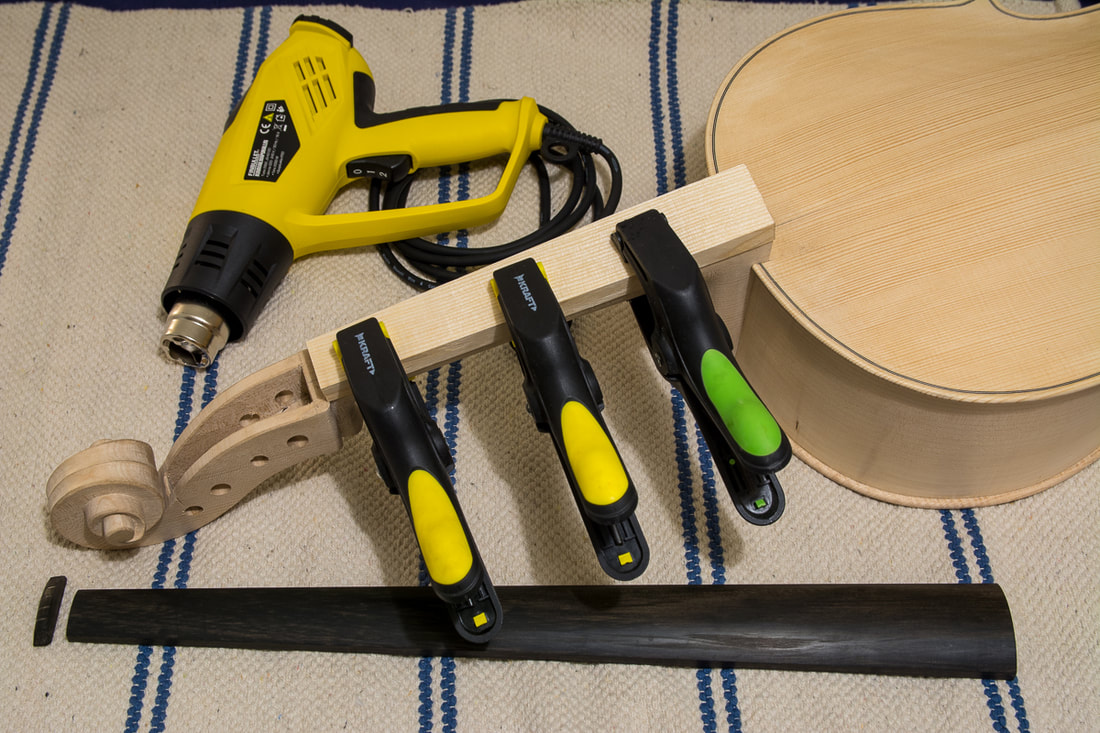 I am done with the fingerboard, for now. I did the hollowing out on the back side. Mostly with gouges. I started going length wise and when I was pretty close it was easier to across the grain. I was surprised how easy it was to work with ebony. Of course the gouges need to be sharp. After the gouge I used a scraper to get a smooth finish. That again was a pleasure. One doesn't notice the grain of the ebony at all and one gets these nice shavings. Wonderful! Next I need to work on the neck again and then it is time to fit the neck on the body. After I have glued the label inside and the top on the sides. Exciting! I haven't been able to make much progress recently. I don't have any good excuse, I just haven't taken the time to do anything. Today I planed the fingerboard to final width.I used my shooting board for that to ensure that the sides are perpendicular to the bottom. The sides were more or less the correct thickness before I reduced the width. It is surprising how much thicker the sides are now that I took a bit off. Need to work on the top surface again. After that I need to also create the hollow on the under-side. 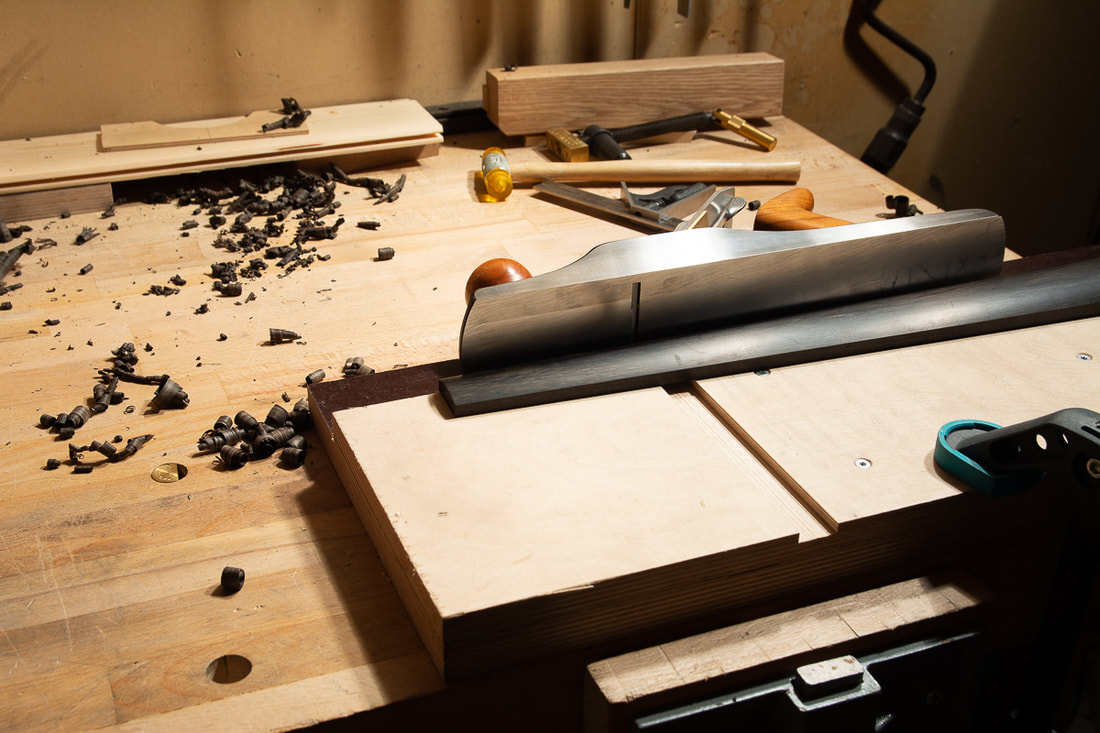 The bottom of the fingerboard wasn't flat any more. At first I thought this would be because the piece of ebony had been in the holding jig for a long time and wasn't in contact with air from all sides any more. Maybe the moisture from the jig or something would have caused the bend in the fingerboard. So I allowed it to breath freely for a week no change. I have reduced material from the fingerboard very non-uniformly so maybe the change in shape has to do with relieved internal stresses in the wood. As a result I decided to reflatten the bottom. So far it has kept the new shape well. I tried out the sanding block I made for the fingerboard the other day. It has the intended curvature of the fingerboard top and should fit nicely on top of the jig. Works great! It is a shame to sand the super smooth surface from the plane but it is just impossible to get a nice even curvature with the straight plane iron. |