|
I drilled some holes today. First I drilled the holes for the pegs. I wasn't sure about the locations. They are now on the same places (scaled) as on Strobel's template. There might be some difference in the relative locations between a 1/2 cello and 4/4 cello. On the current 1/4 my son has, the holes are more evenly spaced. I couldn't really find good literature though so I just went with the templates. The large holes are to help be cut out the neck from the block. I don't have access to a band saw which would make this all quite easy. My plan is to drill some big holes and then saw between them. Or maybe just saw lots of holes. Not sure yet. I might use a router for the scroll. I have some flush trim bit for the router which I think would work. I am not very happy with the neck block actually. The grain isn't very straight. It also twists along the block. I hope it will not cause twisting in the finished neck with time. This is the only bit of wood I bought from ebay, maybe I shouldn't do that anymore. 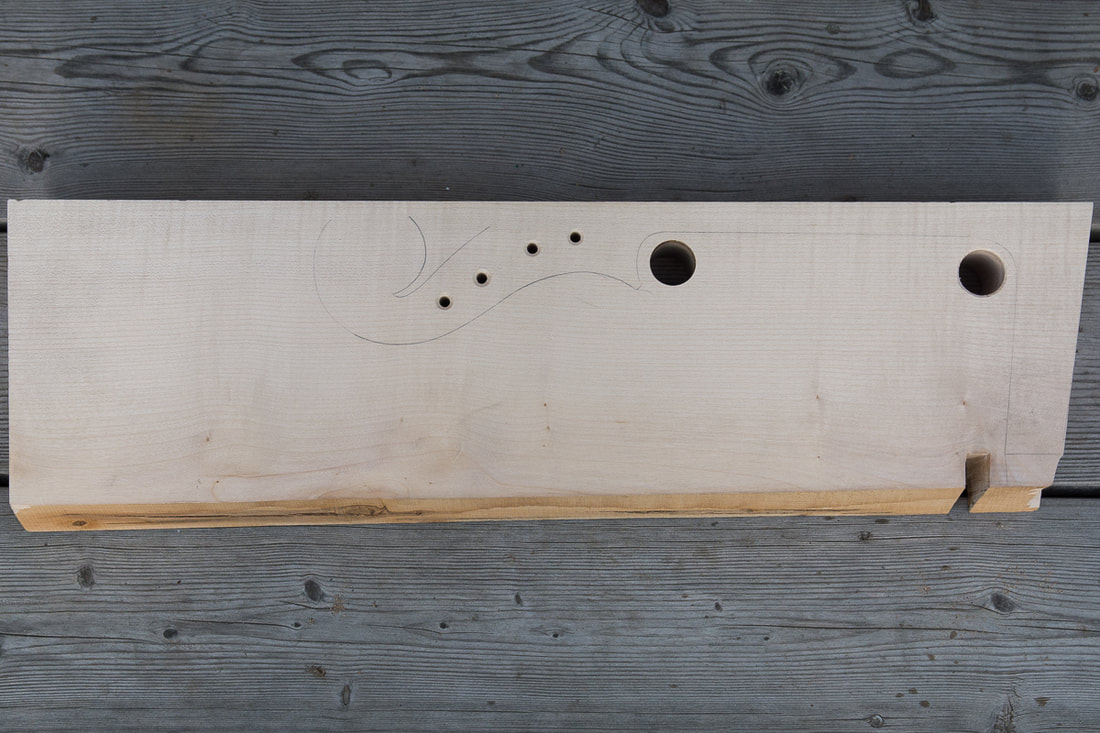
0 Comments
Today I started to make the neck block ready for drawing the neck on it. I flattened one of the sides and squared the face. I also started to thickness it. First now generously. The widest part of the neck is the eye of the scroll., elsewhere the neck is substantially narrower. The block of wood has quite uneven growth rings. Their orientation changes a bit and the growth has also been varying. I hope it doesn't matter too much. I finally had the courage to glue the back on the ribs. I took my bright halogen lights to help with the glueing. Less for the light and more for the heat that they generate. The glueing area is pretty large and the heat from the lights hopefully allow me to work without a hurry. I also used a hairdryer to warm up the glueing surfaces. I first spread glue on all the blocks, let the block suck the glue and then I applied some more glue on the blocks. I then clamped the upper and lower blocks and the corner blocks. After that I used a knife to open and spread the glue on the linings a little at a time and clamped as I went. After I had all the surfaces glued up, I took one or two clamps off at a time and cleanup excess glue. There wasn't too much actually and I think I got it out well. There was some glue on the inside too so when I glue the front I need to be more careful since after the front is glued up I can't access the inside any more. The experience was a lot less scary than I had expected. I think the lights really helped. The three parts for the body area ready to be glued up! The front and back plates are as ready as I will get the now. I hope they are good enough. I haven't done proper tuning of the tap tones. I tried holding on various places and tap and other places but I've had trouble making much sense of all that. And I am concerned that if I now remove material from either plate, I might remove too much from a wrong place I will now glue it all up and wait until the whole thing is ready before returning to it. If anything I think the top has a higher note so maybe I need to reduce the thickness of the front plate, or of the bass bar. But that can also be done later as the top should come off fairly easily. So I will now finish what I can, and once setting up the cello with a luthier I can get feedback on the general sound of the cello and maybe advice on how to fix it. 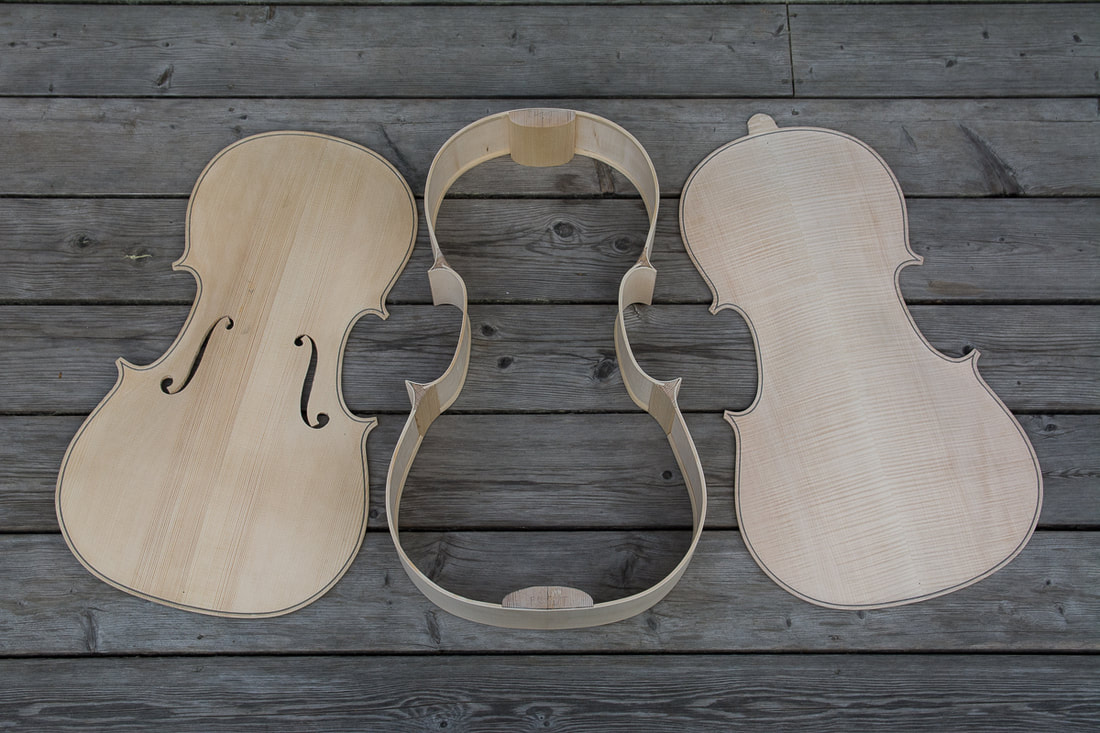 Once the mould was out I could shape the blocks. The corner blocks were shaped using a gouge for which I had ground the bevel on the inside. I used the chisel already to shape the corner blocks after having glued them on the mould. The gouge did most of the rough work. I then finished the blocks using my finger plane. The upper and lower blocks were shaped using a wide chisel and a block plane. Shaping the blocks was nice work. The spruce was easy to work with and I think I got nice curves on all the blocks. Before shaping the lower block I drilled a small hole though the ribs and the block. This is the pilot hole for the endpin hole. It might have been better to drill a bigger whole already now, but since i haven't bought the endpin yet, I wasn't sure how big a hole to drill. After having rounded the edges the next thing to do was to prepare the ribs for the glueing of the plates. First I tried to remove all pencil marks form the outride of the ribs with an eraser and then sanded the ribs lightly with fine sandpaper. Once that was done it was time to get the mould out. It came out pretty nicely in the end. I used a small plastic hammer to tap the blocks gently. Nothing broke! I repeated the rounding of the edge on the front this morning. Although softer, spruce is in many ways harder the work with than the harder maple. The difference between the soft and hard growth rings is much bigger and if careless one can easily remove too much of the soft wood and not enough of the hard one. For both the back and the front I used sandpaper glued to a flat piece of wood. That allowed me to make sure the growth rings are sanded equally. I started to prepare the back for the glue up. The edge needs to be round off and it is easier to do this for the bottom edge before the back has been glued up. I first marked with a pencil a little less than half the edge thickness of the back. I then filed the corner off at 45° all along the edge. I finished off with some sandpaper. It was time to finish the linings. They need to be thinned out at the lower half. The purpose of the linings is to provide more gluing surface for the back and front plates. The lower part only add weight but add no strength. I did the work with the knives I had made. They were nice and sharp. Strobel writes that the linings should be triangular. I maybe took this too literally and in the first pass was aiming to feather the linings to nothing at the lower end. In the second pass I then smoothed the profile of the linings. I did not remove the mould yet like most do at this stage. I am not sure how long it will still take me before I am ready to glue the plates on the ribs so I want to keep the mould on as long as possible. The linings had a small gap in places. I think I will fill the gaps with some glue before going further. I am a little afraid that the gaps might cause some noise when playing the cello if not filled. I finished the bass bar today. No tuning involved. I trusted Strobel's bass bar profile scaled down to 1/2 cello. I did the rough work using the finger planes and finished with some sandpaper. The bass bar is roughly semi-circular at the ends and more elliptical in the centre. The ends of the bass bar are cut at ~45° angle. |


