|
Although I had tried, I didn't quite manage to clean up all the glue straight away, while the glue was still fresh. I went all around the cello and clean up the bigger rests with a scraper. Here's a photo of the biggest one. Glue rests will affect how the wood takes up the stain and varnish so it is important the get it all clean. I will go through the spots once more with hot water to make sure it all comes out before varnishing.
0 Comments
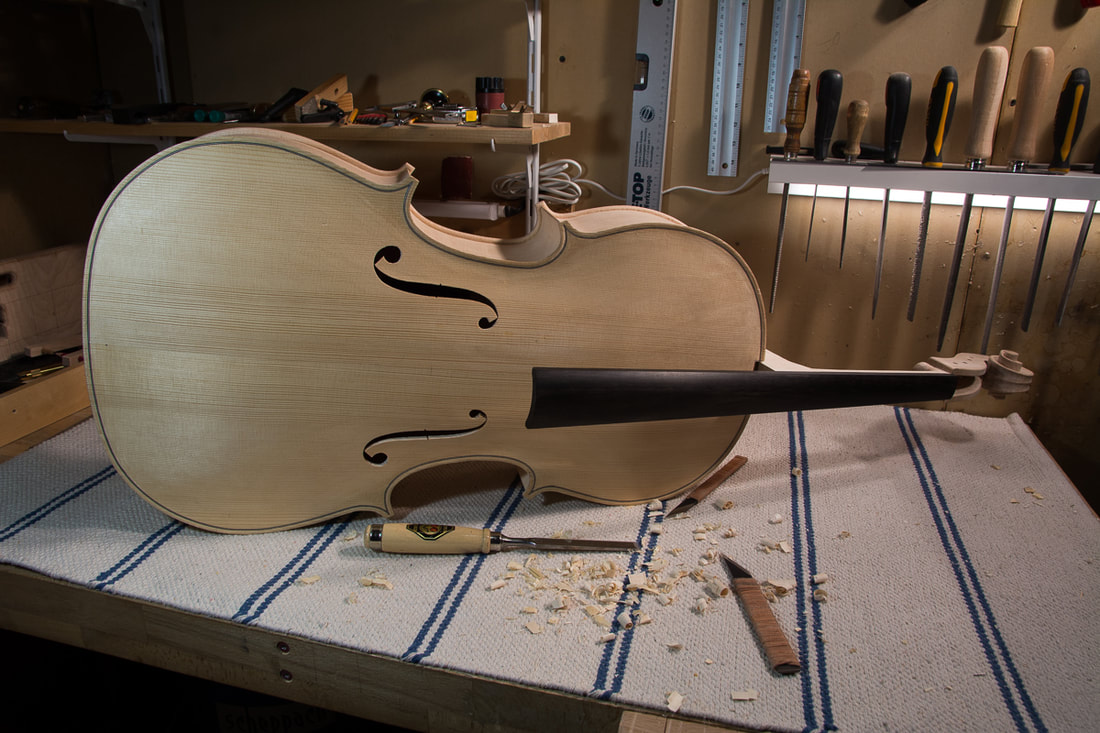
Chalk fitting is done in the end to ensure a good fit every where. Some chalk is put on the heel of the neck before it is pushed into position. Chalk should stay uniformly all over the mortice. And that is indeed mostly the case. There are some spots at the bottom on the sides without chalk but in the centre it goes all the way from the top to the bottom. I will do some refinement but the fitting is now more or less finished. I think I will work first a bit more on the neck to get it finished as this is easier when the neck is not yet attached to the body. 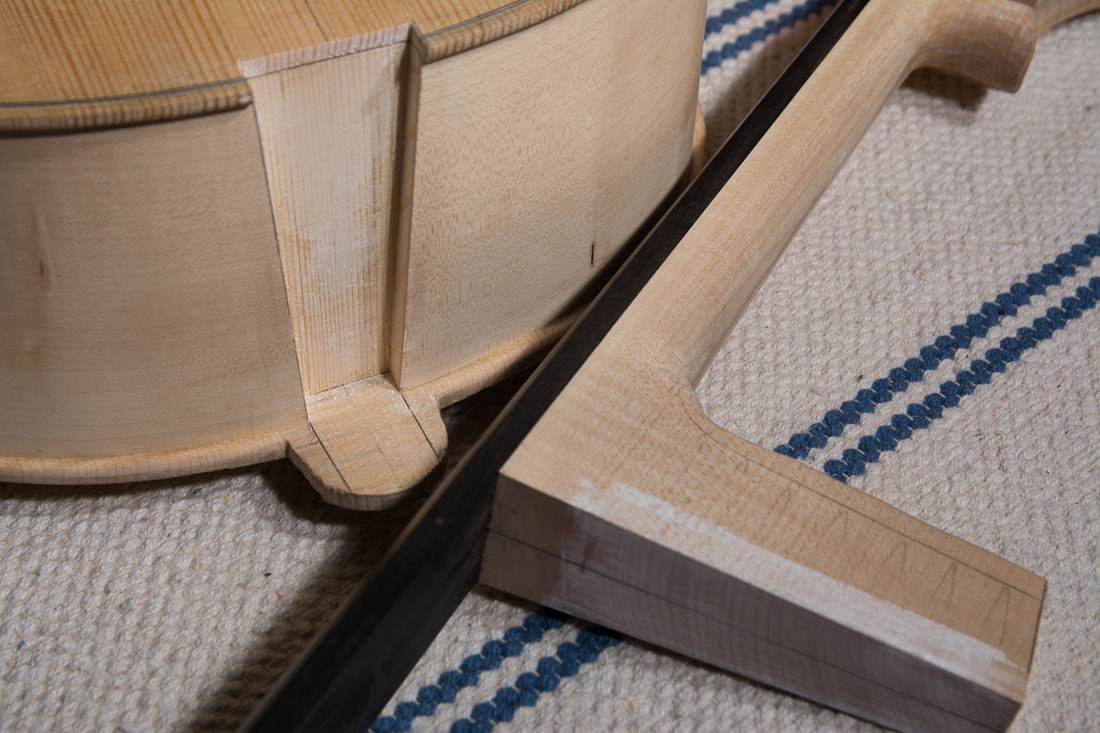 Made good progress today, the neck is almost fitted. It needs to come down still ~1 mm but then it is good. The projected height is then what I want (72 mm) and the height of the bottom of the fingerboard at the heel above the front is 19 mm. I forgot to put links to some good resources earlier so here you go: www.derekroberts.co.uk/making/neckjoint.htm osnesviolins.com/10.Fitting%20the%20Neck.htm YouTube: Davide Sora Lavorazione e incastro del manico di violino YouTube: Jon Magnum How to Build a Fiddle - Part 10 Attaching the neck, nut & saddle 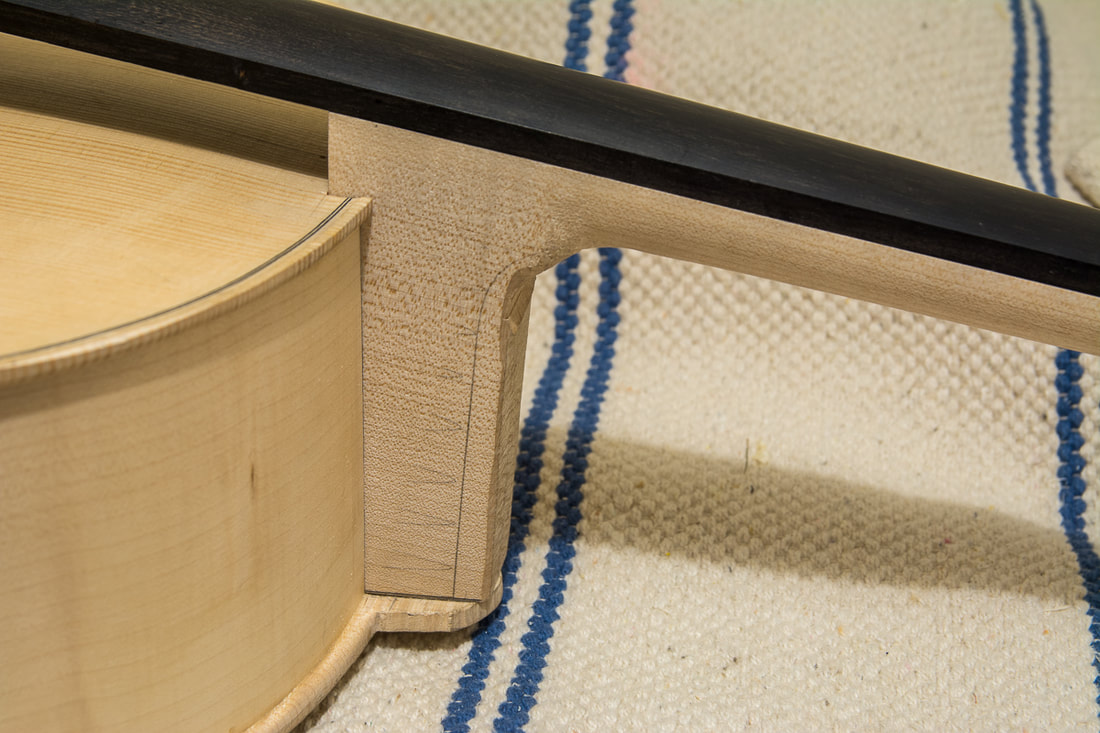 Now I started to measure the correct configuration for the neck. Based on the book by Baker, the projected height of the fingerboard at the bridge is 70 mm. I read somewhere that the height of the fingerboard usually gets a little smaller in a new cello. I am therefore aiming now at 71-72 mm so it is still something 10 mm too high. Luckily also the heel is roughly the same amount too high. This means that I don't need to try to change the angle of the neck, I just need to bring it down. I will now do the rest of the work mostly with files and the grain direction doesn't matter too much anymore. A chisel is actually also quite handy as a scraper to ensure the bottom is flat. The orientation of the neck in other ways. It all looks pretty good. No need to do major adjustments, just make the mortice a little deeper and wider, mostly to the one side. as the centre of the neck doesn't quite match the centre of the body. But it's not far off. Time to fit the neck. I first marked the approximate width of the heel of the neck on the front. Leaving some space to the lines I sawed through the top and then with a knife cut the along the lines to make sure the front doesn't chip. With a chisel I then took to the edge. Now I could set the neck right on the ribs and mark the sides. Again leaving some margin I cut with a knife through the ribs. One that was done I could use a chisel to chisel out the ribs. I now realised I should have paid more attention to how the grain runs in the blocks. On the top block the grain runs slightly towards the inside of the cello. This makes is quite tricky to nicely cut the surface of the block where the neck must fit very well. If anything, the grain should run out of the cello, not into it. Will need to keep this in mind with the next cello. Anyways, even with a shallow mortice on the block, the neck now stays on its place without any external help! It is a big day today. After having glued the label on its place, I also glued the body together! I didn't make any photos of the glue up as it was pretty hectic. But I think I did OK. One thing I realised is that I didn't have enough clamps. I need to make more. Maybe I hadn't noticed that while glueing the back because the maple use on the back is stiffer than the spruce on the front. I also realised I should have done a better clean up after the glueing. There are a few places where the glue has come on the ribs. Oh well, next time. Anyways, this is really exciting. Now I only need to attach the neck and the saddle to the body. |