|
I visited www.howviolins.fi today. I had contacted the keeper of the shop a little while back to see if I could buy some wood for the next cello as I had forgotten to order the blocks and the linings when I bought the rest of the wood for Cello #2. I also asked if he would have a moment to give some feedback on this first cello I built so that I could learn from my mistakes and improve on the next one.
It was a pleasure to meet Guy and spend a little time with him in his shop. He gave me honest and critical feedback on the cello. He had quite a lot to say. The neck is too large/thick and doesn't quite have the right shape, the ff-holes could be larger, the arching is not consistent, the fingerboard is curved the wrong way, the sound post is all wonky... But it was not all gloom and doom. I had done many things fairly well, and he commented that is a good effort for my first instrument. That was of course nice to hear. He had 4 concrete things which could still be improved on this cello to get the most out of it. The sound post should be set properly, the bridge could be improved (though he did say that it was actually pretty good already) and the curvature of the fingerboard should be fixed and the neck needed working. I think I will attempt some of these myself. I will try to do the fingerboard. I knew already that it should be a little hollow. It had made it straight, and at the time I was too afraid to mess it up so I left it straight. It has now apparently curved the wrong way. This can cause a buzzing sound when the strings do not have enough clearance from the fingerboard. I think I will also work on the sound post. Other than being crooked it was also too tight. It will be a good exercise to try to properly fit the sound post. I maybe lost my patience last time. It is not all that easy to put the sound post in and out and know what to do with it to get a good fit. I probably gave up a too early. My plan is now to do those 2 things and then take it back to Guy and let him finish it off. I want to give it a try myself as I want to learn this stuff, but I also want to get the best sound out of the cello.
0 Comments
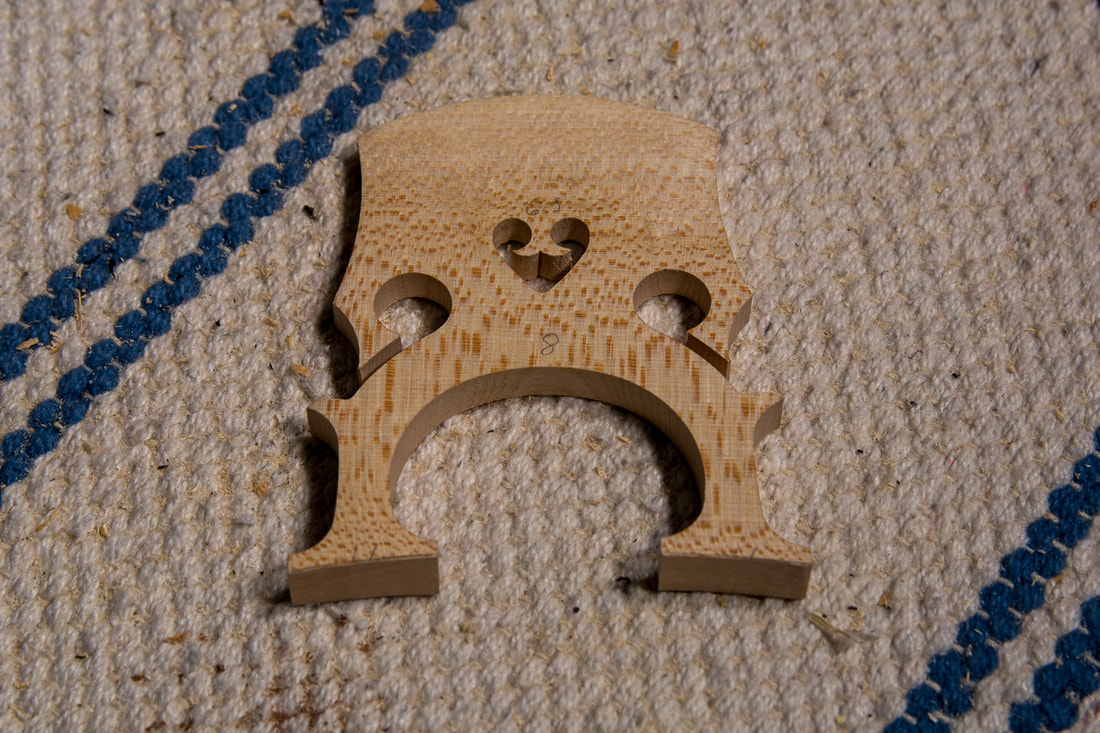
Pekka had mentioned that the sound of the cello could be improved by thinning out the bridge. The bridge transmit the vibrations of the string to the front and via the sound post to the back. A lighter bridge vibrates more freely and should in theory open up the sound. So that is what I set out to do today. The feet of the bridge were 10.5 mm thick and the top of the bride was 2.6 mm thick. I found some measurements for a 1/2 cello from www.alangoldblatt.com/specs/Cello.pdf. It specifies the foot thickness as 9.3 mm and the sop thickness as 2.2 mm. So that's what I did. I am sure these are not necessarily the optimal measurements for this bridge and this cello but I do not have the experience to do otherwise. After the modifications to the bridge Elias played a few of the pieces he practices now and I think I can hear the difference. But maybe that is only because I hear what I want to hear. Interesting to see if Elias' teacher notices anything in his next practice.
This was the final thing I knew I needed/wanted to do on the cello. Now I call it officially finished. Still not sure what to do next. It will be either a 3/4 cello or 4/4 cello. It could be that the time Elias needs a 3/4 cello will be quite short so it might not be worth the trouble to build one that size. On the other hand it would be another practice cello before the "final" 4/4 cello. I did various small things today. First I cleaned up all the ebony parts from varnish. I started with a scraper, then used some sandpaper up to 2000 grit with some oil to get a really nice surface. I did that for the saddle and the fingerboard. Secondly I worked on the bridge. The height, thickness etc. are already finished. Maybe some work needs to be done if the cello doesn't sound right or is not good for Elias to play. In stead, I worked on the details. Some of the edges are chamfered and refined. One also tries to remove as much extra material as possible to reduce the weight and allow the bridge to vibrate more freely. Strobel in his book shows where to remove material and chamfer the bridge. I also found a really good post by Sally Mullikin on the topic, trianglestrings.com/newcellobridge. I really liked the way the width of the chamfer changes in some parts and tried to do that. I will not attempt to get the "kneecaps" as refined as she's done though. Something again for the next cello. The chamfers are quite subtle. In the photo below I have done the right side of the bridge. Not sure if you can make any sense of that. Check Sally's page for more details. 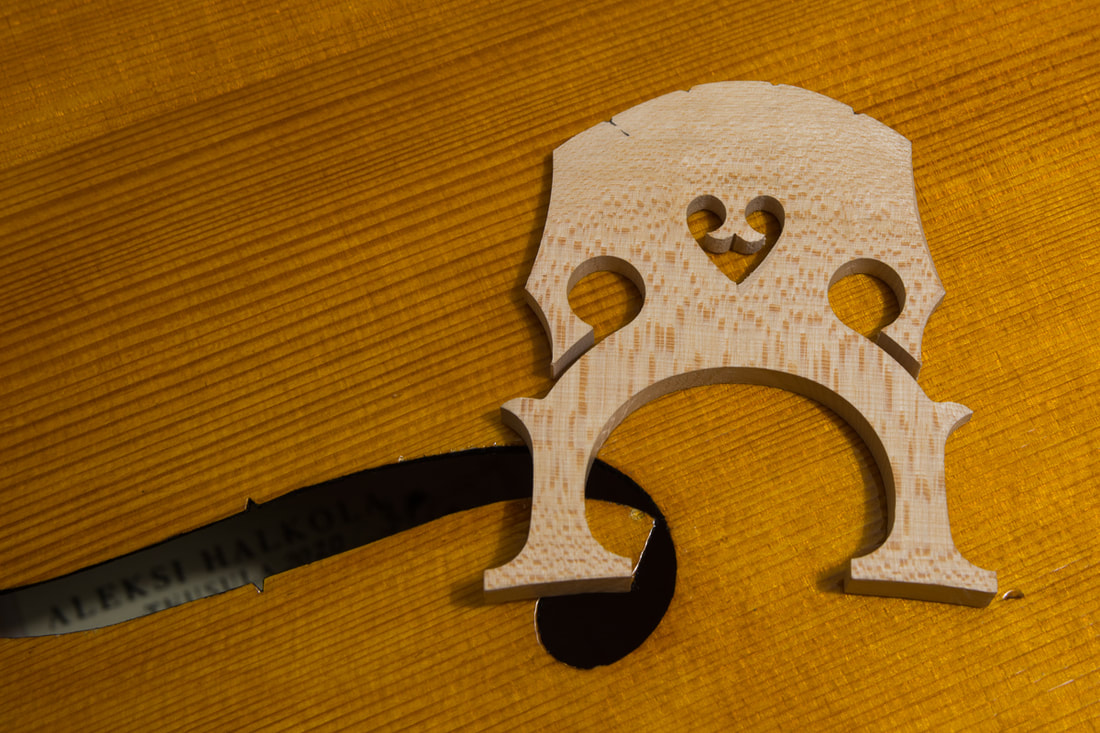 Now that the sound post is in place it is time to finish the nut. At least mostly. I will prepare it so that I can put the strings on but will not fine tune the clearances to the fingerboard before the final set up. They are quite close so Elias should be able to play it like this too. I used a file to round off the nut towards the pegbox. The edge towards the fingerboard should stay crisp. After having done the end pin, I started fitting the bridge. The bridge is quite tall so I need to remove a lot from the feet, other wise the heart comes too close to the strings. The bridge really should be fitted after the sounds post is in place. Which it isn't. That's why I will only go so close. The thickness of the bridge is actually already pretty close. I think I will only thin the upper part to ~2.5 mm but other wise leave it as is. At least until the cello is varnished. My plan now is to get the first sound out, make sure I don't need to open the cello again. And after that varnish and finalise the fitting of the sound post and the bridge. Not sure if this plan makes sense. But anyways, I will now do what I can, then meet with Pekka again to put the sound post in and get his feedback and help with the rest and then varnish. Hopefully soon! My plan still is that the cello will be finished this year. |