|
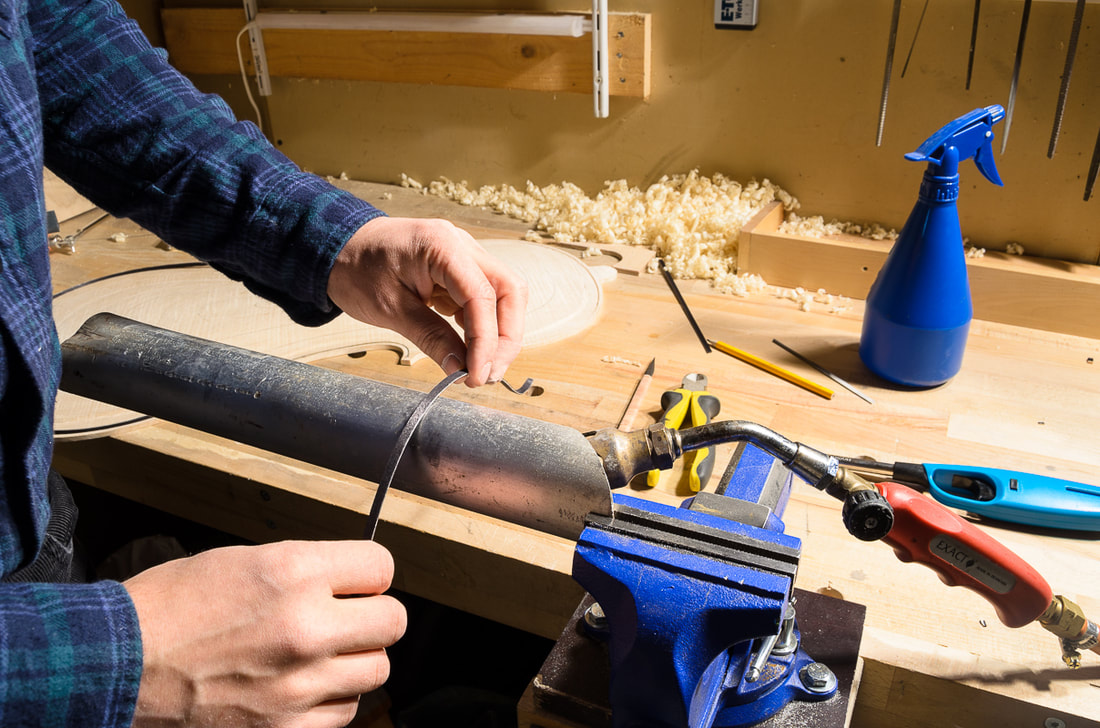
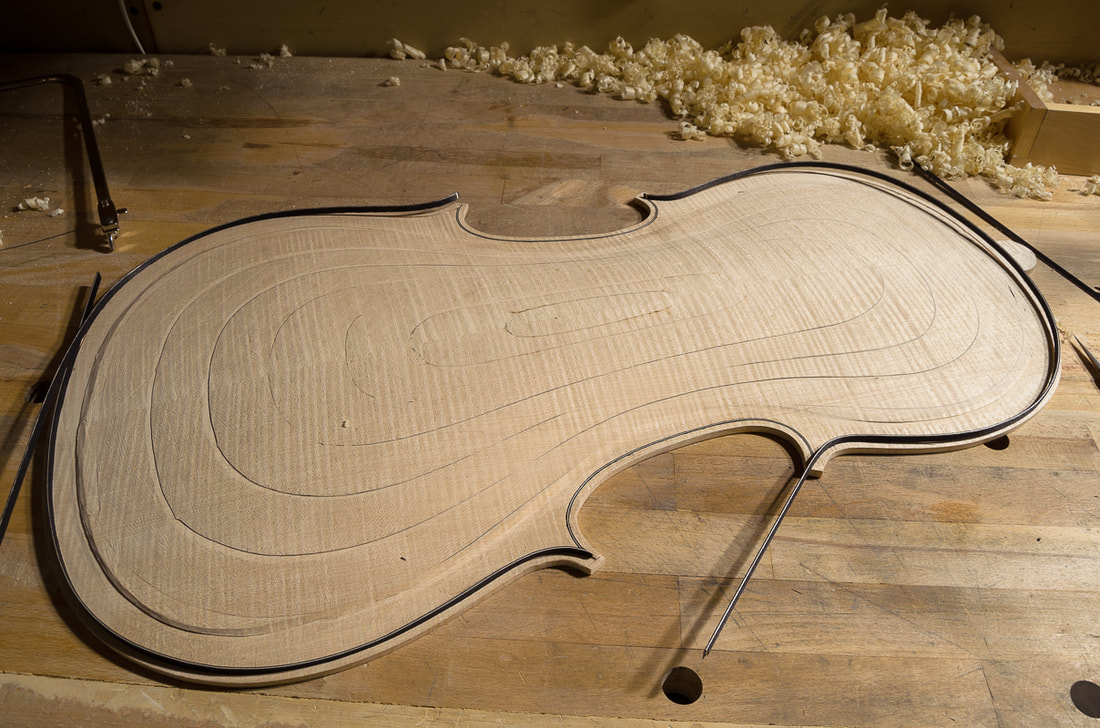
Today I finished the purfling on the back. It went pretty smoothly. I first bent the purfling to fit the groove on the back of the cello and then carefully cut the ends to match the purfling on the c-bouts which I had glued on already earlier. For the lower bout I had to make a splice. For the front I had made the splice in the "wrong" direction which I rectified this time. I had much more trouble getting a good spline this way. The photos below show my setup in preparing the purfling. The blowtorch isn't on when I am bending the purfling. I didn't take photos from the glueup. I used a large injection needle to put the glue in the purfling groove. Keeping the needle in the hot gluepot made sure it stays hot and liquid.
0 Comments
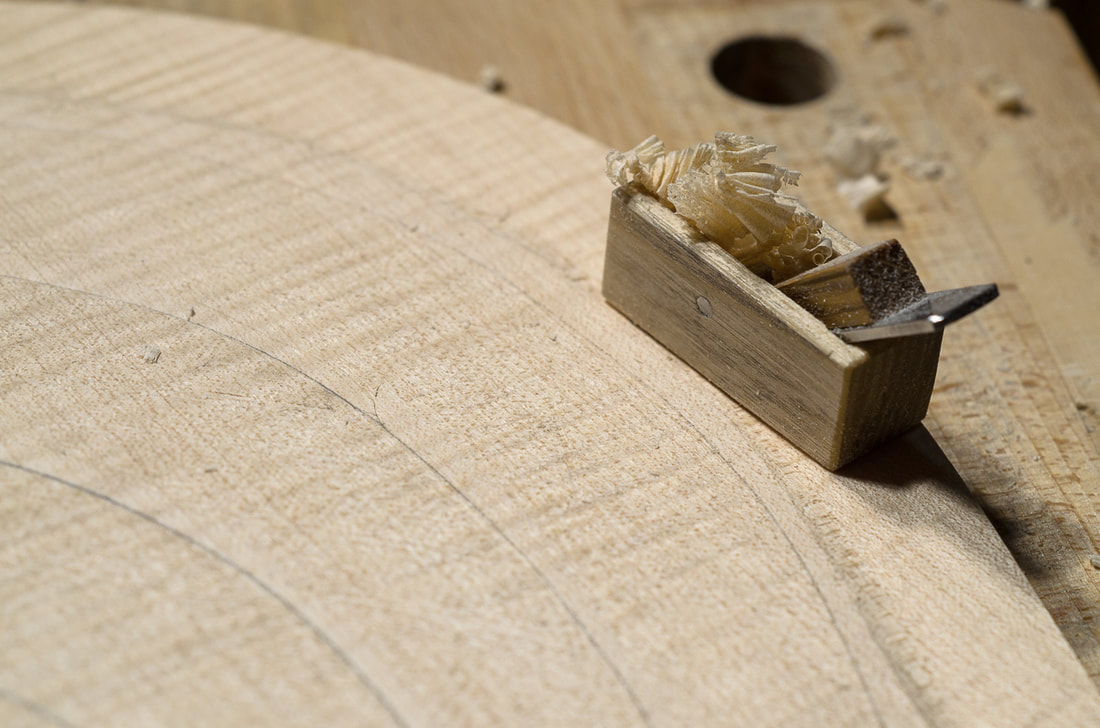
Once the purfling is in place, the outer surface of the plate can be finished. This starts with the fluting of the edge where the purfling is and smoothing out the arching. I have done this for the front. I am waiting for some more purfling to arrive so that I can finish the purfling on the back. I still have to do the upper and lower bouts. Fluting the edge means to bring it down a millimetre or so relative to the rim. I did this with gouges and the curved 10 mm fingerplane. I started with one of my old gouges but finished it with 10 mm and 20 mm sweep 7 gouges which arrived in the post the other day. After I had finished the fluting I used the arching guides to get the front plate to correct shape. This was done with the same fingerplane and scrapers. I seem not have taken many pictures of that. After the arching was good I drew some contours using a pencil gauge. I was surprised to see that the contours turned out pretty symmetric the first time and only needed a little adjustment. I made the pencil gauge from a few scraps of maple and a bolt and a wing nut. It works quite well, but I need to be careful not to push it too hard against the plate. Maybe I made it too thin and the arms flex a little. Some good references:
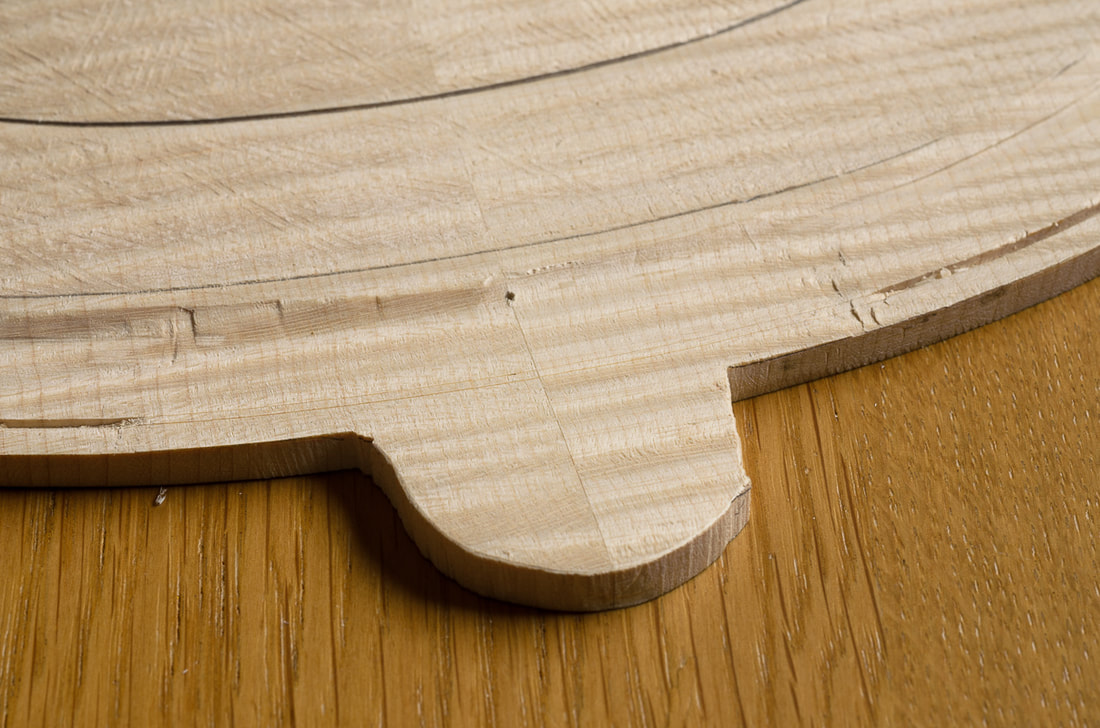
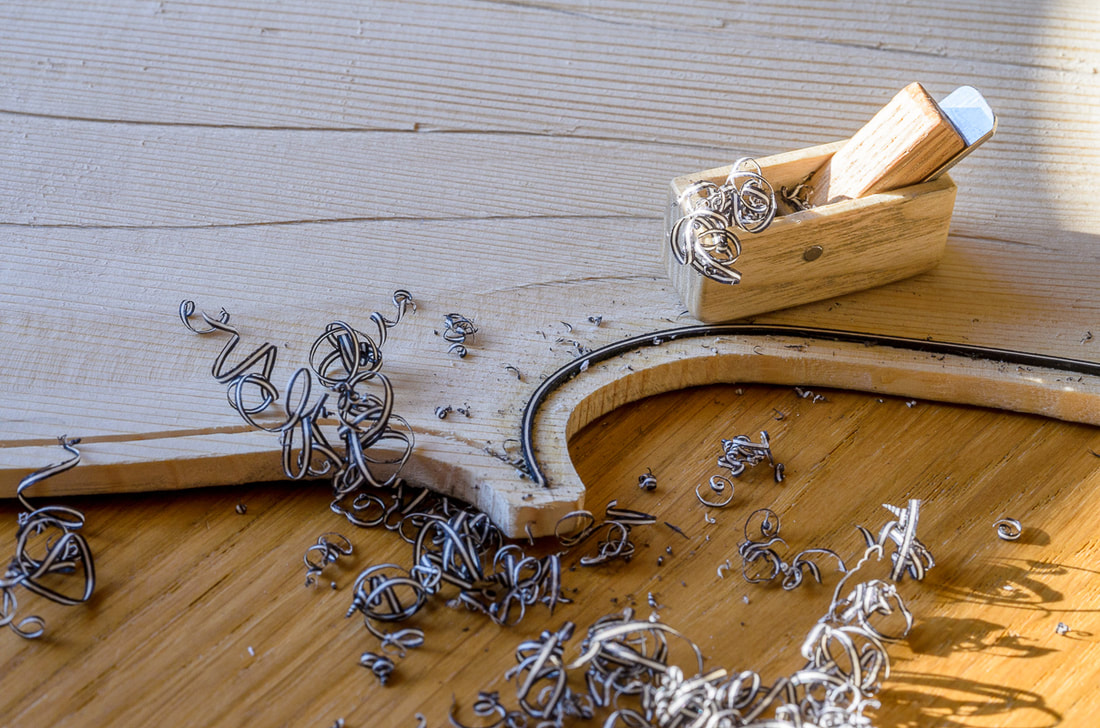
Purfling is a thin laminated strip of wood going round the edge of both the back and the front plates. Its purpose is both decorative and functional. The length wise grain of the purling strengths the edges of the plates. There is some variation as to when the purfling is done. It seems to be most common to do the purfling after the rough arching so that's what I will also do. Since the purfling is at a constant distance from the finished edge, the ribs (sides) need to have been done at this stage. I have done those, but I will probably describe the process in detail after I have finished the top plate as this is what I am doing at the moment. I hope this little discontinuity won't be confusing. I used the ribs to draw the outline of the cello on the back and the top plates and then removed most of the extra material using a saw and brought the outline to the marked line using a file. Once the plate has the correct shape, adding the purfling itself can start. The first step is to prepare a flat surface all around the edge of the plate. I first marked the width of the flat surface with a pair of compasses and then flattened the edge using a small plane and a file. As I didn't take many photos when working on the front, the photos below are a mixture from making the back and the front. After this, the purfling groove is marked with a special pufrling marker. The flat edge helps to do this accurately. I built a purfling marker from a bit maple I had extra from the back, and some nuts and bolts I had available. The blade is from a small knife. First both sides of the purfling are marked lightly with the marker, and then cut carefully deeper using a sharp knife. The width of the groove should of course match the thickness of the purling used. Once the edges have been cut to sufficient depth, the groove can be excavated using a purfling picker. I again made my own from a small chisel I had lying around. There are a few places which need extra attention. The first are the corners where the purfling from the c-bouts meet the ones from the upper and lower bouts. I made these so that the purfling in the c-bout stays a constant distance from the edge and purfling from the upper and lower bouts come to meet them. This means that the distance of the purfling from the edge is larger for the upper and lower bouts near the corners. The second place which needs to be handled differently is at the top of the back plate where the button is. This cannot be marked using the purfling marker. I made a template from the front plate and used that to mark the purfling groove of the back. The photos below also show another little tool I made. It is just a small block of oak with a short piece from the end of a hacksaw screwed in. The oak block makes sure the bit of saw blade stays perpendicular and also that it doesn't cut too deep. With this little helper it was quite easy to make the purfling groove the same depth everywhere. The blade needs to be short so that it can be used also in the tighter parts of the curves. Once the groove has been made, the purfling can be bent to follow the shape of the groove. I don't have fancy bending iron so I used an aluminium pipe and a blowtorch to heat it up. The pipe stayed hot quite long so I didn't need to have the blowtorch on while bending. Working this way I could bend the purfling for a couple of grooves before needing to heat the pipe up again. Once the purfling had the correct shape it could be cut to size. I glued in first the purflings in the c-bouts, trimmed them to the level of the plate surface and prepared the end for a nice joint with the purfling from the upper and lower bouts. The purfling wasn't long enough for the lower bout so I had to splice it. I did it widthwise and later read somewhere that one should do it in up/down direction. I think it worked out pretty nicely like this too, and actually the one I made was on the front which will anyways be cut out since the saddle comes where the splice was. I haven't yet done the purfling of the lower bout of the back so I can still make that one correctly. Some good references:
|