|
I visited www.howviolins.fi today. I had contacted the keeper of the shop a little while back to see if I could buy some wood for the next cello as I had forgotten to order the blocks and the linings when I bought the rest of the wood for Cello #2. I also asked if he would have a moment to give some feedback on this first cello I built so that I could learn from my mistakes and improve on the next one.
It was a pleasure to meet Guy and spend a little time with him in his shop. He gave me honest and critical feedback on the cello. He had quite a lot to say. The neck is too large/thick and doesn't quite have the right shape, the ff-holes could be larger, the arching is not consistent, the fingerboard is curved the wrong way, the sound post is all wonky... But it was not all gloom and doom. I had done many things fairly well, and he commented that is a good effort for my first instrument. That was of course nice to hear. He had 4 concrete things which could still be improved on this cello to get the most out of it. The sound post should be set properly, the bridge could be improved (though he did say that it was actually pretty good already) and the curvature of the fingerboard should be fixed and the neck needed working. I think I will attempt some of these myself. I will try to do the fingerboard. I knew already that it should be a little hollow. It had made it straight, and at the time I was too afraid to mess it up so I left it straight. It has now apparently curved the wrong way. This can cause a buzzing sound when the strings do not have enough clearance from the fingerboard. I think I will also work on the sound post. Other than being crooked it was also too tight. It will be a good exercise to try to properly fit the sound post. I maybe lost my patience last time. It is not all that easy to put the sound post in and out and know what to do with it to get a good fit. I probably gave up a too early. My plan is now to do those 2 things and then take it back to Guy and let him finish it off. I want to give it a try myself as I want to learn this stuff, but I also want to get the best sound out of the cello.
0 Comments
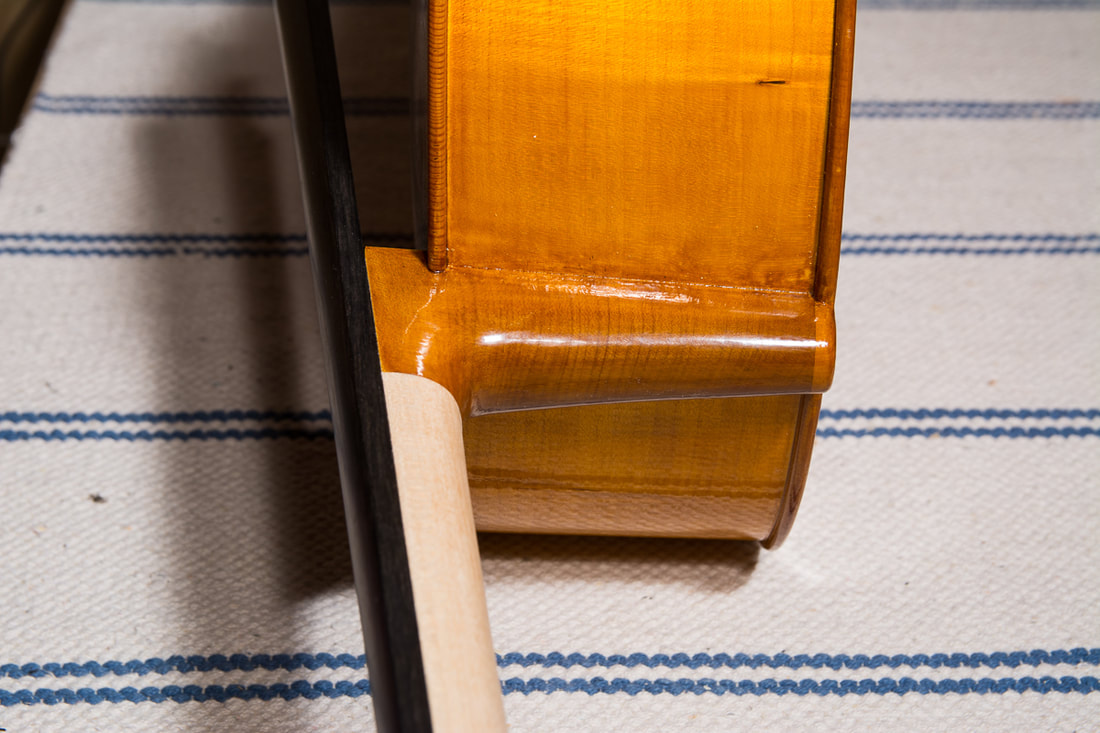
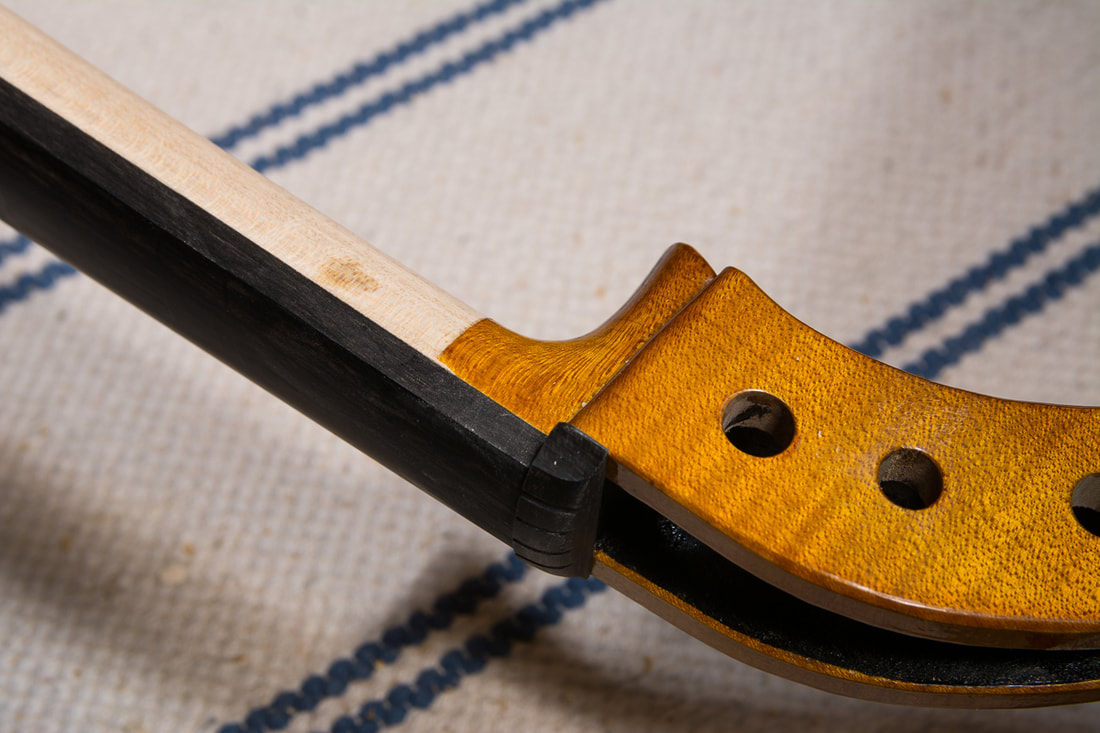
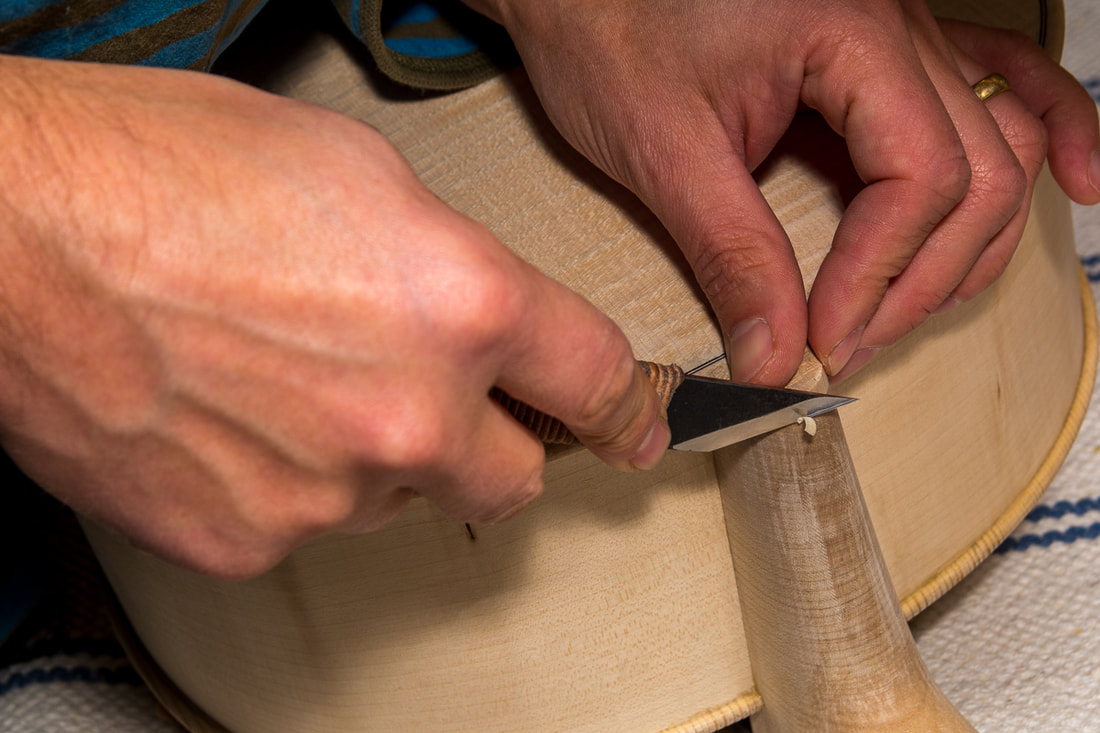
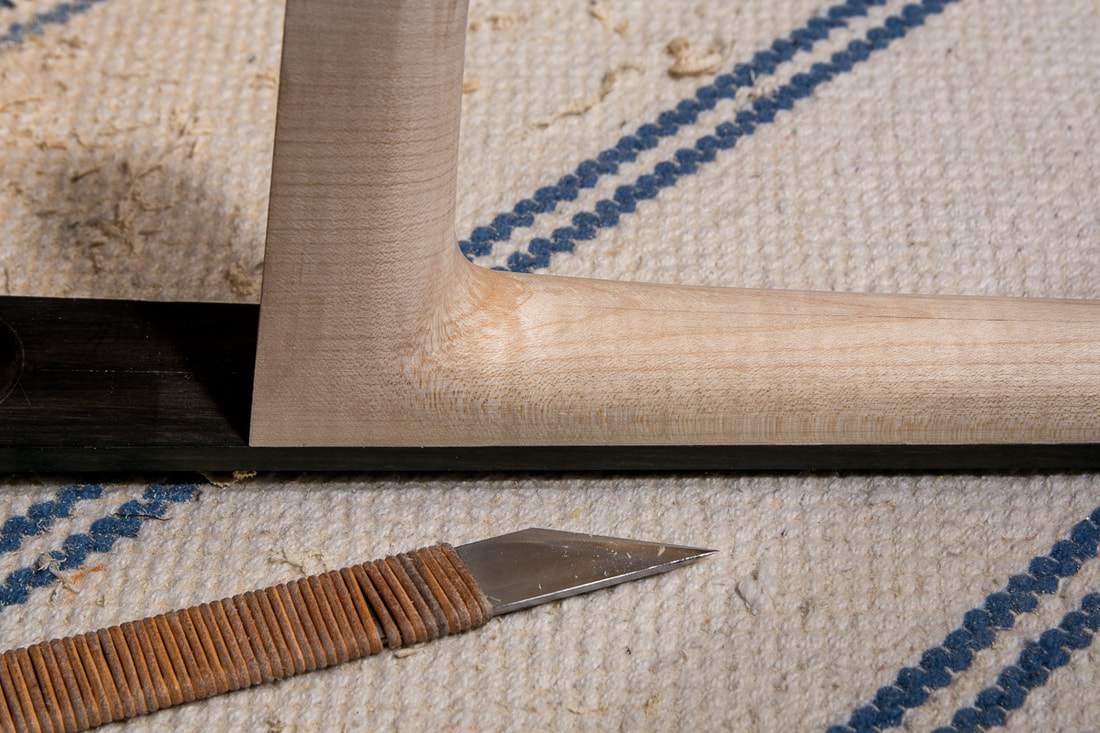
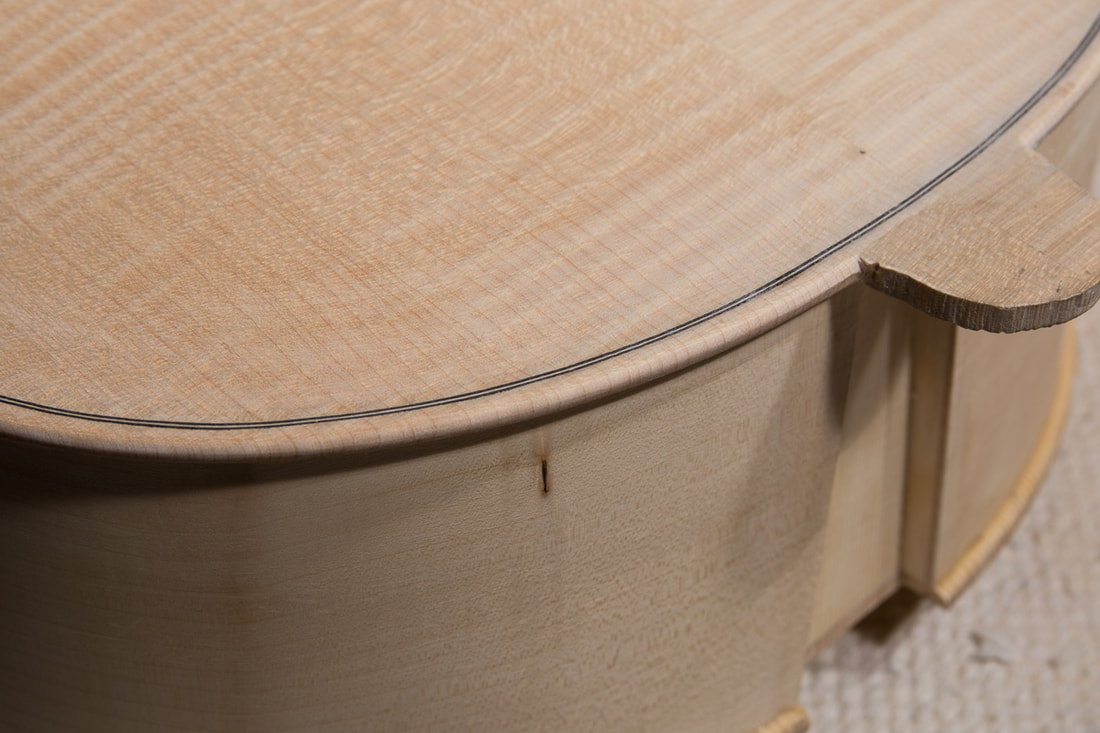
After having created the blending, I varnished the neck with the provided "Giffpolitur farblos". I think it is just pure shellack in some alcohol. Before finishing the neck I was reading in some forums that one often leaves the neck untreated to leave it smoother and more slippery which makes it easier to play. Some say that a French polish or shellack may be used. Since the set Have includes this grip polish, I think it is exactly the French polish that some use. It's really quite clear. Maybe I should have stained the neck before hand as the colour wasn't quite even. Oh well, something to do differently in the next one. The neck still needs a finish. I faded out the earlier varnishing first with a scraper and then with some sandpaper . It was surprisingly difficult to get a nice long smooth transition. So I stopped trying. The varnish for the neck also has a little colour so I hope that improve the blend. Maybe the spirit will also help there. I did some work on the neck. The heel felt a little clumsy. Now I think it is pretty good. 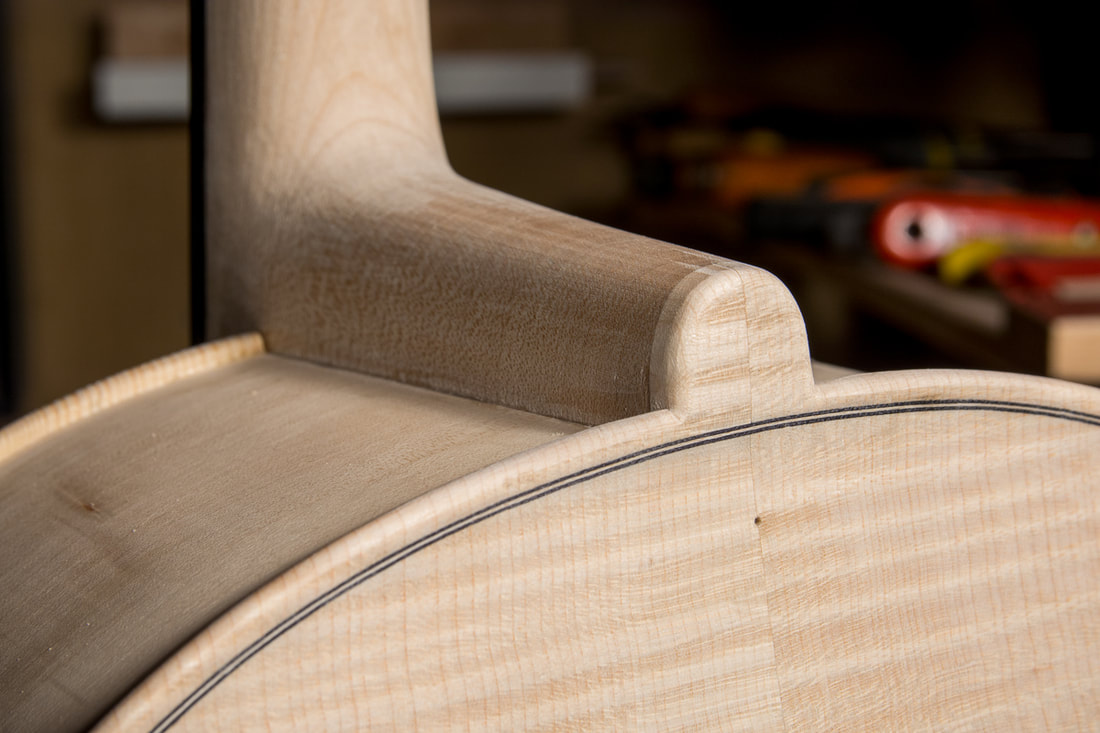 I could also shape the button now to match the heel of the neck. I did that with the left and right handed knives. The button seems quite thick. I will need to find out if there are some ways to make it thinner, or to at least look less bulky. I didn't add a chamfer yet, maybe that is enough. I had left the pegbox a little rough so I thought I would clean it up a little now. A sharp chisel can make same nice shavings. I did decide to do the glue up. I first glued up the neck. I really hope it all went well. It took a while to get the clamps right. And maybe the glue was too thick. It looks good now but I don't know if I can count on that. Otherwise the neck look goods. It appears centred on the body and the projected height is right. After the neck was done I also glued up the saddle. Now all its all done! I smoothed out the curves of the neck a little more. First with a fine rasp, then with a file and in some parts also with the knife. In the end I asked my son how the neck and all feels. He said it feels all very good. So I thought maybe I can finish the neck refinements. Today I wanted to get both the body and the neck more refined before glueing them together. I had already rounded out the corner of the edges towards the ribs. Now I did the outer edge. The idea is to first make a bevel with a shallow angle, followed up with a second one with a steeper angle and then smooth the bevels with some sand paper. At first I wondered why it is done this way but I think I realised it while doing it. Making a bevel is pretty straightforward, and if the lights are correctly set one sees very clearly the flat bevel created. It is then quite easy to make sure that both the bevel angle and the width of the bevel stays constant. After having done the back and front edges I started also refining the neck. I sawed off some extra material from the heel and also started shaping. Chalk fitting is done in the end to ensure a good fit every where. Some chalk is put on the heel of the neck before it is pushed into position. Chalk should stay uniformly all over the mortice. And that is indeed mostly the case. There are some spots at the bottom on the sides without chalk but in the centre it goes all the way from the top to the bottom. I will do some refinement but the fitting is now more or less finished. I think I will work first a bit more on the neck to get it finished as this is easier when the neck is not yet attached to the body. 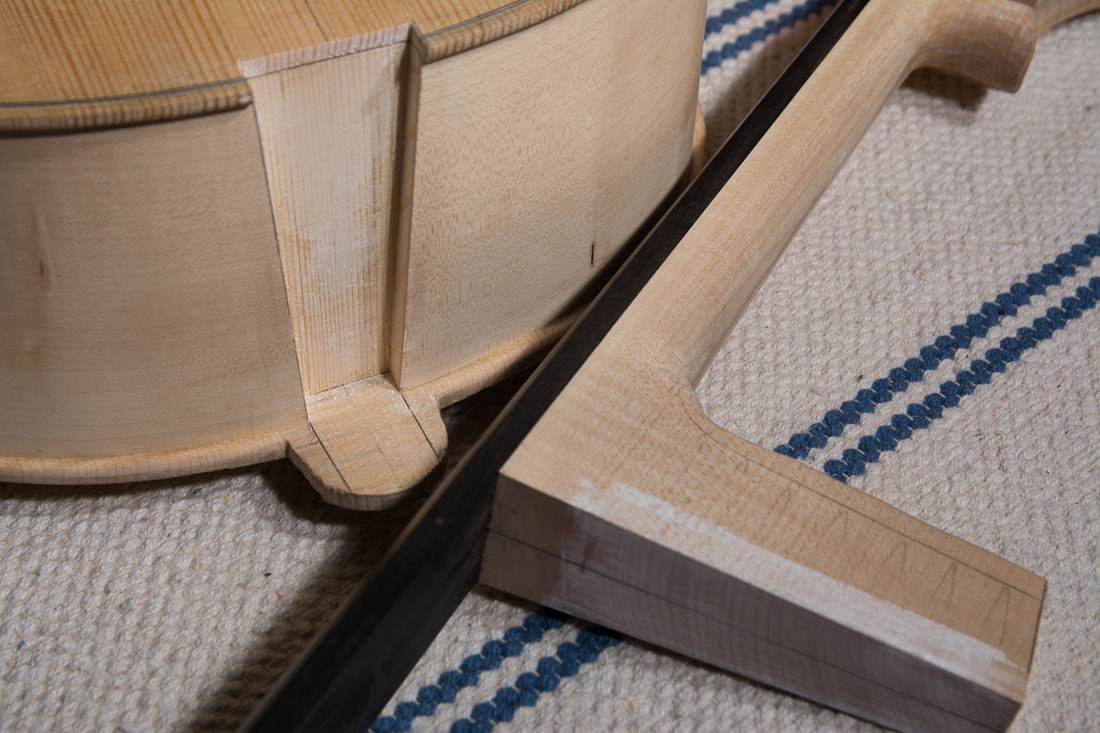 |