|
I haven't been able to make much progress recently. I don't have any good excuse, I just haven't taken the time to do anything. Today I planed the fingerboard to final width.I used my shooting board for that to ensure that the sides are perpendicular to the bottom. The sides were more or less the correct thickness before I reduced the width. It is surprising how much thicker the sides are now that I took a bit off. Need to work on the top surface again. After that I need to also create the hollow on the under-side. 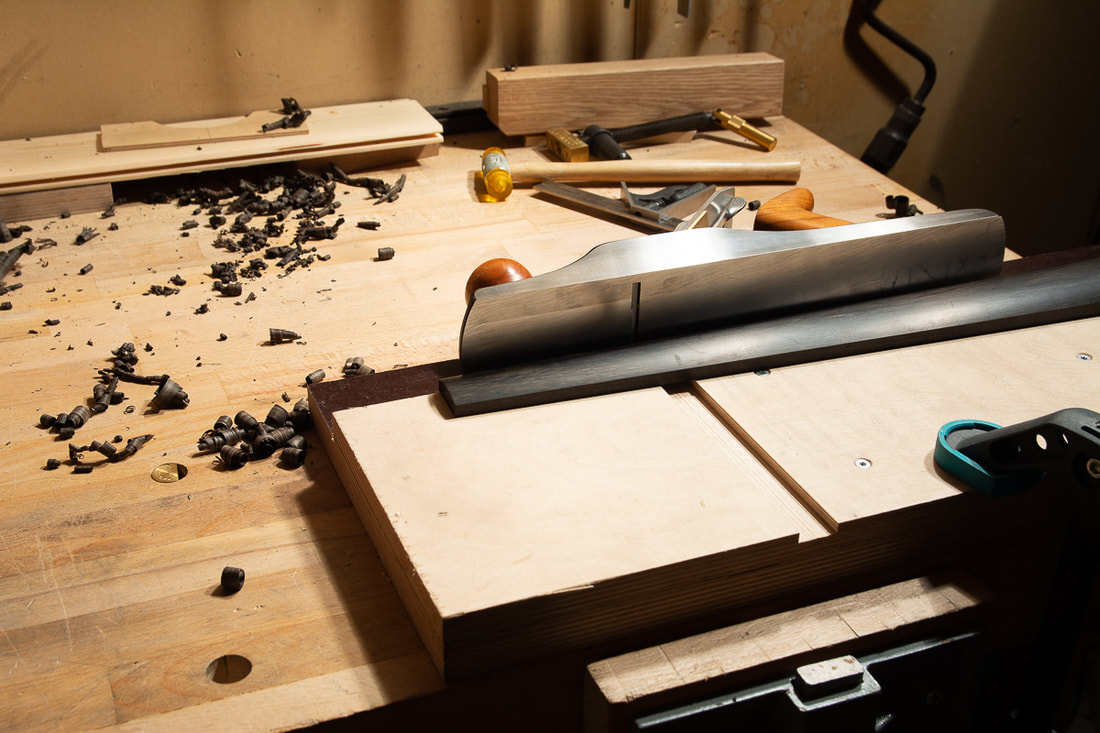
0 Comments
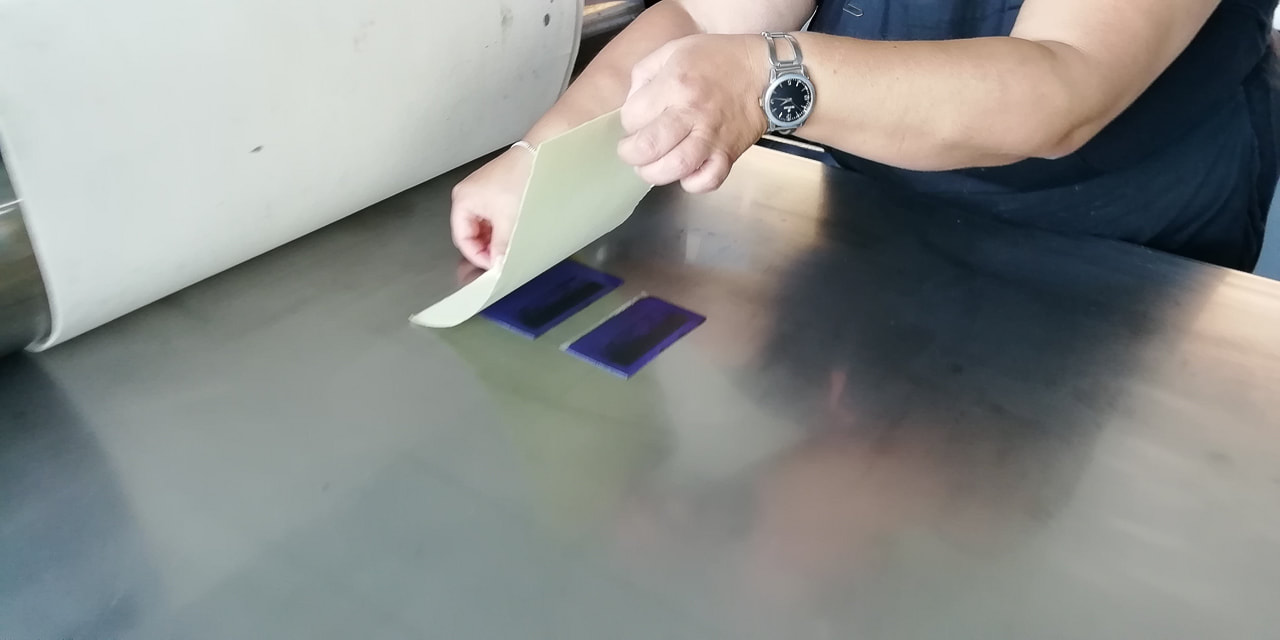
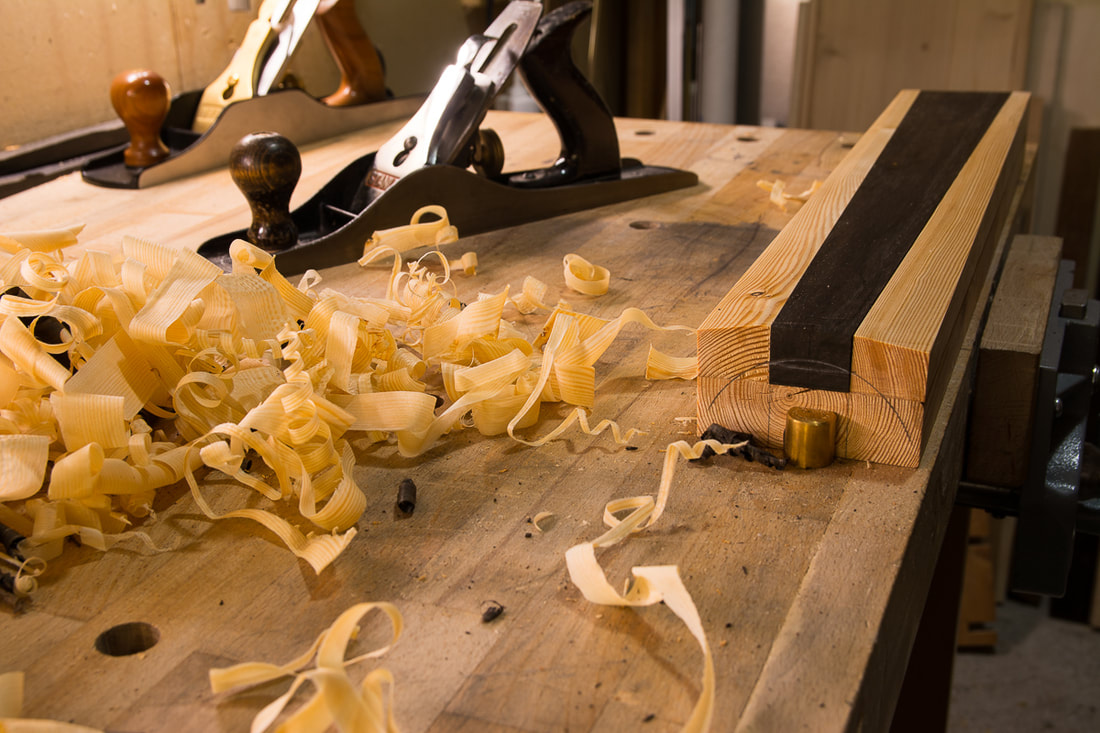
Each instrument should have the maker's label inside. My first idea was to design the label myself but then I thought I would like to make the label also special. I contacted artist Laura Miettinen (www.lauramiettinen.net) and commissioned her to design and print the label for me. I visited her last week and had the pleasure of seeing the first test prints being made. It was great! The label is so beautiful and I like the idea that there is a little piece of art inside the cello. She will print 10 labels for me, they should last me a while! The bottom of the fingerboard wasn't flat any more. At first I thought this would be because the piece of ebony had been in the holding jig for a long time and wasn't in contact with air from all sides any more. Maybe the moisture from the jig or something would have caused the bend in the fingerboard. So I allowed it to breath freely for a week no change. I have reduced material from the fingerboard very non-uniformly so maybe the change in shape has to do with relieved internal stresses in the wood. As a result I decided to reflatten the bottom. So far it has kept the new shape well. I tried out the sanding block I made for the fingerboard the other day. It has the intended curvature of the fingerboard top and should fit nicely on top of the jig. Works great! It is a shame to sand the super smooth surface from the plane but it is just impossible to get a nice even curvature with the straight plane iron. Finally some real progress again. I had cut the fingerboard to approximate width already which made it a little difficult to plane the top surface to the correct curvature. So I decided to build a jig to help hold the fingerboard while planing. It turned out great and I think I would also next time do it this way. The fingerboard is still a little too thick, but it is pretty close to final thickness. I'll reduce it by 1 or 2 mm still. I have been wondering about the geometry of the fingerboard. The curvature of the fingerboard is constant along it's length, basically the surface of a cylinder. If the edge has constant thickness, as is usual, there must be some scoop along the length of the fingerboard. Instead of a cylinder the the top is the surface of a bent tube or a banana. MJ Kwan has a nice post about the fingerboard geometry on her blog, fingerboard-geometry. I've been wanting to get some feedback on the cello from somebody who knows about these things for a while now. Firstly to decide some important measurements before I continue with the neck, secondly to see if I need to modify the plates etc. before I close the body. I finally managed to find somebody, Pekka Untamala. He is not a cello builder himself but has great experience is repairing and setting up instruments. I spent almost an hour with him going through a 1/2 cello he has and looking at my cello. He also explained many things related to the various proportions of the neck and the fingerboard and the body and how they affect the playability. I am so thank for him for all his insights. Looks like I've so far managed to go mostly in the right direction. I will make the fingerboard a little narrower at the bridge end, about 56 mm. And maybe thin out the top plate at the edges. But other than that, things look promising!
|