|
I decided to go forward with the chosen dimensions I wrote about last time. Today I marked the lines on the piece of ebony and used a saw and a plane to get to ~1 mm from the line. The blue tapes are there just to mark the lines as both knife and pencil lines are difficult to see on the dark wood.
0 Comments
The fingerboard is made of ebony. I have never worked with ebony before. It is very heavy and hard wood. I had decided to make the fingerboard from scratch. It is usual to start with a prepared blank which is almost ready. I couldn't find 1/2 fingerboard and also wasn't quite sure at the time which size I would need it to be so I bought a block of wood for the job. I am maybe not quite ready with the neck to really start with the fingerboard. I have had difficulties figuring out the right dimensions for the fingerboard though. So far this has been the trickiest part in building a 1/2 cello. There just doesn't seem to be too much information around. It also seems to be one of the things which scales least linearly with the other dimensions. The fingerboards on smaller cellos are proportionally wider than on bigger ones. The width of the fingerboard obviously affects the width of the neck which is why my progress has been slow recently.I have contacted some professional luthiers to help me on this but so far without success. But I think I have figured this out now. The measurements for 1/2 cello I did find seemed to be too far off from the normal scaling that I didn't want to trust them. Now I think I will go with what I have. I will take the length of the fingerboard from what I get when I scale the one from Strobel down by 86.8 % as I have done until now. Scaling the width similarly would result in width at the lower end of 56 mm. This is less then what Baker lists in her book for 1/4 cello (58 mm). The width of the fingerboard in my son's current cello is only 48 mm. Which is a lot less than what Baker has. For a 1/2 cello Baker lists a lower end width of 59 mm and upper end width of 29 mm. This is also what I find in www.alangoldblatt.com/specs/Cello.pdf. However Baker and Goldblatt have very different lengths for a 1/2 cello finger board, 487 mm and 510 mm respectively. Strobel has in his "Useful Measurements for Violin Makers" a length of 500 mm but he doesn't list any widths. Confusing. Anyways, I am now decided. I will take the (consistent) widths of 29 mm at the upper and 59 mm at the lower end. The length will be 503 mm as scaled down from Strobel's 1/1 cello. If anything these will be a wider than necessary and then I can always remove some material later if necessary. With these widths, the width of the fingerboard at neck foot will be more or less that of a 1/1 cello. It was great to plane the ebony blank flat on one face. The surface is incredibly smooth. It will be quite a bit of work to get this finished. Continued with the fluting today. I did the centre and sides of the fluting towards the peg box. Just the sides today. Tomorrow I will then gouge out the middle. I started fluting the scroll today. I first watched a few videos on Youtube about this to gather up my courage. I especially liked the videos by Davide Sora and will do my fluting in a similar fashion. I compared the curvatures of my gouges against the fluting on my son's current cello. The 7 / 10 was a pretty good match. It also has the tightest curve of my gouges. I started with the narrowest part at the back to test how it goes. With a sharp gouge the end grain gets cut into beautiful thin shavings. Tomorrow I can hopefully get a lot more done now that I know what I am doing. Some good references:
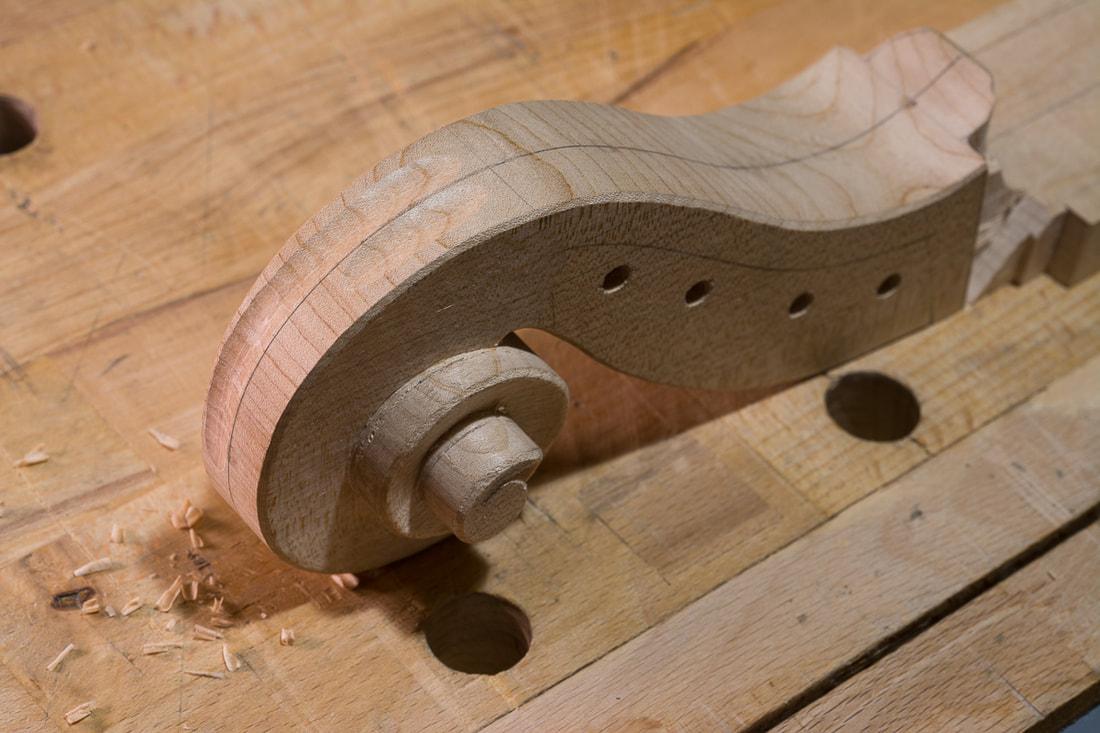
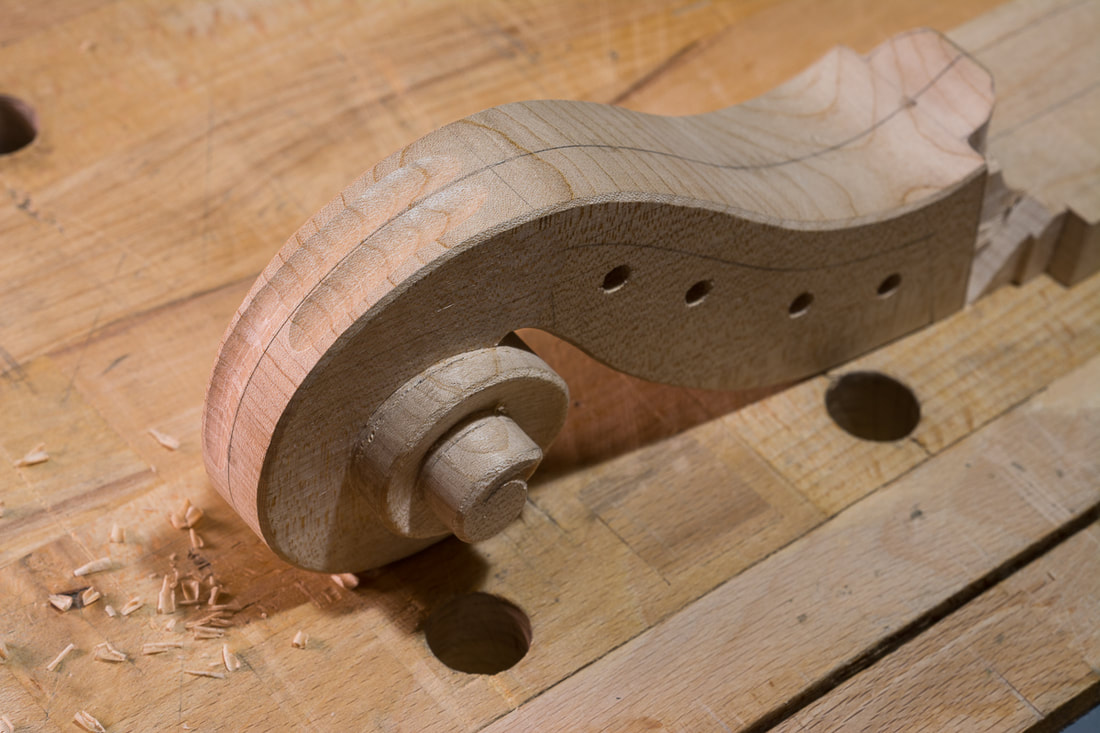
No progress on the scroll today. But I made two scrapers to finish the scroll. They are basically the same but have the bevels on opposite sides. Hopefully tomorrow I can work on the scroll. Maestro Kimon has a video on making scarpers and he also provides the shapes on a downloadable file. Check it out at www.youtube.com/watch?v=xMg8lQa1fQ8. 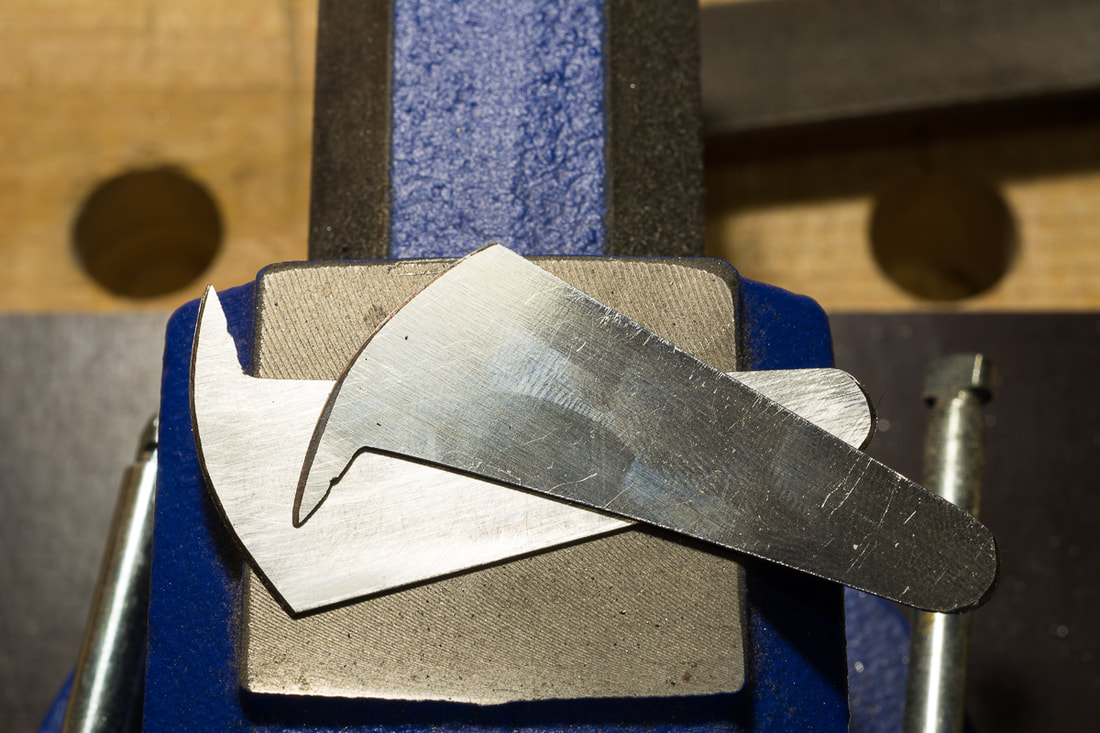 Today I did the other side. I aimed to replicate the incurve on the other side. I think I got pretty close. Next I need to check that they really match and then smoothen and refine them but first I need to make a scraper or two in order to get into all the nooks and crannies in the scroll. Finally got some time again to continue on the scroll. It was time to do the incurve on the faces of the scroll. I did that with the gouges, carefully first carving from the edge to the centre and then coming from the top to cut the shavings off. The incurve starts fairly shallow and increases in depth towards the eye of the scroll. I think I got the first side more or less where I want to have it. My son's current cello has somewhat deeper incurve but I quite like it now when it is not quite as deep. This is the first iteration. I will next do the incurve on the other side to match this one and then refine it once I can see the scroll as a whole. |