|
I did various small things today. First I cleaned up all the ebony parts from varnish. I started with a scraper, then used some sandpaper up to 2000 grit with some oil to get a really nice surface. I did that for the saddle and the fingerboard. Secondly I worked on the bridge. The height, thickness etc. are already finished. Maybe some work needs to be done if the cello doesn't sound right or is not good for Elias to play. In stead, I worked on the details. Some of the edges are chamfered and refined. One also tries to remove as much extra material as possible to reduce the weight and allow the bridge to vibrate more freely. Strobel in his book shows where to remove material and chamfer the bridge. I also found a really good post by Sally Mullikin on the topic, trianglestrings.com/newcellobridge. I really liked the way the width of the chamfer changes in some parts and tried to do that. I will not attempt to get the "kneecaps" as refined as she's done though. Something again for the next cello. The chamfers are quite subtle. In the photo below I have done the right side of the bridge. Not sure if you can make any sense of that. Check Sally's page for more details. 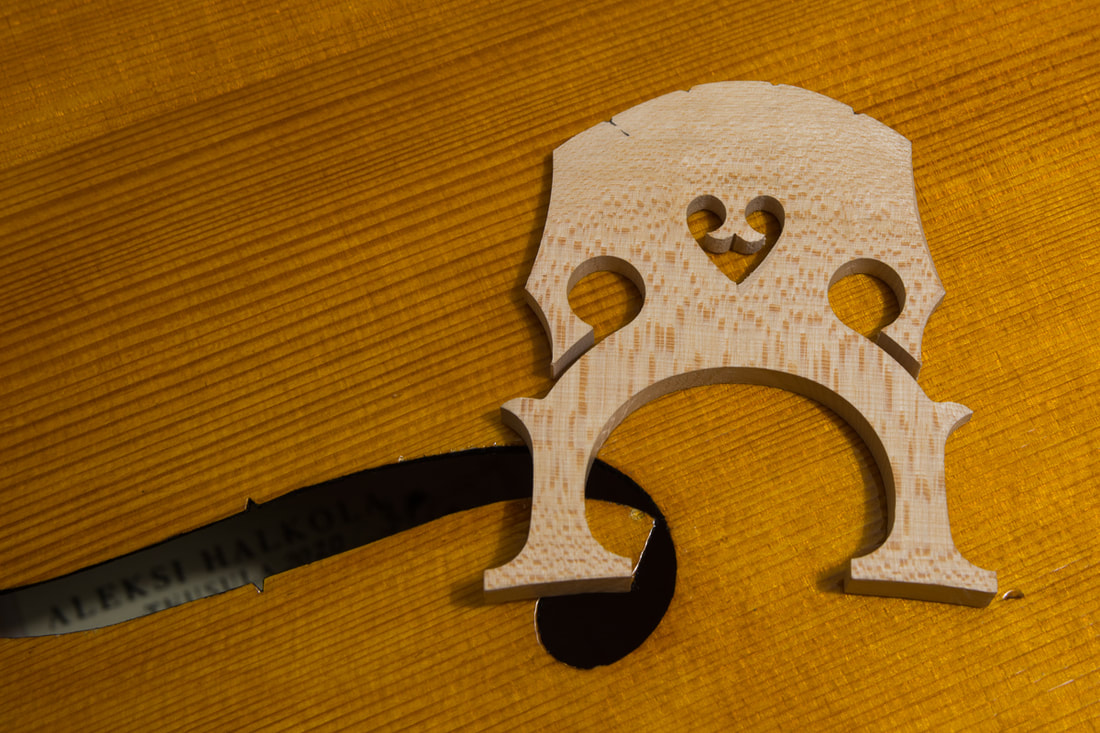
0 Comments
Leave a Reply. |