|
I hadn't quite finished the fluting of the scroll. I had left the very end for later. Now is the time to bring it forward before proceeding further on the neck. I didn't do too much progress today but at least I got started. I think it won't too long. I want to get this done before gluing the fingerboard on the neck or refining the shape of the neck further.
0 Comments
Continued with the fluting today. I did the centre and sides of the fluting towards the peg box. Just the sides today. Tomorrow I will then gouge out the middle. I started fluting the scroll today. I first watched a few videos on Youtube about this to gather up my courage. I especially liked the videos by Davide Sora and will do my fluting in a similar fashion. I compared the curvatures of my gouges against the fluting on my son's current cello. The 7 / 10 was a pretty good match. It also has the tightest curve of my gouges. I started with the narrowest part at the back to test how it goes. With a sharp gouge the end grain gets cut into beautiful thin shavings. Tomorrow I can hopefully get a lot more done now that I know what I am doing. Some good references:
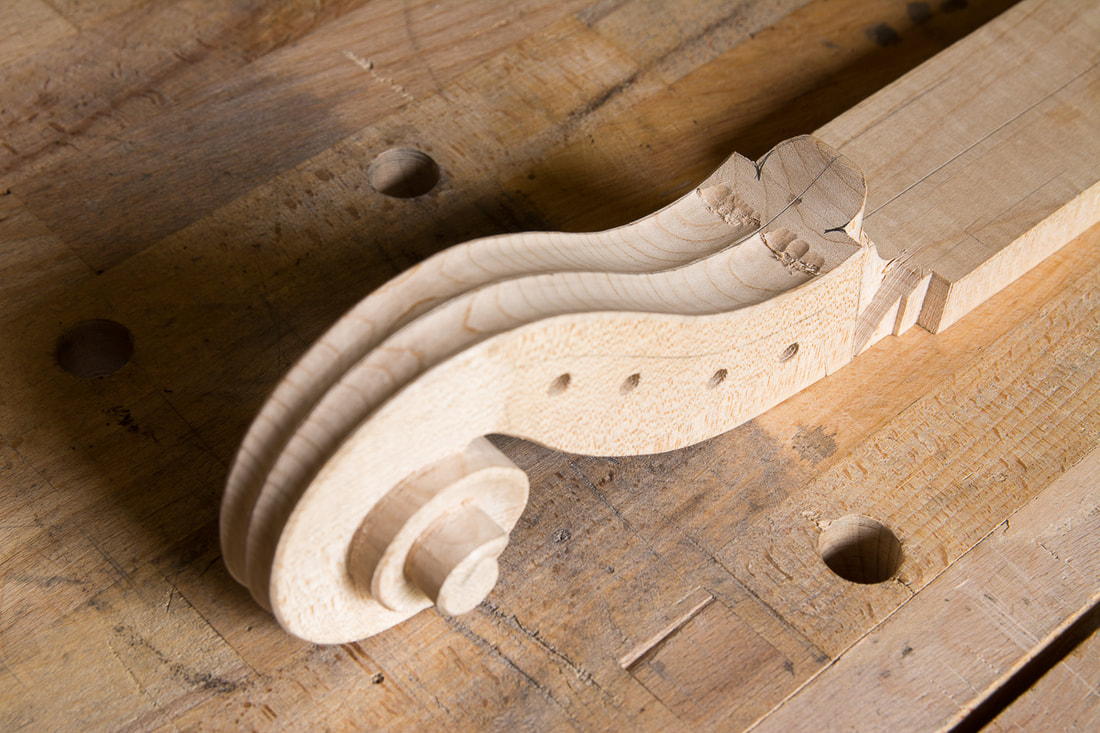
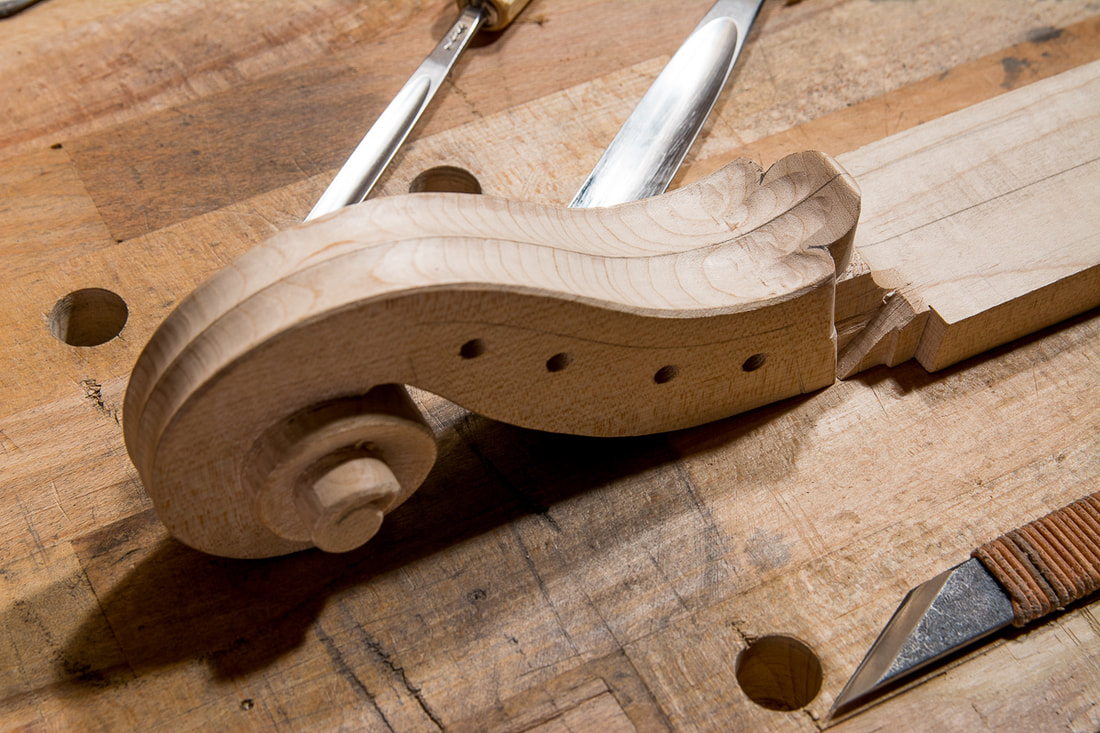
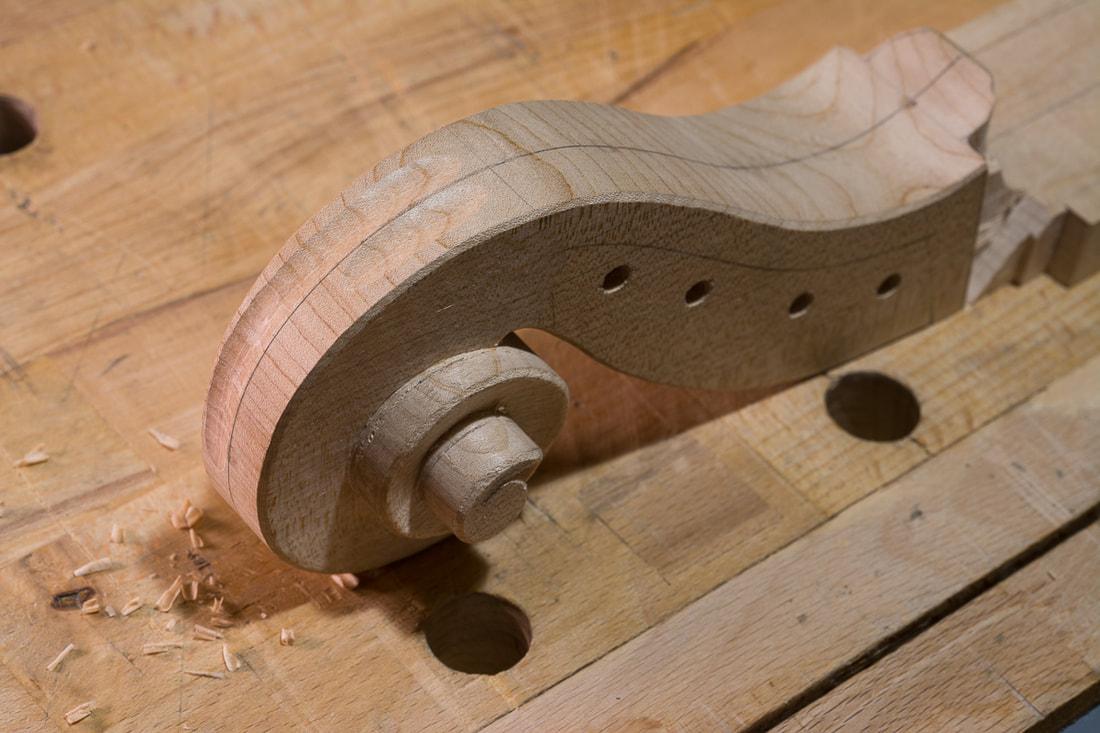
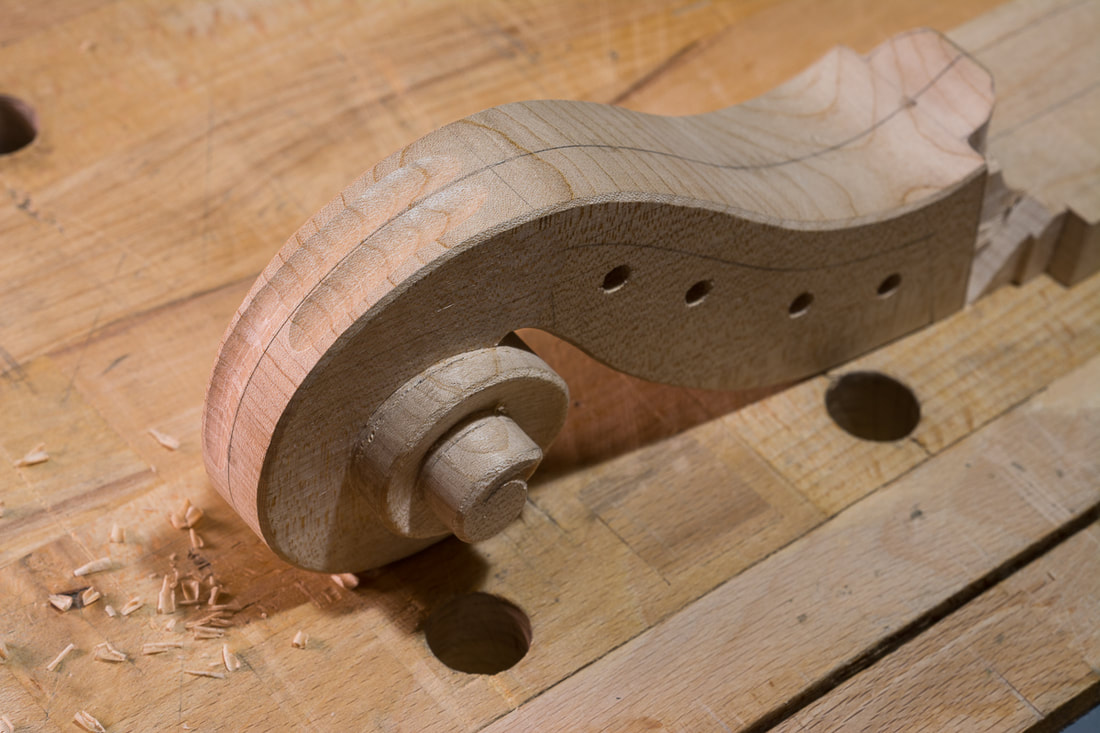
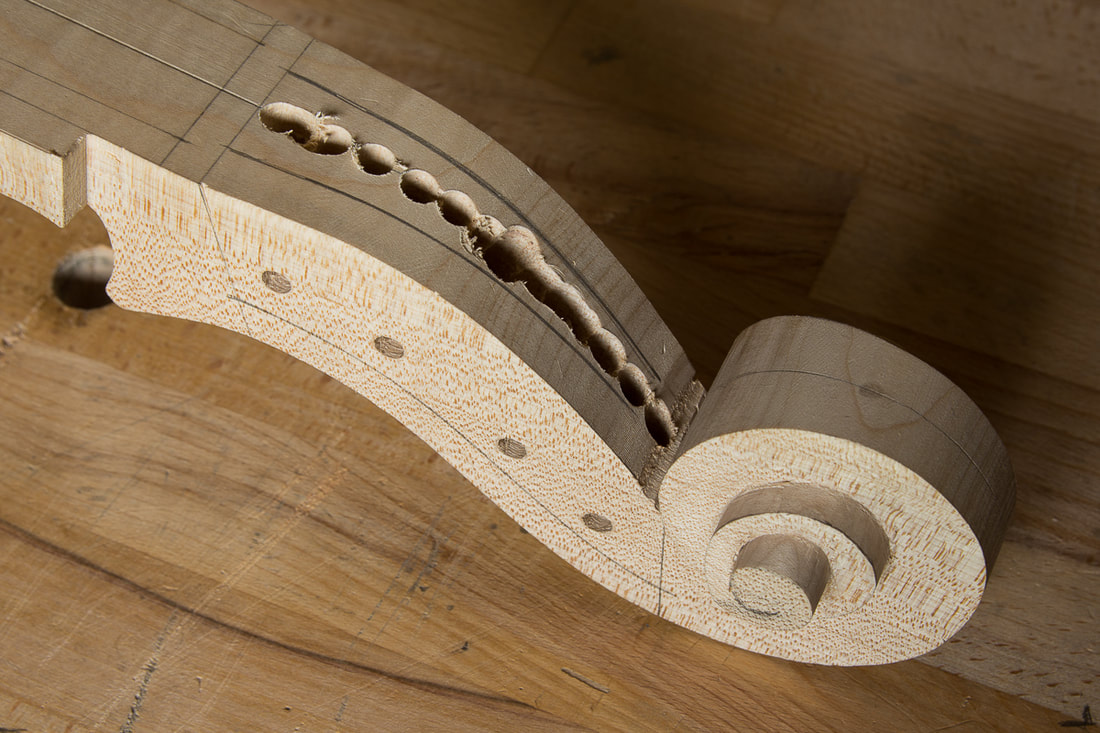
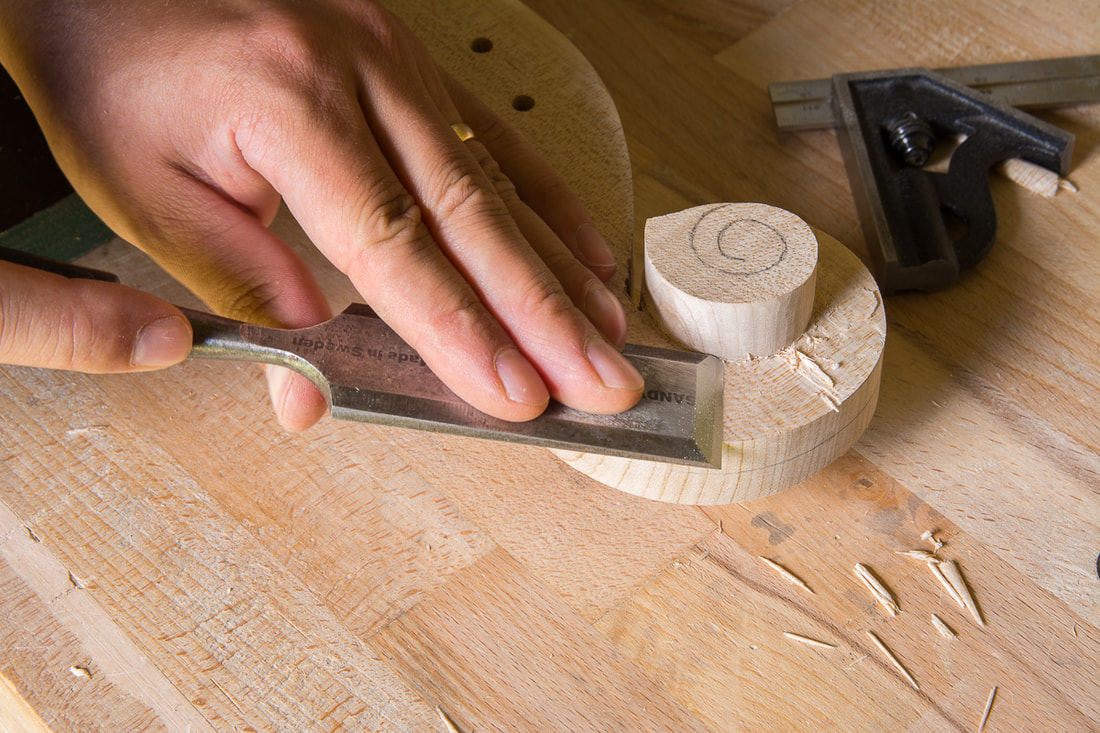
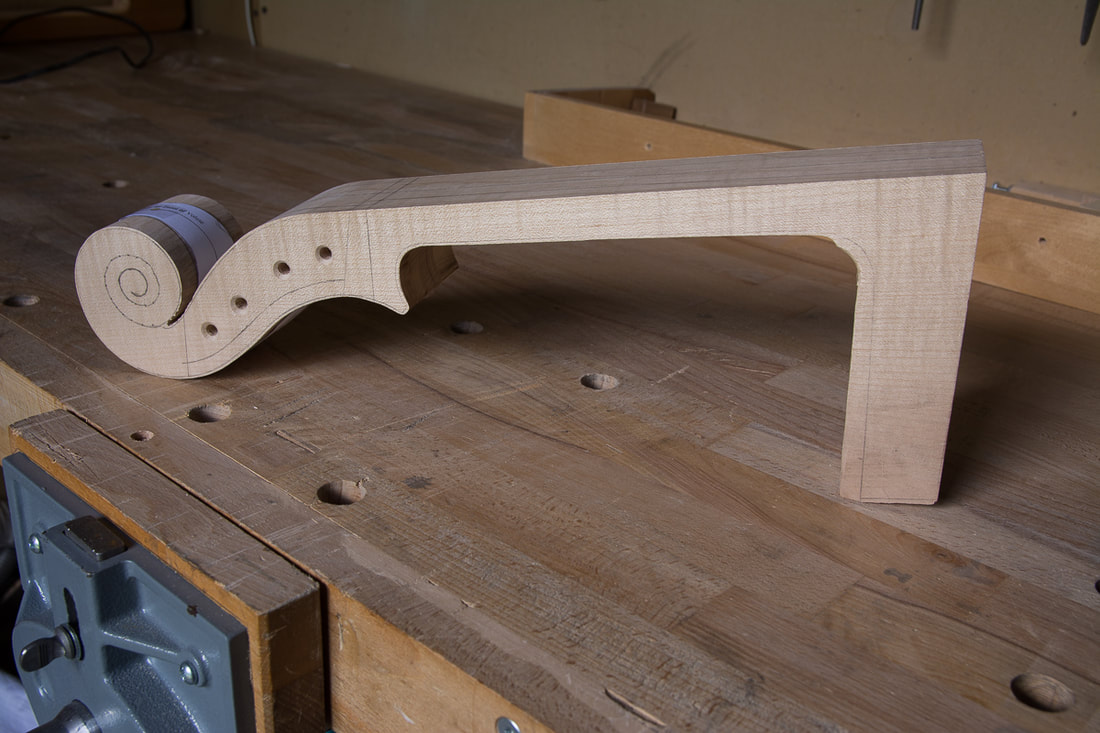
Today I did the other side. I aimed to replicate the incurve on the other side. I think I got pretty close. Next I need to check that they really match and then smoothen and refine them but first I need to make a scraper or two in order to get into all the nooks and crannies in the scroll. Finally got some time again to continue on the scroll. It was time to do the incurve on the faces of the scroll. I did that with the gouges, carefully first carving from the edge to the centre and then coming from the top to cut the shavings off. The incurve starts fairly shallow and increases in depth towards the eye of the scroll. I think I got the first side more or less where I want to have it. My son's current cello has somewhat deeper incurve but I quite like it now when it is not quite as deep. This is the first iteration. I will next do the incurve on the other side to match this one and then refine it once I can see the scroll as a whole. I had a good day today. I thinned the walls of the pegbox to something reasonable. I also added the chamfer to the edges of the scroll. I modified the tool I used for marking the purfling to help me mark the chamfer edges on both sides. After the chamfer was marked I used my knives and a chisel to cut the chamfers. Next I need to incurve the faces of the scroll. That will have to wait a while though as I am going on one of the remote islands off the coast of Turku in western Finland. I thought it would be time to carve the pegbox now that the scroll is in good shape but not yet finished and delicate. To start off I marked the part of the pegbox I need to carve out on the outside. On the top I put the wall thickness at the bottom (10 mm). I thought it was a good idea to first carve the pegbox walls straight down with the widest thickness and I will then later finish the walls so that they are thinner at the top than at the bottom. To make the start easier I first drilled out a channel into the middle which I then widened and deepened using chisels. I expected this to be hard work but with sharp chisels it was surprisingly easy. Cutting hard maple across the grain was the most difficult part and it dulled the chisels quickly so I needed to sharpen more often than usual. I think I got the pegbox deep enough but now still I need to get the width right. I used the same technique to ensure that I didn't drill too deep as I used when graduating the plates. A peg on the bottom and then setting the distance between the peg and the drill just right. The peg left some marks on the bottom of the scroll which I didn't expect. Next time I will use a larger dowel, or a softer wood for it. Getting closer to the eye now. Just one saw cut and then some chisel/gouge work on the faces and the sides. I will not proceed on the eye yet, but will next do the incurving of the faces. The faces will not stay perpendicular like I've done them now, but they will go deeper in towards the centre of the scroll. The more so the closer one gets to the eye. I also need to mark the edge for the chamfer now. The corners of the scroll will have a 45° chamfer all along. This is something my son's current cello doesn't have so I won't have an example to study for that. But I have seen photos and at least for my eye the chamfer really makes a great difference to the scroll. This is what I did yesterday. I tried to get the first turn of the volute ready. That means getting the sides vertical and the faces perpendicular, if that makes sense. Here Baker's book was a good resource. She wrote that it is easiest to get the faces perpendicular with a flat chisel. I started with a gouge going radially in, but that was tricky because of the varying angle of the grain and often the direction was not good. Going with a flat chisel down the face was quite easy and effective. After the first round was ready I drew the next turn on the new side and got most of the material away with a saw. The rest was done again like the first turn, a gouge for the side and a chisel for the face. I only have 3 gouges but they are enough. I have a 3/25 which really is too shallow/open everywhere but still useful. I then have a 7/20 which is a perfect fit maybe half way up the volutes. My final gouge is 7/10 which is a great fit for the eye, but eye only. I have never done much woodcarving and I was a little afraid of the scroll. It is by no means finished, nor perfect, but I am enjoying the work none-the-less. And it is again one of those things in cello building which I like where one can make quick progress one moment (with the saw) and then it is time for slow work (with the chisels and gouges). Bit of a jump from last time. I cut out the neck from the block and don't seem to have taken any photos of it. I don't have a band saw or anything like that. Since there was a lot of material to remove I actually made a plywood template of the neck profile and used my router with a trim bit to slowly cut out the neck. It worked surprisingly well. I had a lot of trouble getting the dimension for the scroll and the neck. This seems to be one of the parts which doesn't scale linearly with the size of the cello. The only example I have is my son's 1/4 cello which is some dimensions is actually fairly close to this 1/2 cello. The scroll is actually almost the same width as one on a full size cello. Otherwise it is scaled with the body size, more or less. So that is also what I decided to do. I took the scroll template and scaled it with 86.8 % length wise but only 95 % in the width. This then matches with the pegbox outer width of 44 mm. After having marked the centreline for the neck I transferred the scroll outline on the neck. I then made some saw lines across the pegbox to make the chiseling easier. I wasn't careful enough with my saw work and accidentally went a little too deep in a few places. I think I will be able to remove those by rounding the edges of the pegbox a little. |