|
I visited www.howviolins.fi today. I had contacted the keeper of the shop a little while back to see if I could buy some wood for the next cello as I had forgotten to order the blocks and the linings when I bought the rest of the wood for Cello #2. I also asked if he would have a moment to give some feedback on this first cello I built so that I could learn from my mistakes and improve on the next one.
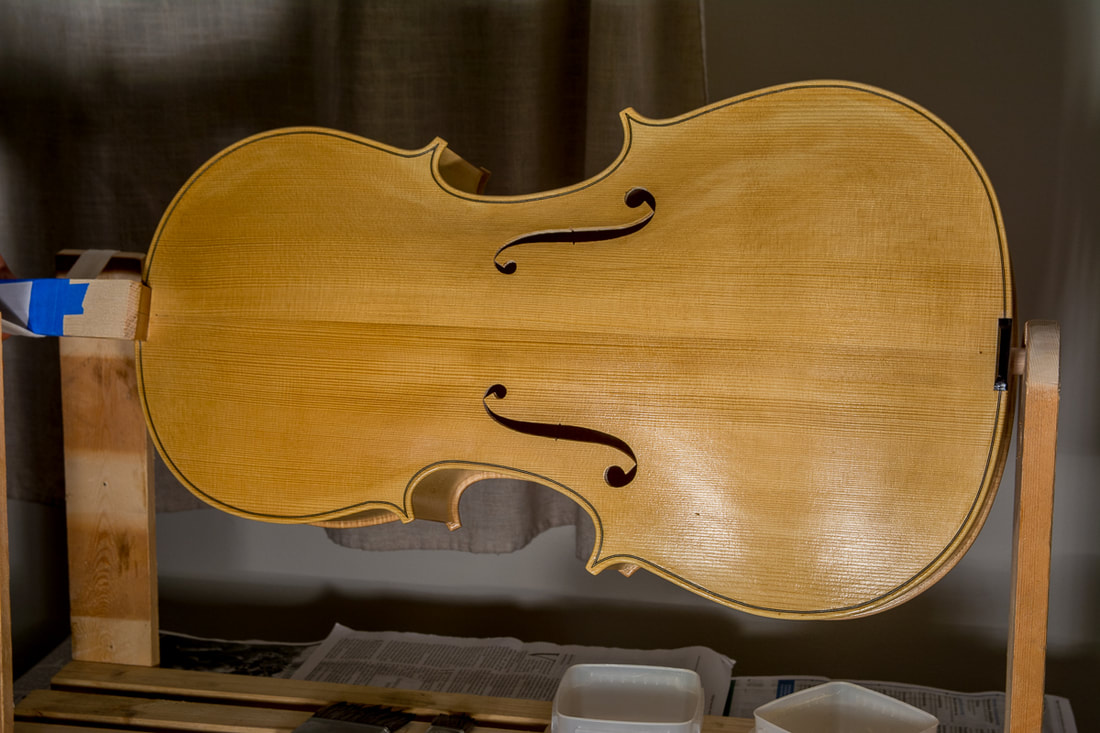
It was a pleasure to meet Guy and spend a little time with him in his shop. He gave me honest and critical feedback on the cello. He had quite a lot to say. The neck is too large/thick and doesn't quite have the right shape, the ff-holes could be larger, the arching is not consistent, the fingerboard is curved the wrong way, the sound post is all wonky... But it was not all gloom and doom. I had done many things fairly well, and he commented that is a good effort for my first instrument. That was of course nice to hear. He had 4 concrete things which could still be improved on this cello to get the most out of it. The sound post should be set properly, the bridge could be improved (though he did say that it was actually pretty good already) and the curvature of the fingerboard should be fixed and the neck needed working. I think I will attempt some of these myself. I will try to do the fingerboard. I knew already that it should be a little hollow. It had made it straight, and at the time I was too afraid to mess it up so I left it straight. It has now apparently curved the wrong way. This can cause a buzzing sound when the strings do not have enough clearance from the fingerboard. I think I will also work on the sound post. Other than being crooked it was also too tight. It will be a good exercise to try to properly fit the sound post. I maybe lost my patience last time. It is not all that easy to put the sound post in and out and know what to do with it to get a good fit. I probably gave up a too early. My plan is now to do those 2 things and then take it back to Guy and let him finish it off. I want to give it a try myself as I want to learn this stuff, but I also want to get the best sound out of the cello.
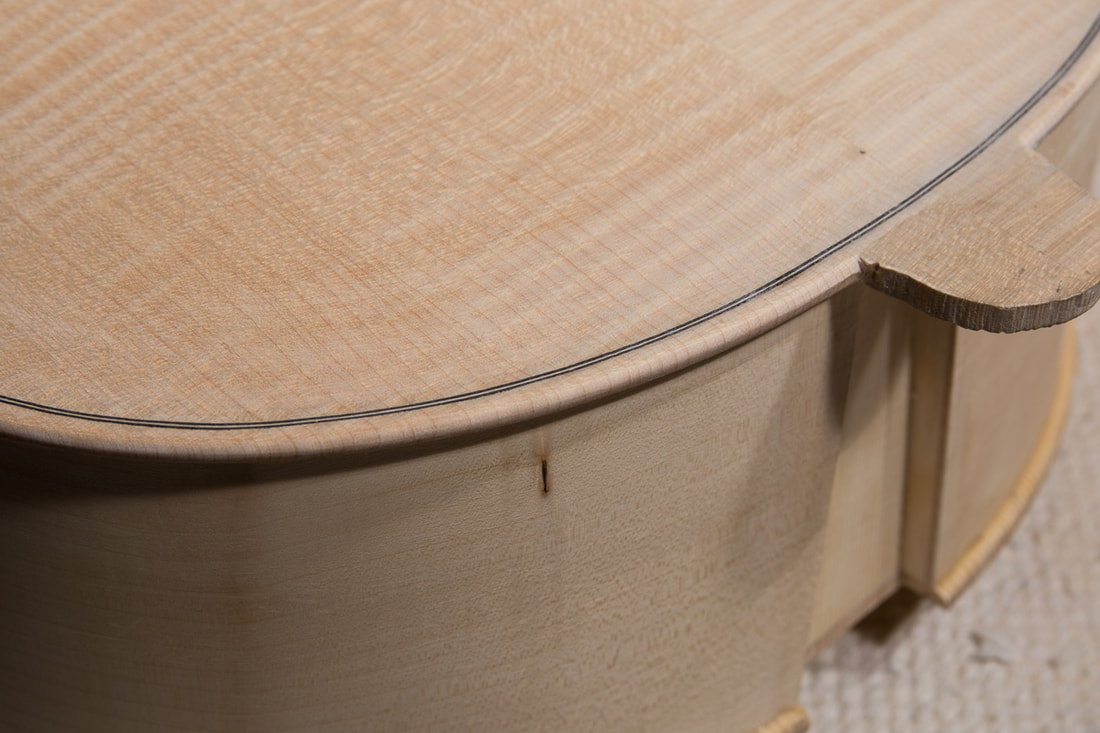
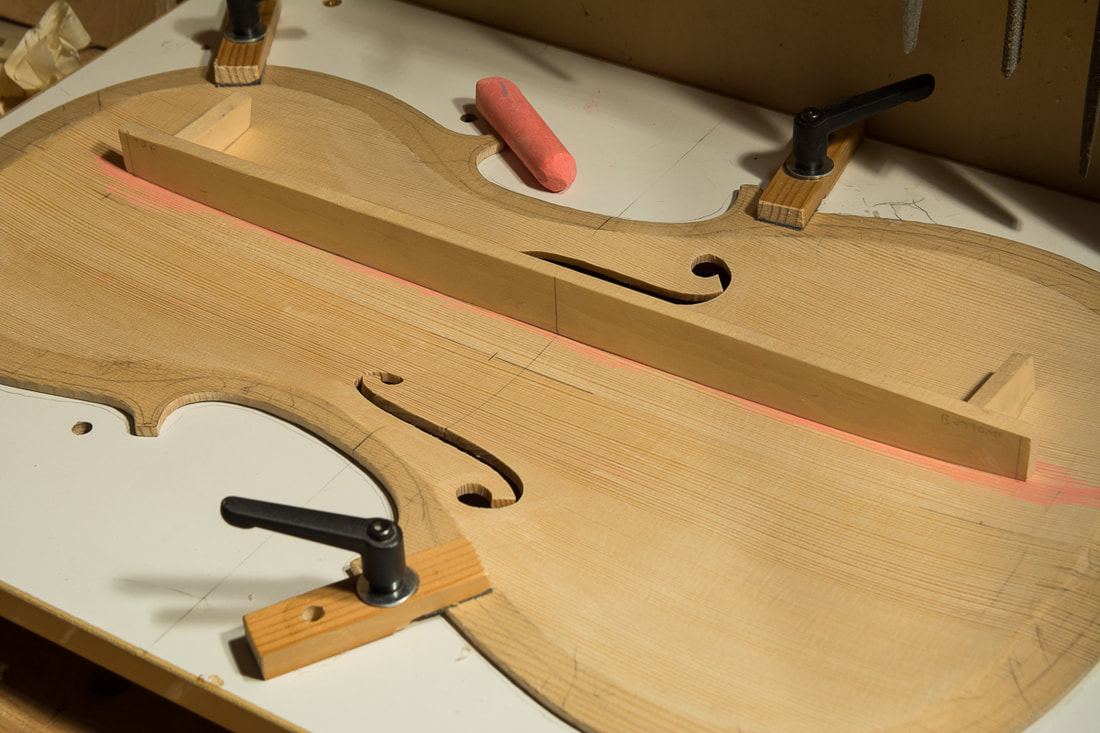
0 Comments
The first layer of primer needed to dry 12 hours. Before putting the second layer on, I sanded the whole cello with the included sandpaper (400 grit). The second layer went on pretty well. But it does dry very quickly and trying to correct anything later on is not possible. Luckily I didn't need to, I just noticed that very shortly the varnish is a sticky film and should be left alone. Already the first layers of varnish have made the surface nice and shiny which really bring out the nice flaming of the back. The front has a little uneven colour. I think it was a bit visible already before, but I couldn't get rid of it. I hope the coloured varnish will hide the imperfections. Before the first coloured layer can go on, I need to smoothen the surface with rottenstone powder and water first. Today I wanted to get both the body and the neck more refined before glueing them together. I had already rounded out the corner of the edges towards the ribs. Now I did the outer edge. The idea is to first make a bevel with a shallow angle, followed up with a second one with a steeper angle and then smooth the bevels with some sand paper. At first I wondered why it is done this way but I think I realised it while doing it. Making a bevel is pretty straightforward, and if the lights are correctly set one sees very clearly the flat bevel created. It is then quite easy to make sure that both the bevel angle and the width of the bevel stays constant. After having done the back and front edges I started also refining the neck. I sawed off some extra material from the heel and also started shaping. I thinned the front down considerably today. The bouts were just under 5 mm which is lot for a 1/2 cello. Now they are a little over 3 mm. I hope that's good enough now. If needed I will re-open the cello once I have heard the first notes from it. I got some feedback that the front (and back) were too thick. I left them thick on purpose to begin with in the hope to get some one to have a look and advice me. That advice turned out to be much more difficult to get that I had though. Hence I already glued to back to the ribs and the bass bar on the front. I really want to get the corpus closed soon so I thought it was time to revisit the front and finish it. I reduced the thickness along the edges today. Tomorrow I will likely finish the ff-holes. That's it then probably for now. I think I won't know what to do better before the cello is all fitted up (in white, without varnish) and somebody can hear it. That doesn't seem so far any more! The three parts for the body area ready to be glued up! The front and back plates are as ready as I will get the now. I hope they are good enough. I haven't done proper tuning of the tap tones. I tried holding on various places and tap and other places but I've had trouble making much sense of all that. And I am concerned that if I now remove material from either plate, I might remove too much from a wrong place I will now glue it all up and wait until the whole thing is ready before returning to it. If anything I think the top has a higher note so maybe I need to reduce the thickness of the front plate, or of the bass bar. But that can also be done later as the top should come off fairly easily. So I will now finish what I can, and once setting up the cello with a luthier I can get feedback on the general sound of the cello and maybe advice on how to fix it. 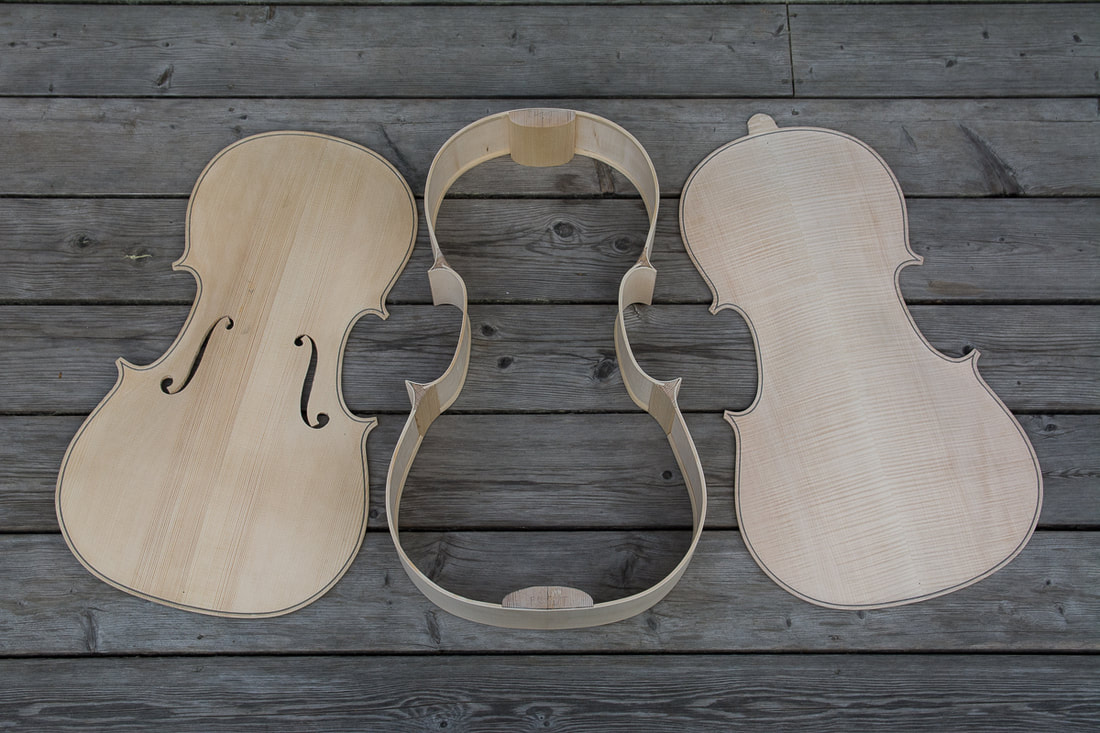 I repeated the rounding of the edge on the front this morning. Although softer, spruce is in many ways harder the work with than the harder maple. The difference between the soft and hard growth rings is much bigger and if careless one can easily remove too much of the soft wood and not enough of the hard one. For both the back and the front I used sandpaper glued to a flat piece of wood. That allowed me to make sure the growth rings are sanded equally. I finished the bass bar today. No tuning involved. I trusted Strobel's bass bar profile scaled down to 1/2 cello. I did the rough work using the finger planes and finished with some sandpaper. The bass bar is roughly semi-circular at the ends and more elliptical in the centre. The ends of the bass bar are cut at ~45° angle. I glued the bass bar yesterday. I should have put more protection on the outside of the front, on elf the clamps left some marks. I hope I can get them away still. Otherwise the gluing went well and the bass bar fit really well. Today and transferred the scaled bass bar heights from Strobel on the bass bar and roughly cut it to shape. Strobel stresses that the bass bar was made for his cello and may not be suitable for others, on the other hand he also says that it is not as important as many make it. I will now not remove too much material from the plates, and also not pay not to much attention to the bass bar. Hopefully by the time the cello is ready I have the chance to meet up with a luthier to set up the cello and check it all round. At that point we can still open the cello and fix a few things if needed. Getting a "perfect" fit on the bass bar was surprisingly easy. Pressing the bass bar against the chalked front and wiggling it around a bit left clear chalk marks on the bass bar and it was quite straightforward to get it to fit so that chalk is all over the bass bar. It was only once I had a perfect fit that I started to think what is really needed. The bass bar should not have a perfect fit on the front, with out any pressure there should actually be a little gap at the ends. This is so that the bass bar provides more support for the front once the strings pull down the bridge. Baker in her books says 1 mm for a cello, Strobel says 2-3 mm. So getting wasn't quite so straight forward. What I did was to mark a tapering pencil line on the perfectly fitting bass bar which I then roughly planed out. I then proceeded with the chalk method this time making sure I pressed the bass bar from the ends of the bass bar only. And now I made sure not to remove any material from the and or from the middle. This way I could keep the gaps at the ends of the bass bar but still get a good fit. Although a little more complicated, this worked out also pretty nicely. Now I need to glue the bass bar to the front. |