|
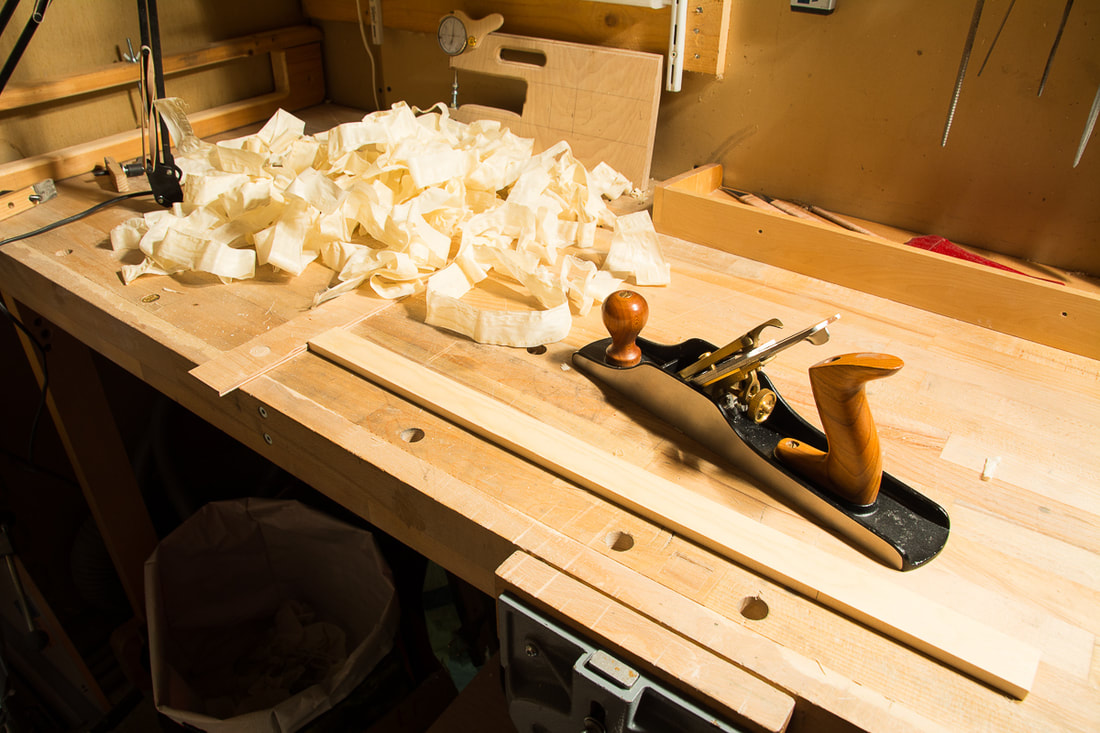
I started fitting the bass bar. First I planed the bass bar to right thickness. For this 1/2 cello Baker in her book specifies a thickness of 9.5 mm. This again matches well with the scaled thickness of the bass bar in Strobel's cello book. I don't know why I keep being amazed by the consistency between the two. Some how I can't below one can just scale all dimensions by the same factor. Apparently one can though. Once the bass bar had the correct thickness I clamped the bass bar to the front plate an used a large washer to roughly mark the shape of the front on the bass bar. I did that on both sides since the front is curved also perpendicular to the bass bar. I also marked the length of the bass bar. A spokeshave quickly removed the extra material. I also attached two block on the front plate with double sided plate to ensure the bass bar is always in the same position and angel relative to the front plate. Next step is to carefully fit the bass bar to the front. This is usually done by putting chalk on the front plate and placing the bass bar on its place. If the chalk is not evenly on the bass bar, then one knows where to remove a little wood at a time from the bass bar.
0 Comments
I think I might be there with the graduation. The thicknesses are now in the right ball park to where they should be. Getting better is maybe out of my reach for now. I don't want to build a system to measure the Chladni patterns. And anyways I don't really know what I should do to change the patterns. I have also had some trouble measuring the tap tones. Maybe I'll post some of the spectra I have measured. I maybe don't quite know the right position where to hole not where to tap. So I maybe see is mixture of frequencies of all sort of modes. The final step for the front would be to add the bass bar. Then I think I would be ready to glue it up. I now think that I will be put it all together and once I am sort of ready I maybe try to find a luthier with whom I could set up the cello. If I then need to open up the body and adjust the plate thicknesses then maybe it is not too bad. I finished the ff-holes today. I tried with a file at first thinking it would be easier to deal with the differences hard and soft grains of the wood. But that wasn't so. I found it difficult to control the file and ended up always taking more of the oft wood out than I wanted. So used the knives I had made earlier. They worked great. I used all knives in the end. The very thin blade was great at the tight spots where as the wider ones allowed me to get nice smooth shavings elsewhere. It was good to have a left handed blade also. The ff-holes aren't in fact quite finished, I didn't do the nicks yet. Scraped a little more off the front. It weighs now 418 grams. Now I don't dare take any more off before I have made progress on the back. Below is a double exposure showing both sides of the front at the same time. 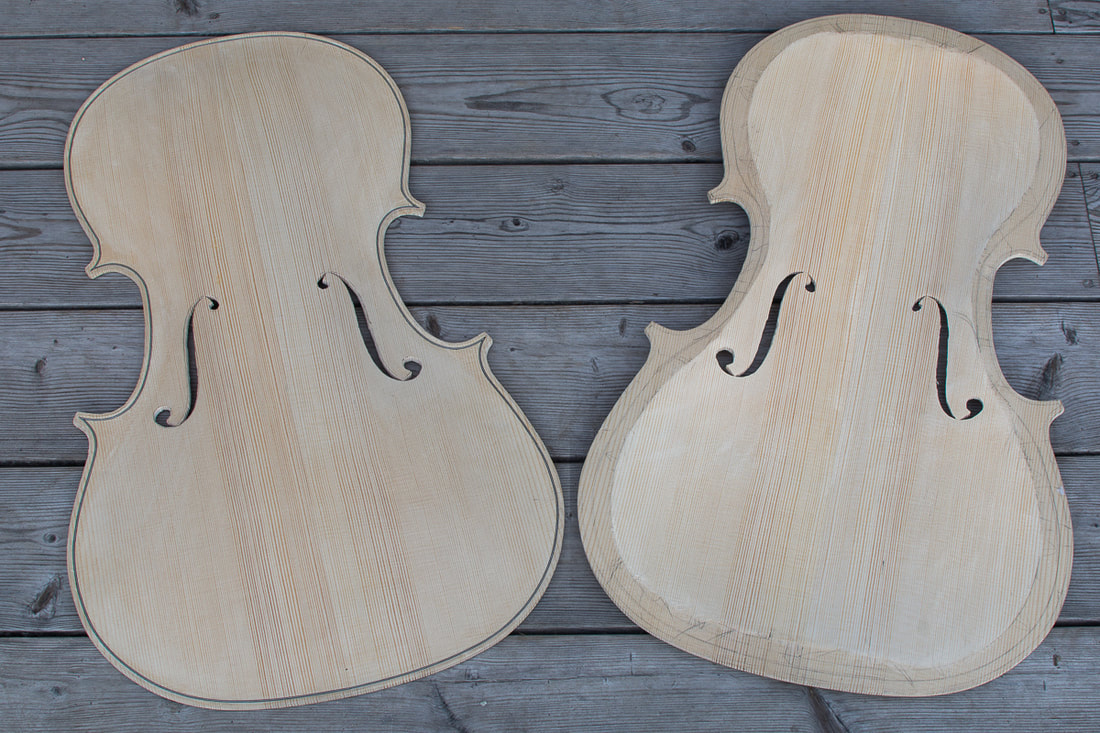 I am now at ~5 mm everywhere. Some places in the lower an upper bouts are a little less. The front plate now weighs 429 grams. I have been doing this now with the graduation punch, the pencil gauge and a scraper. Mostly with the latter two. I find it easier to use the pencil gauge to mark up high spots. My process is as follows:
It is not quite uniform, nor is it exactly 5 mm. But I think it is close enough for now. Maybe I will move to the back next, hollow it out and start the graduation. Once both plates are fairly close I can then fine tune and match the tap tones of the plates. I am not quite sure how important it is for the tap tones that I have cut the sound holes already. And in fact maybe I could finish the sound holes next. Will need to think about this a bit. I reduced the thickness further today. I am nearing 5 mm everywhere. The weight is now 460 grams. It seems like a lot when comparing to some other values I have seen around. Table 3 in www.platetuning.org/html/modes_-_tuning_plates.html lists the belly (front) plate weight for 1/2 cello at 295 grams. That seems like a lot of weight to reduce still. The table is based on some theoretical correlation and is the weight which would be expected by scaling a full cello front. I will keep the number in mind but not aim for it.
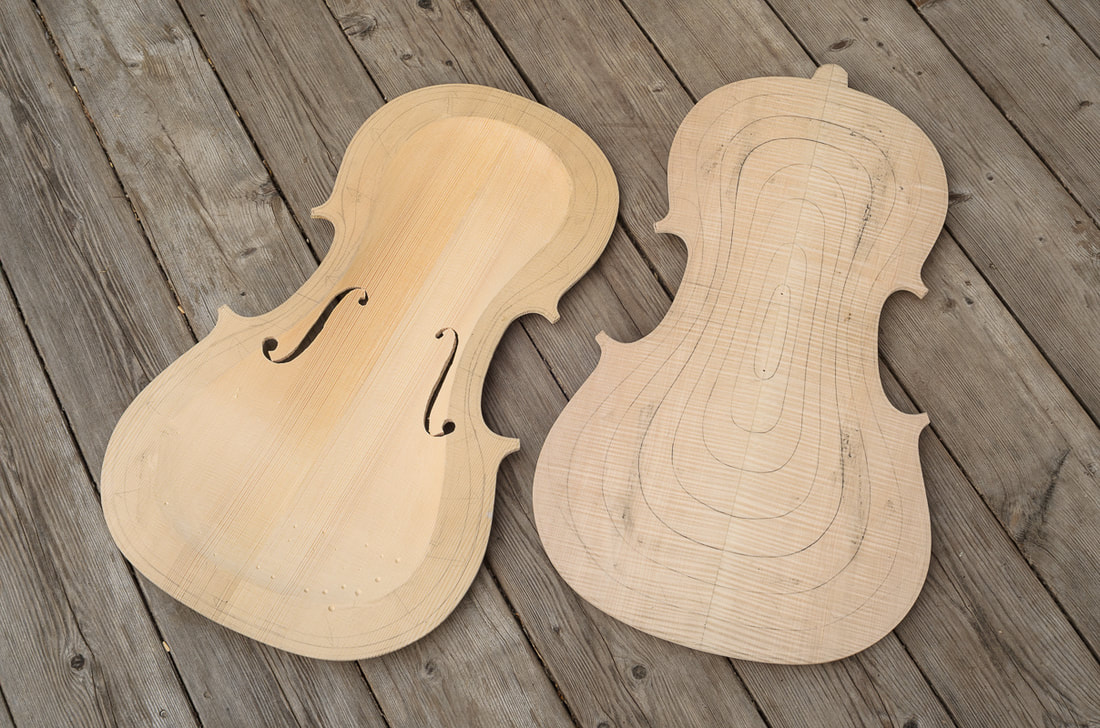
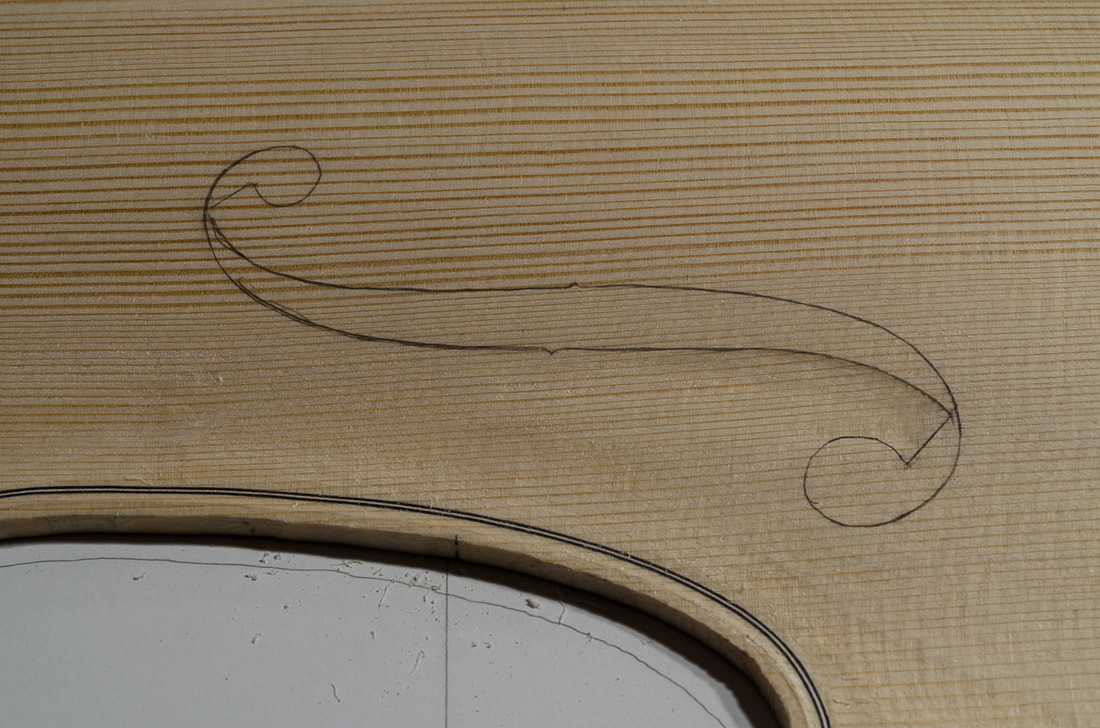
I just realised a small mistake I made in hollowing out the front. I didn't leave enough flat area around the bottom and top blocks. Or maybe just enough at one end. I thought I had marked the allowed areas properly but clearly I hadn't. One should always be alert and not trust that one did all correctly previously. I hope it doesn't matter too much. I started with the graduation of the front. I am bringing the whole front to a uniform thickness of maybe ~5 mm. I think that should be safe so that I have still material to remove. Today I managed to get it to ~6 mm everywhere. The photo below shows light shining through the front plate (where the circle is). The unevenness is mostly due to differences in wood density. The plate itself is pretty consistent. Only where the two plate halves join in the middle is the plate actually thicker. This is because I need to plane one side in the opposite direction from the other. In order not to plane against the wood, I have to stay a bit off the centre on both sides leaving a small ridge in the middle. I also had some good exchange of emails with maestro Kimon today. Thanks maestro! We discussed how to best do the graduation and the tuning of the plates. I haven't found good material on how to do it for a small cello like this 1/2 cello I am making. It is probably not possible to get the tap tones of a 4/4 cello without the plates getting too thin. The current plan is to keep the plate thicknesses reasonable. And rather than concentrating on the absolute frequencies of the tap tones, I want to make sure that the tap tones of the back and the front have a good relation to one another. 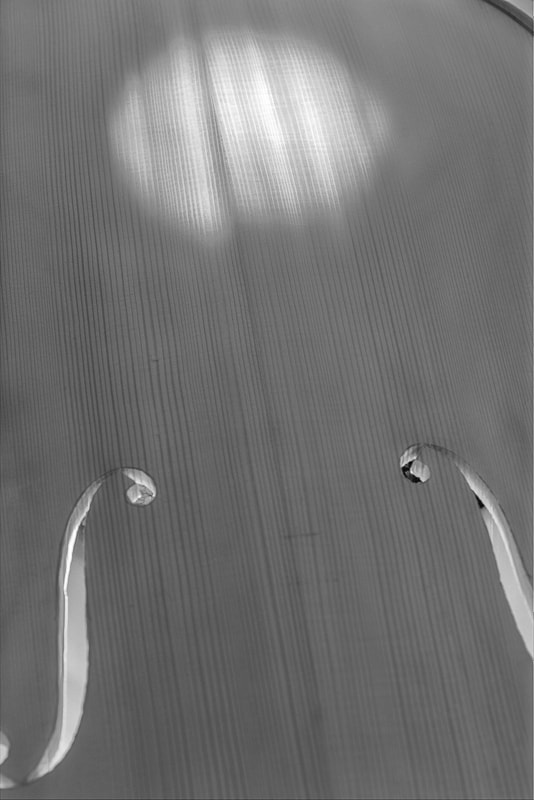 The photos show how the plates look at the moment. Both have the purfling all round. The front plate has been arched and hollowed, and the ff-holes have been roughly cut. I still need to do the graduation and finish the ff-holes. The back has been roughly arched and has the purfling. The arching needs to be finalised next and then the plate needs to be hollowed. And both plates need to be tuned up. Today I cut out the second ff-hole. Nothing too special there. In one spot I sawed to the line. I hope it didn't go much too far. Both ff-holes are now roughly sawn out. I stayed pretty close to the line when sawing so that I don't have all that much to clean up with the knife. The next thing on the front plate is to bring it to final thickness and so finish the graduation. After the graduation is done I will then finalise the ff-holes. The front is starting to look like a cello top! I also made a small knife for refining the ff-holes. I took the measurements for #VK025R from www.hocktools.com/products/knives.html. I made the blade from a piece of O2 steel which I bought with my last order from Dictum. I got the idea for making my own knives from Uri Tuchman, for example Making a Tree Shaped Kiridashi. Look also for other videos by Uri, he has some great projects. 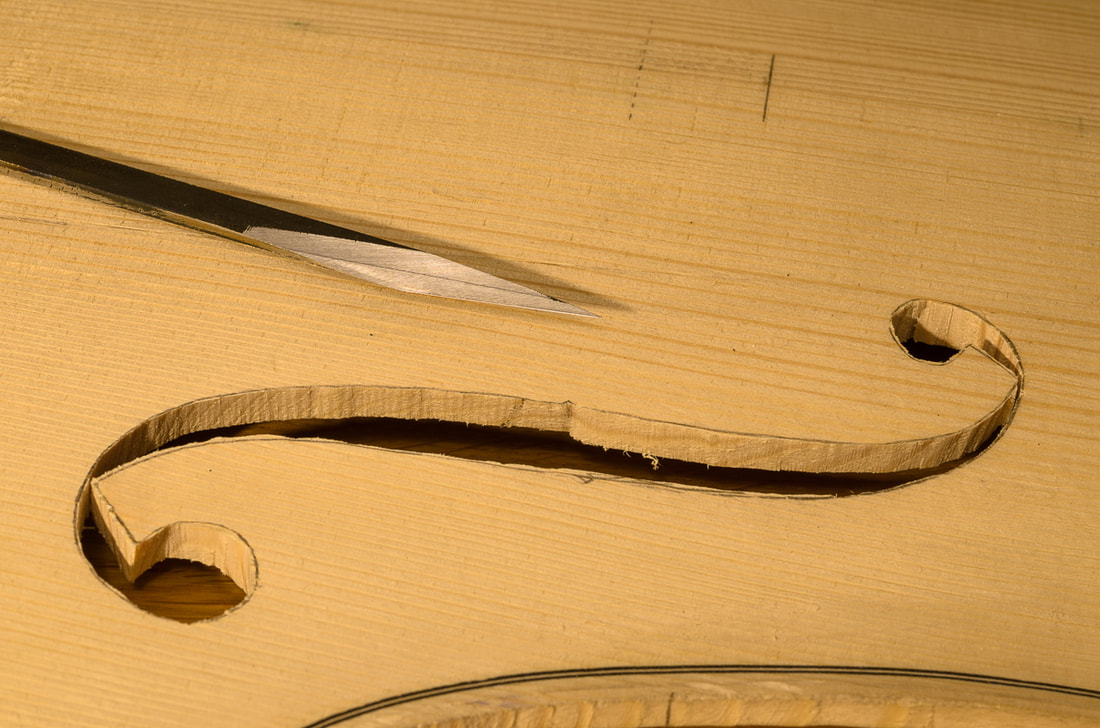 The next step now that the front has been hollowed out is to start working on the ff-holes. First I needed to add the fluting of the lower wings. The instructions are mostly quite short on this and the cello my son currently has doesn't have fluted ff-holes so I wasn't too sure what I was aiming for. I added some but not all that much. Maybe I should done a stronger fluting. The good thing is that the fluting is purely decorative and shouldn't affect the sound. After having added the fluting to both sides it was time to cut out the first ff-hole. I first drilled two holes so that I could insert the saw blade. And then sawed the ff-hole open. The corners around the ends are very delicate so one needs to be careful when cutting out the holes. One should always go with the grain, and first cut the corner open while it is still well supported. I didn't have time to cut both ff-holes today. And maybe anyways I'll finish the first one first so that I can learn from my mistakes on the first one before doing the second. Some good references:
|