|
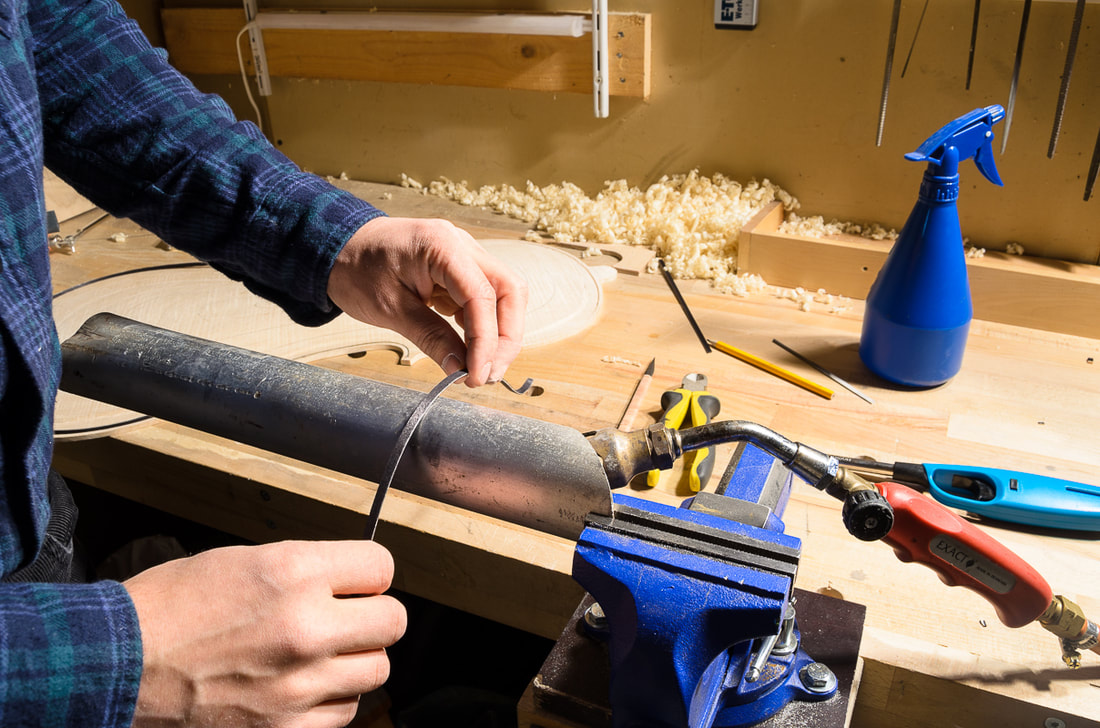
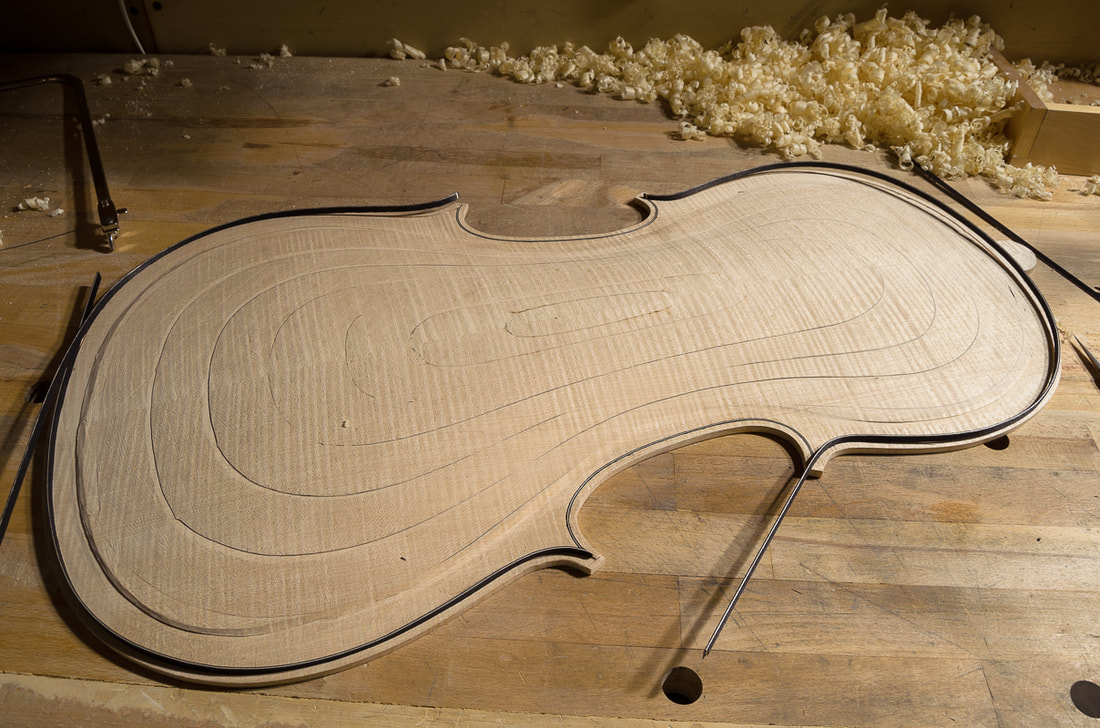
Today I finished the purfling on the back. It went pretty smoothly. I first bent the purfling to fit the groove on the back of the cello and then carefully cut the ends to match the purfling on the c-bouts which I had glued on already earlier. For the lower bout I had to make a splice. For the front I had made the splice in the "wrong" direction which I rectified this time. I had much more trouble getting a good spline this way. The photos below show my setup in preparing the purfling. The blowtorch isn't on when I am bending the purfling. I didn't take photos from the glueup. I used a large injection needle to put the glue in the purfling groove. Keeping the needle in the hot gluepot made sure it stays hot and liquid.
0 Comments
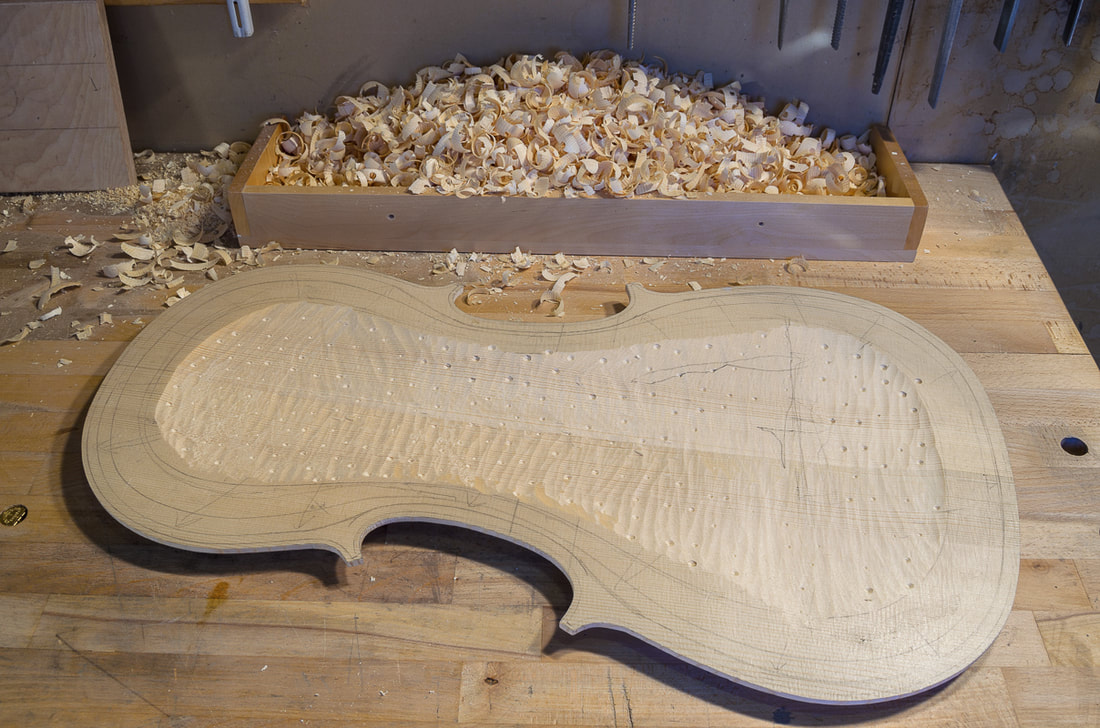
Today I cut out the second ff-hole. Nothing too special there. In one spot I sawed to the line. I hope it didn't go much too far. Both ff-holes are now roughly sawn out. I stayed pretty close to the line when sawing so that I don't have all that much to clean up with the knife. The next thing on the front plate is to bring it to final thickness and so finish the graduation. After the graduation is done I will then finalise the ff-holes. The front is starting to look like a cello top! I also made a small knife for refining the ff-holes. I took the measurements for #VK025R from www.hocktools.com/products/knives.html. I made the blade from a piece of O2 steel which I bought with my last order from Dictum. I got the idea for making my own knives from Uri Tuchman, for example Making a Tree Shaped Kiridashi. Look also for other videos by Uri, he has some great projects. 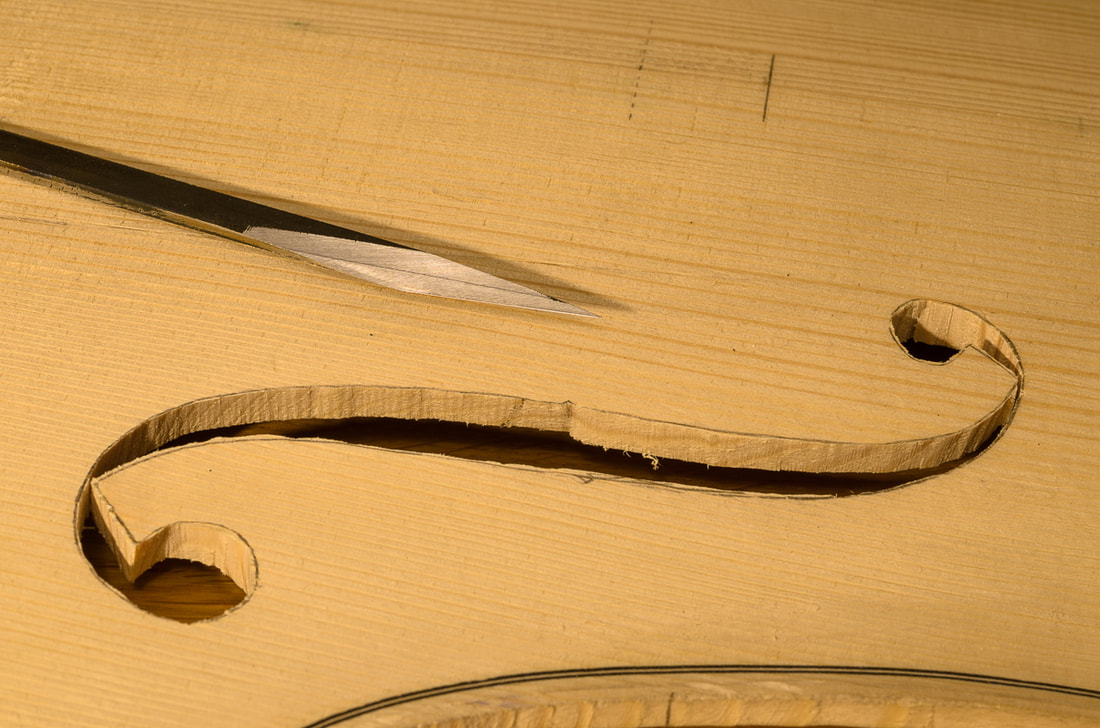 The next step now that the front has been hollowed out is to start working on the ff-holes. First I needed to add the fluting of the lower wings. The instructions are mostly quite short on this and the cello my son currently has doesn't have fluted ff-holes so I wasn't too sure what I was aiming for. I added some but not all that much. Maybe I should done a stronger fluting. The good thing is that the fluting is purely decorative and shouldn't affect the sound. After having added the fluting to both sides it was time to cut out the first ff-hole. I first drilled two holes so that I could insert the saw blade. And then sawed the ff-hole open. The corners around the ends are very delicate so one needs to be careful when cutting out the holes. One should always go with the grain, and first cut the corner open while it is still well supported. I didn't have time to cut both ff-holes today. And maybe anyways I'll finish the first one first so that I can learn from my mistakes on the first one before doing the second. Some good references:
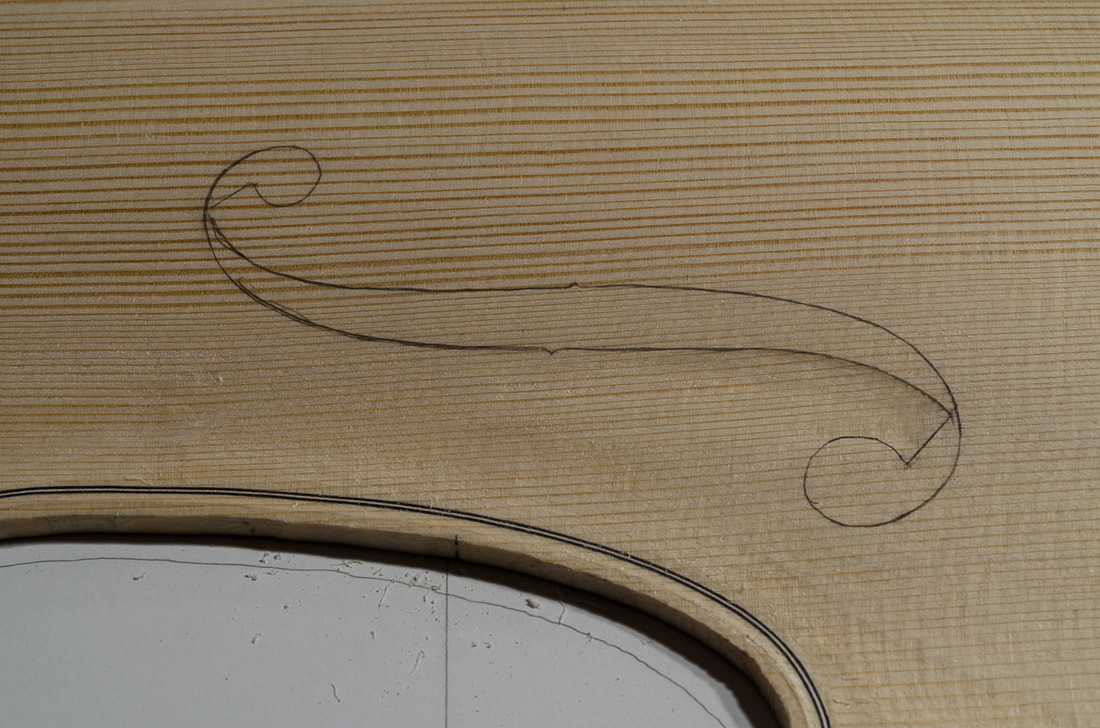
Today I tried out my new graduation punch. After punching a few holes with the graduation punch I had three kinds of marks on the plate. The larger holes still left from the drilling, the small holes from the graduation punch, and some scribbles from the pencil gauge. Using my favourite fingerplane, I removed material until almost all the marks were gone. The hollowing out is now done for the front. The thickness is still a couple of millimetres more than the final thickness. This will be reduced in the graduation phase. I had time today to also make a graduation punch. It will be used during the graduation of the plates are brought to final thickness. The punch has a sharp point whose distance for the peg underneath can be adjusted. The idea is the same as when drilling the hole during hollowing. With the punch one can mark the areas of the plate which are thicker than the distance between the peg and the point. Once the areas have been marked one can the easily remove material from the correct spots. 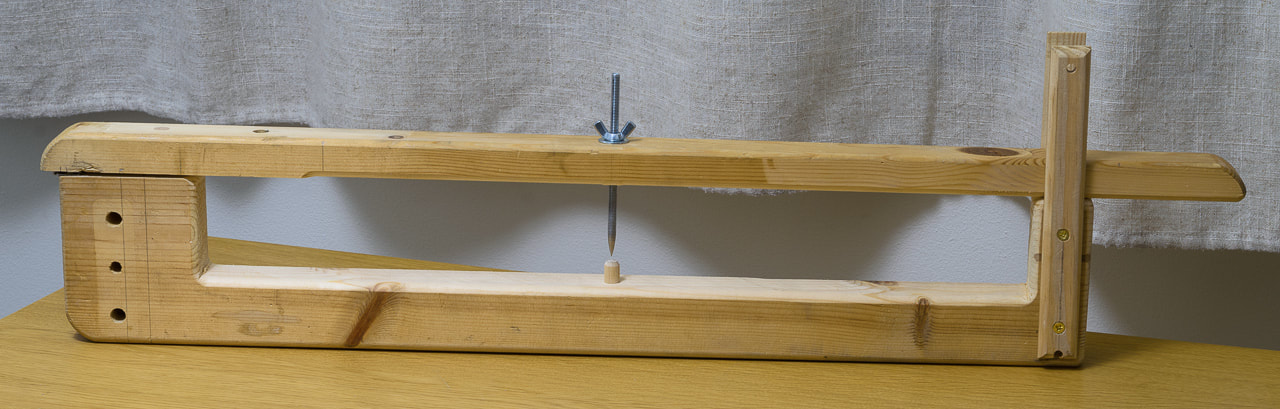 After checking my books, I decided to draw the f-holes next. I think I will still reduce the thickness of the front plate a little before actually cutting the f-holes but I thought it wouldn't hurt to mark them already now. I have been a worried if my assumption that I can just downscale a 4/4 cello uniformly by 86.8 % will work, but this time I actually got a nice validation of the approach. Barker's table for approximate measurements for a cello list for 1/2 cello:
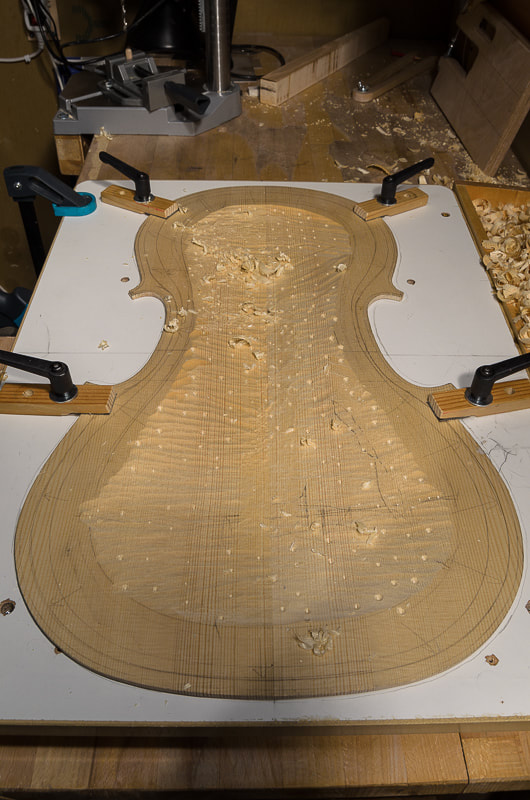
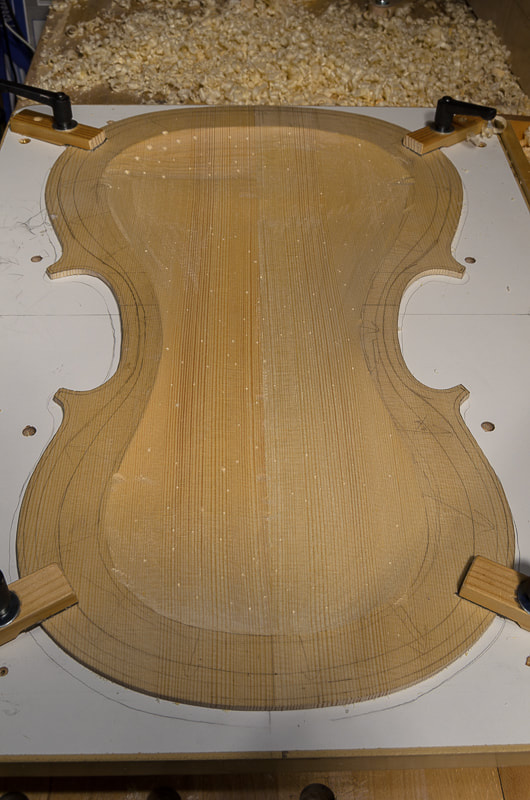
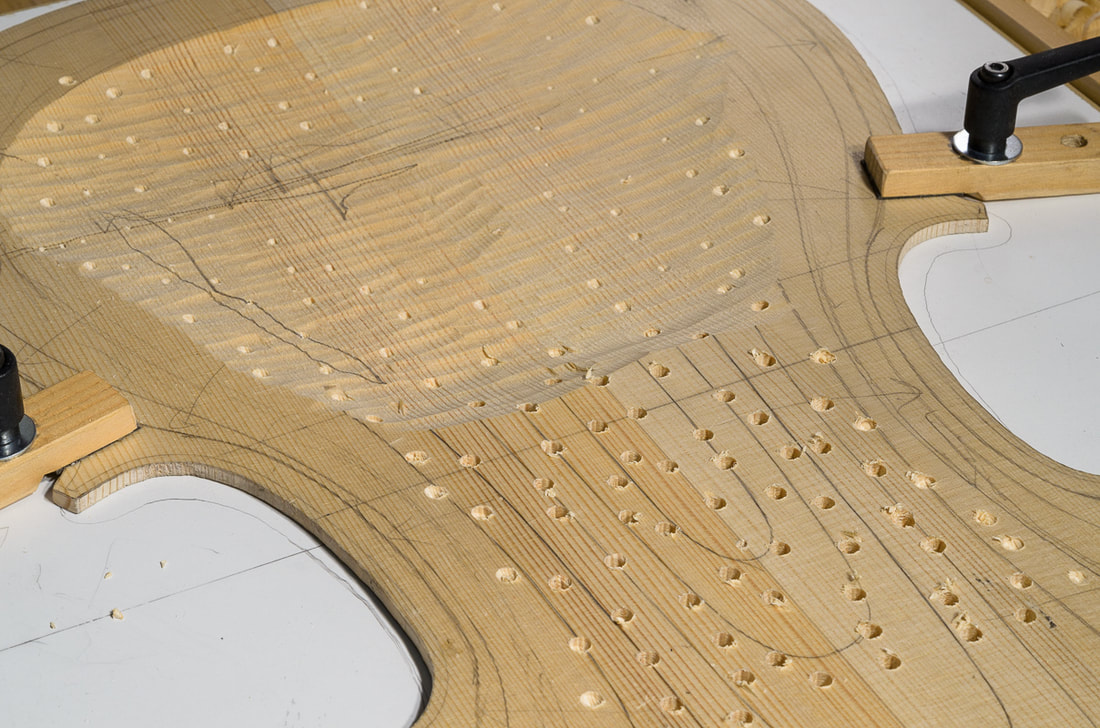
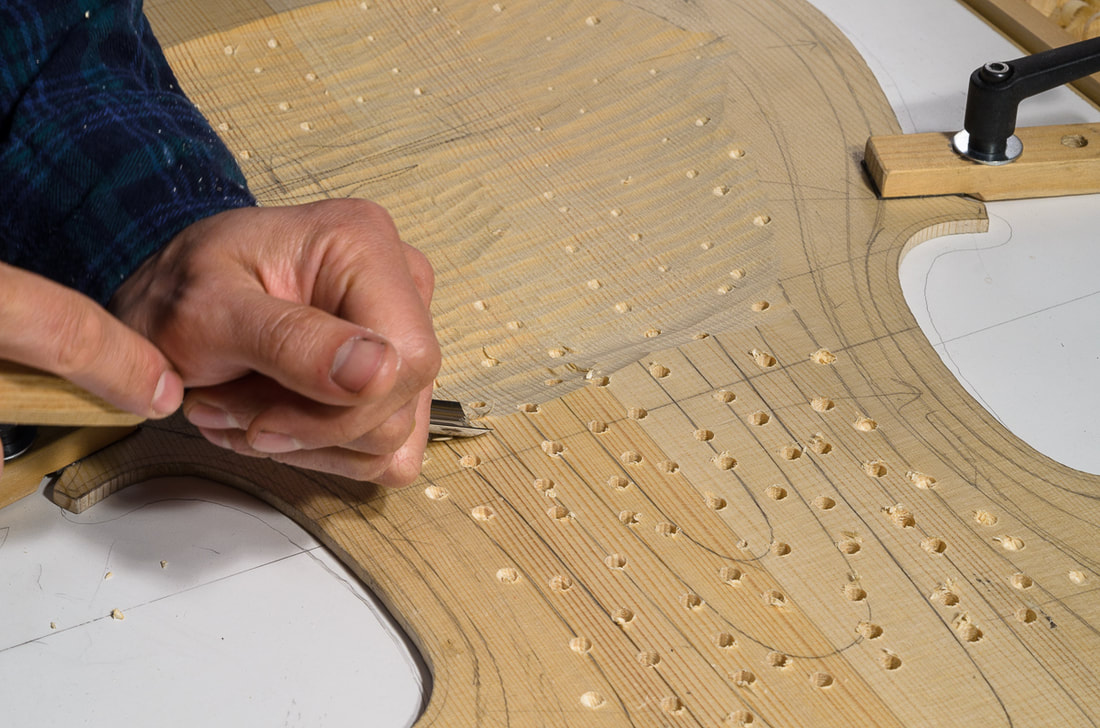
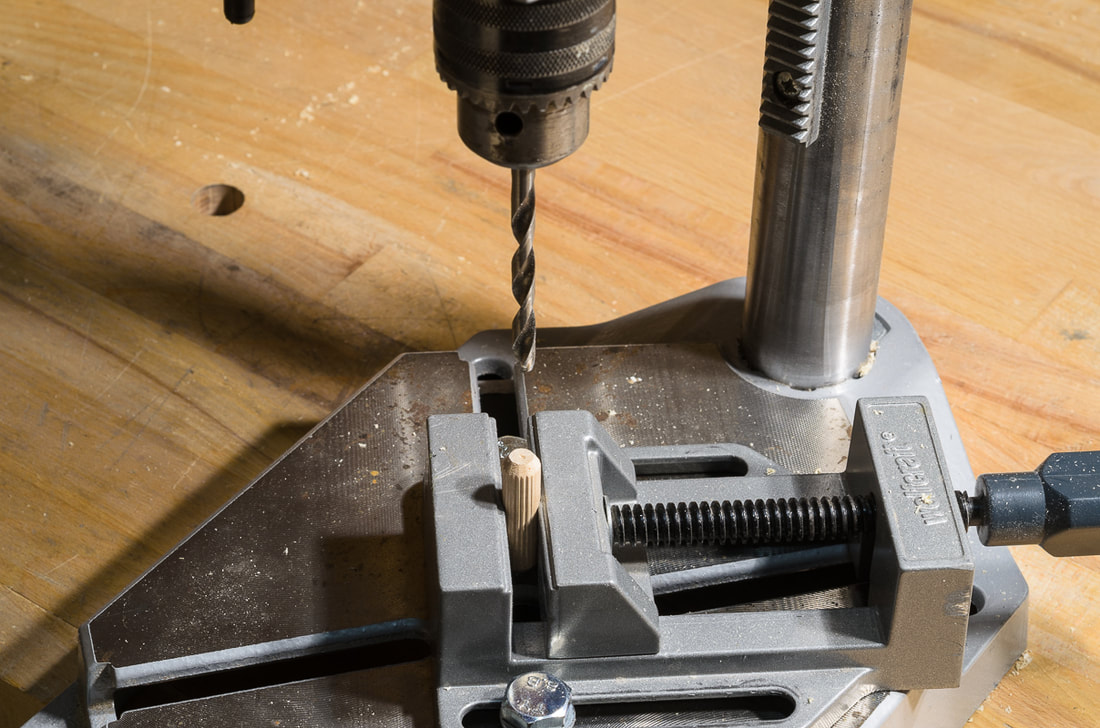
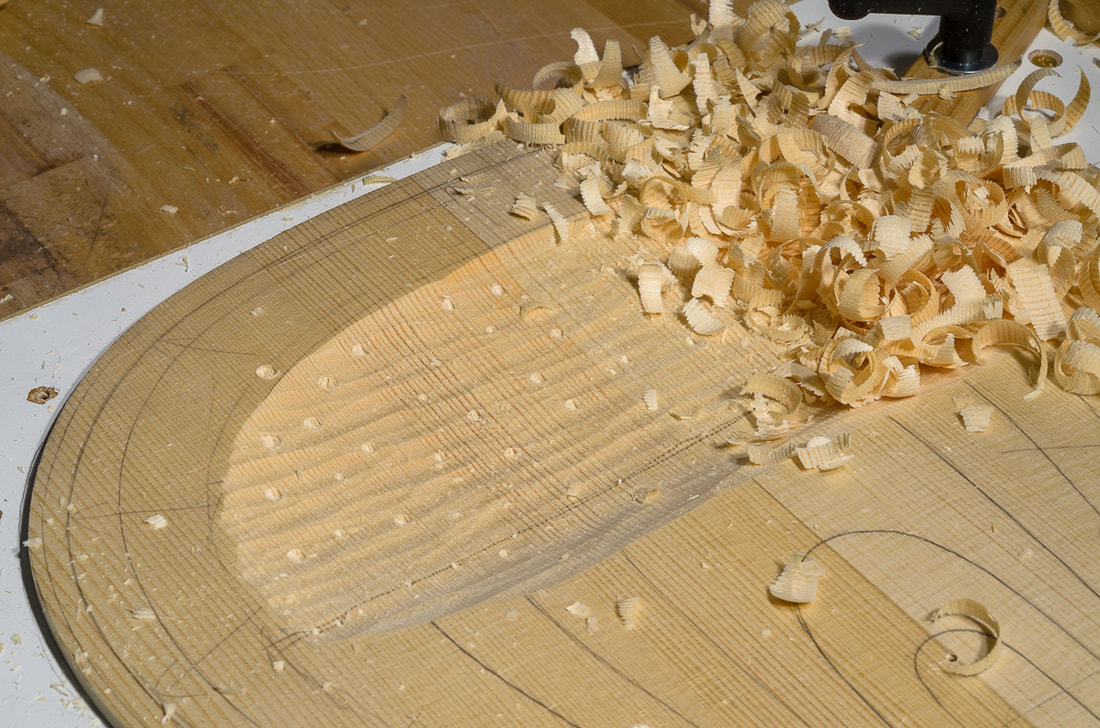
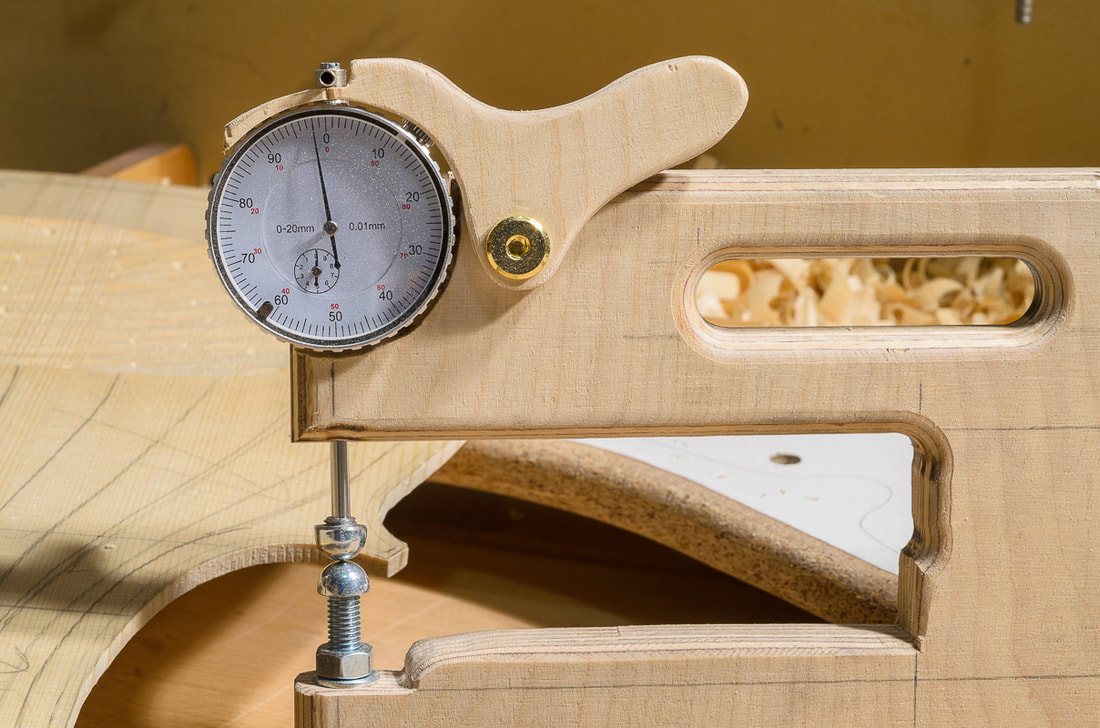
To mark the f-holes I glued the scaled f-hole from the plans to a piece of plastic sheet and cut it out. I then traced the hole on both sides symmetrically. When cutting out the f-holes the lines will need to be cut out too. I did the rough work in hollowing out the front yesterday with the drill and a gouge. Today I continued with the little fingerplane. It may be too fine at the this stage but using it is just such a joy. One should not underestimate these little planes. They might look small and harmless but they can really remove material fast. I planed the inside of the plate all over so that I could still barely see the holes from drilling. One can see on the top left of the last photo the region where the drill was setup wrongly and I drilled too deep. I did't dare to remove any more material form there at the moment. I am sure it will be fine in the end though. The front plate is now roughly 8 mm thick. I could maybe take off a little more now, or cut the f holes. Or maybe finish the purfling of the back as the new purfling arrived today in the mail. Time to consult the books. For the first time, I am writing on what has happened today. I continued with the hollowing out of the front. Nothing too special here, I drilled more holes to mark the depth and gouged the excess out. I am not going too close on the thickness now and some of the marks are still quite clear. I prefer to take things slowly so that I don't mess anything up. The front plate is starting to feel a lot lighter already. I am turning the cello around in the photos below. It might not be clear from the partial cello visible. My drill press is quite small. Or rather it is not a drill press at all, just a drill stand. I cannot reach the middle of the lower bout with it. That region I will need to do by eye. Luckily the area is pretty small. Building a cello is quite interesting. There are times when one needs to be very careful and remove only a fraction of a millimetre at a time. And just a moment later one can take large heavy shavings. I like that. Although not really clear from the photos, I managed to roughly hollow out the whole front plate. Next time I will start refining the plate thickness. The plate should be of fairly uniform thickness in the end. Just a little thicker near the sound post and the sound holes. I am catching up with the actual progress. I still haven't described how the ribs were done and that will follow, but from now on I will be telling actual progress in real time. After the final arching of the top, one needs to hollow out the inside. I started doing this by eye and using the pencil gauge to mark areas which were too thick. I set the pencil gauge to 8 mm and marked on the front plate the position where it touched the bottom of the plate. I could then hollow inwards from this position. As this is my first instrument, I had trouble trusting trust my eye which meant that I was constantly checking the thickness. Hence I decided to drill depth markers. Some use this method also to remove much of the wood. I prefer to use hand tools as much as possible. It is more pleasant with more contact with the wood. Hand tools also make less noise and dust. So I drilled as few marker holes as I thought were required. I set the depth stop of the drill press so that there remained a gap of 8 mm between the dowel and the drill bit. The photos below show my setup for the drilling. Now with the depth marked at regular intervals I could easily gouge out the wood to correct depth. It was great to remove some nice shavings! I first carved from one side and then the other. I think it would probably be better to scoop across the whole plate on go. While doing this I noticed that the holes which I had drilled last were a little too deep, about 6 mm. The depth stop must have changed during the drilling. I need fix it more securely the next time. Luckily 6 mm is still more than the final thickness of the plate which is around 4.5 mm. After I had hollowed the first patch, I checked the thickness with a self-made thickness gauge. I bought an inexpensive dial indicator and fixed it on a piece of thick plywood. The thickness gauge works great. My only criticism is that the dial indicator is too accurate. The small dial shows the millimetres, the larger one 0.01 mm. In many cases it would be enough to read the small indicator but I find that difficult. I always read both which makes it quite slow. The dial indicator itself has a travel of 20 mm but with the setup I made I can easily set the range to be 0 mm - 20 mm but also for example 10 mm - 30 mm if needed for some reason. Some good references:
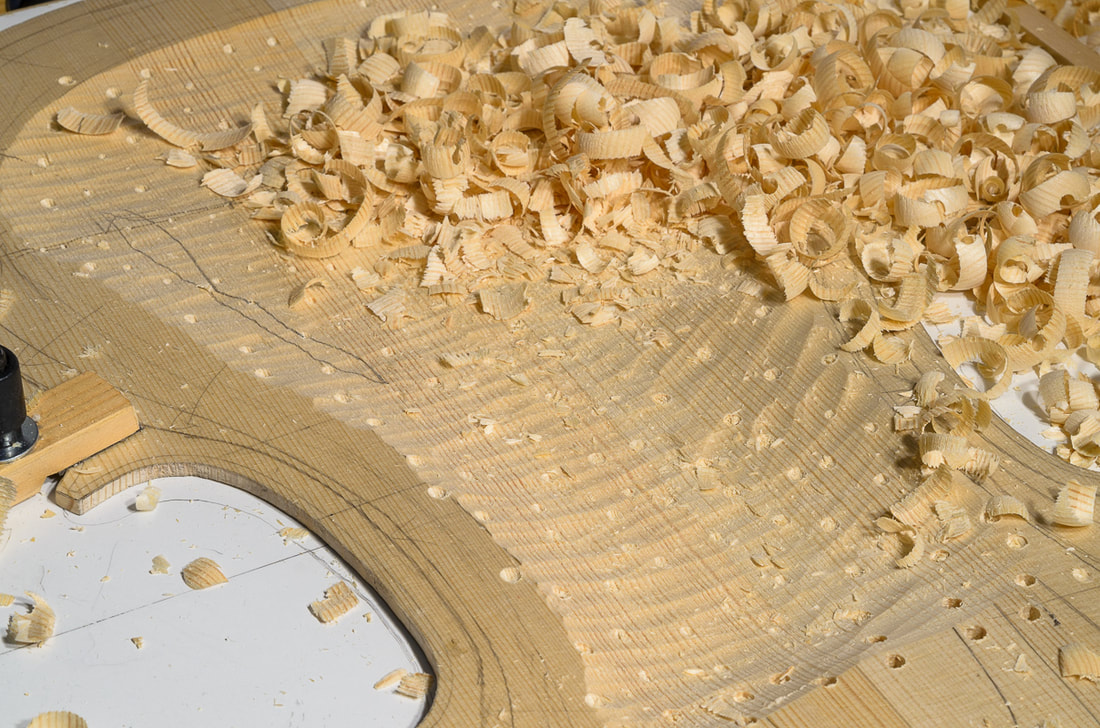
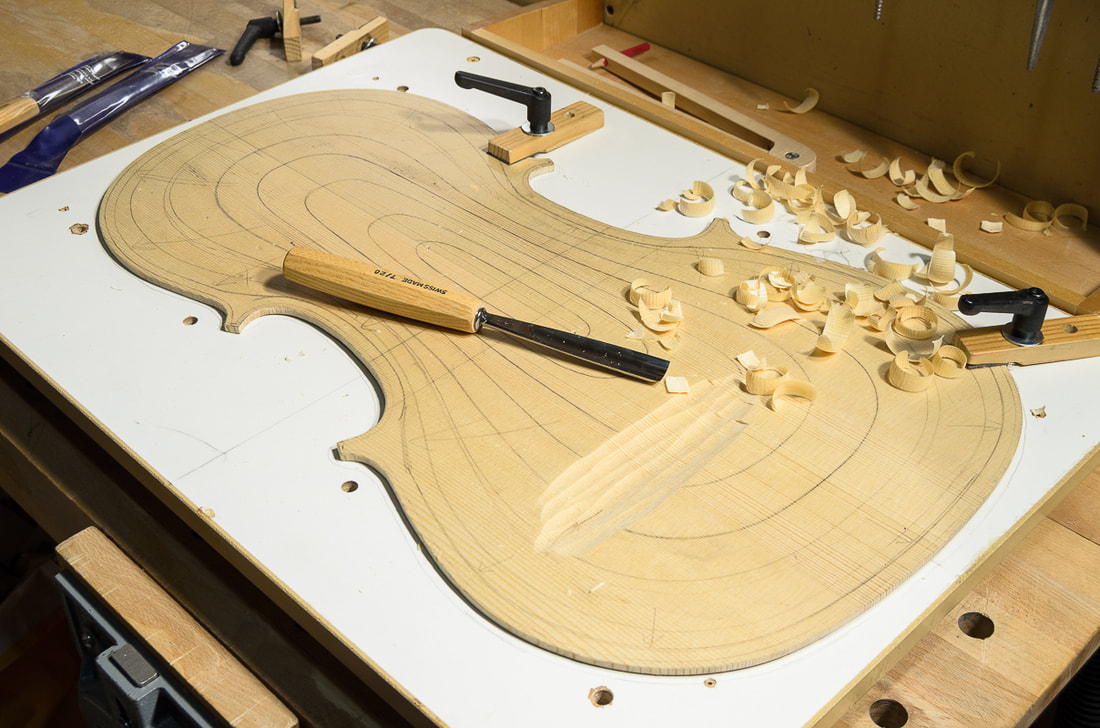
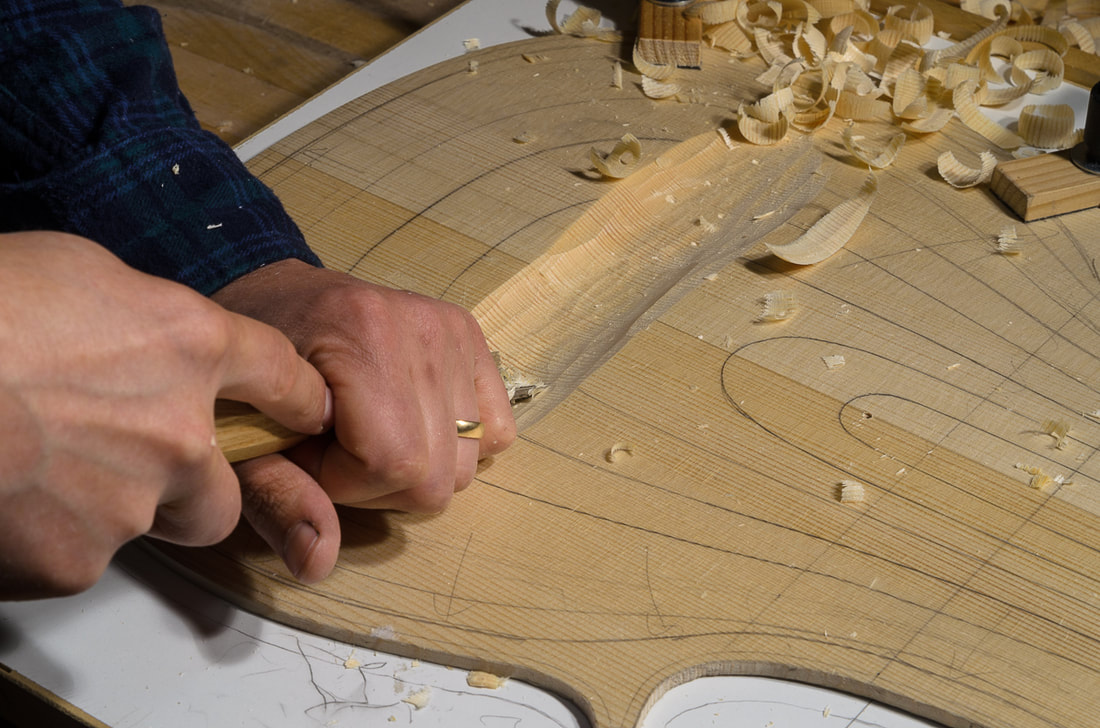
Once the purfling is in place, the outer surface of the plate can be finished. This starts with the fluting of the edge where the purfling is and smoothing out the arching. I have done this for the front. I am waiting for some more purfling to arrive so that I can finish the purfling on the back. I still have to do the upper and lower bouts. Fluting the edge means to bring it down a millimetre or so relative to the rim. I did this with gouges and the curved 10 mm fingerplane. I started with one of my old gouges but finished it with 10 mm and 20 mm sweep 7 gouges which arrived in the post the other day. After I had finished the fluting I used the arching guides to get the front plate to correct shape. This was done with the same fingerplane and scrapers. I seem not have taken many pictures of that. After the arching was good I drew some contours using a pencil gauge. I was surprised to see that the contours turned out pretty symmetric the first time and only needed a little adjustment. I made the pencil gauge from a few scraps of maple and a bolt and a wing nut. It works quite well, but I need to be careful not to push it too hard against the plate. Maybe I made it too thin and the arms flex a little. Some good references:
|