|
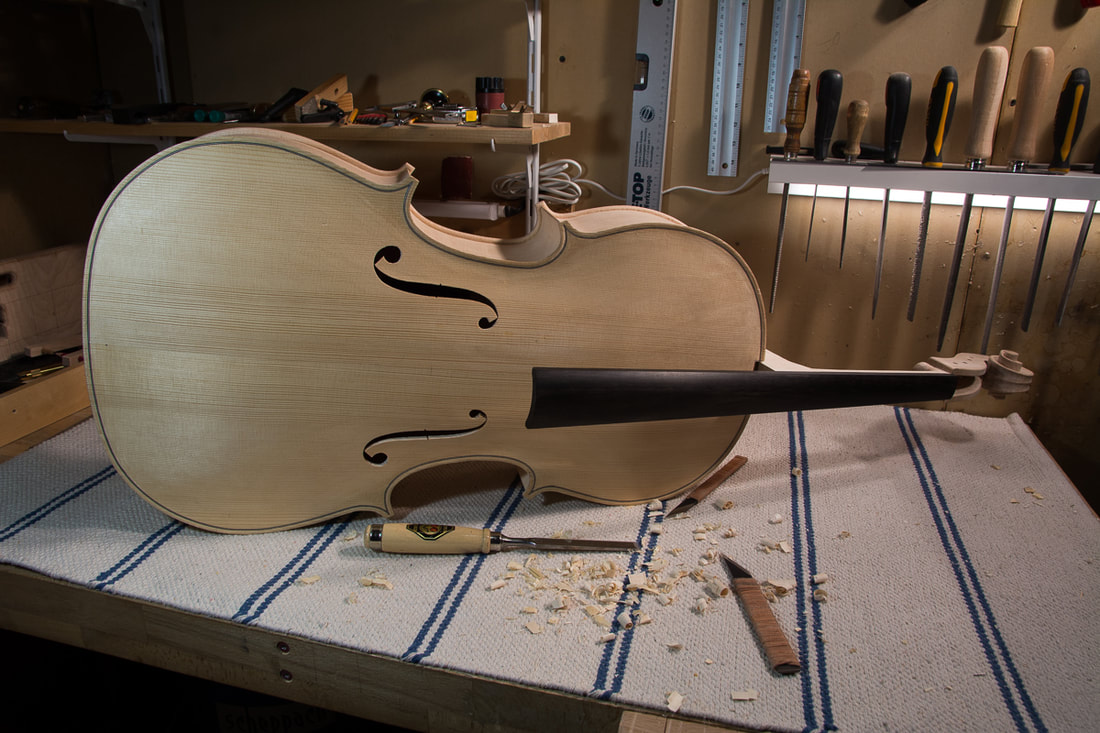
Made good progress today, the neck is almost fitted. It needs to come down still ~1 mm but then it is good. The projected height is then what I want (72 mm) and the height of the bottom of the fingerboard at the heel above the front is 19 mm. I forgot to put links to some good resources earlier so here you go: www.derekroberts.co.uk/making/neckjoint.htm osnesviolins.com/10.Fitting%20the%20Neck.htm YouTube: Davide Sora Lavorazione e incastro del manico di violino YouTube: Jon Magnum How to Build a Fiddle - Part 10 Attaching the neck, nut & saddle 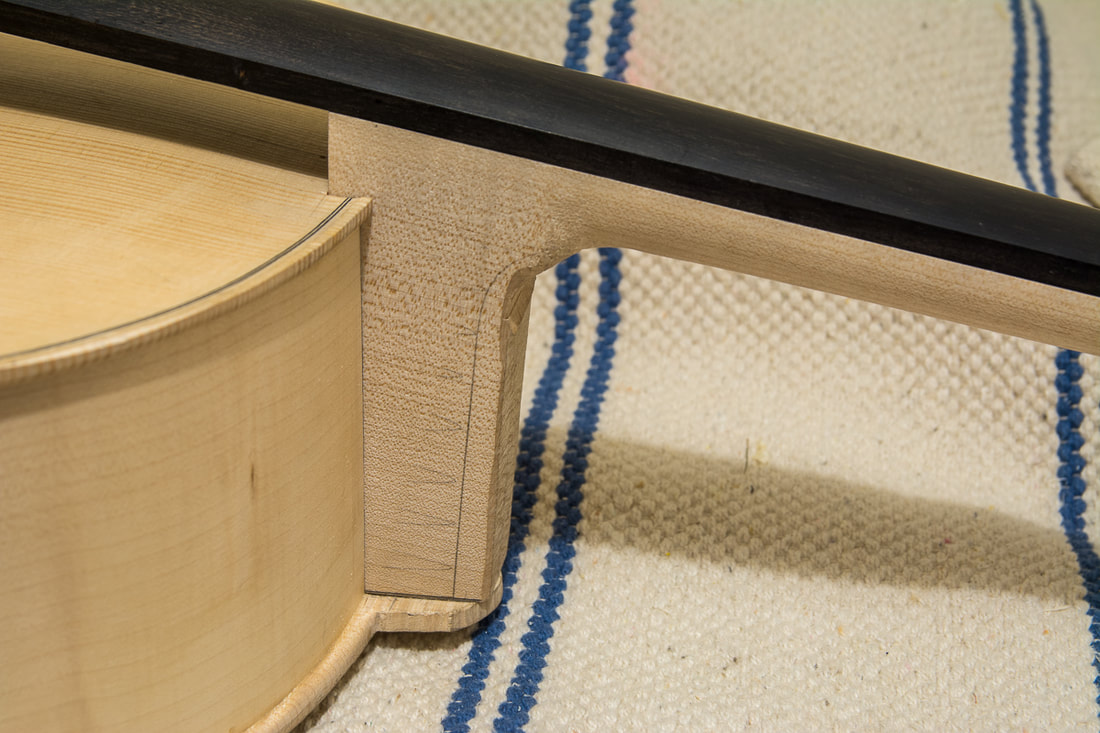
0 Comments
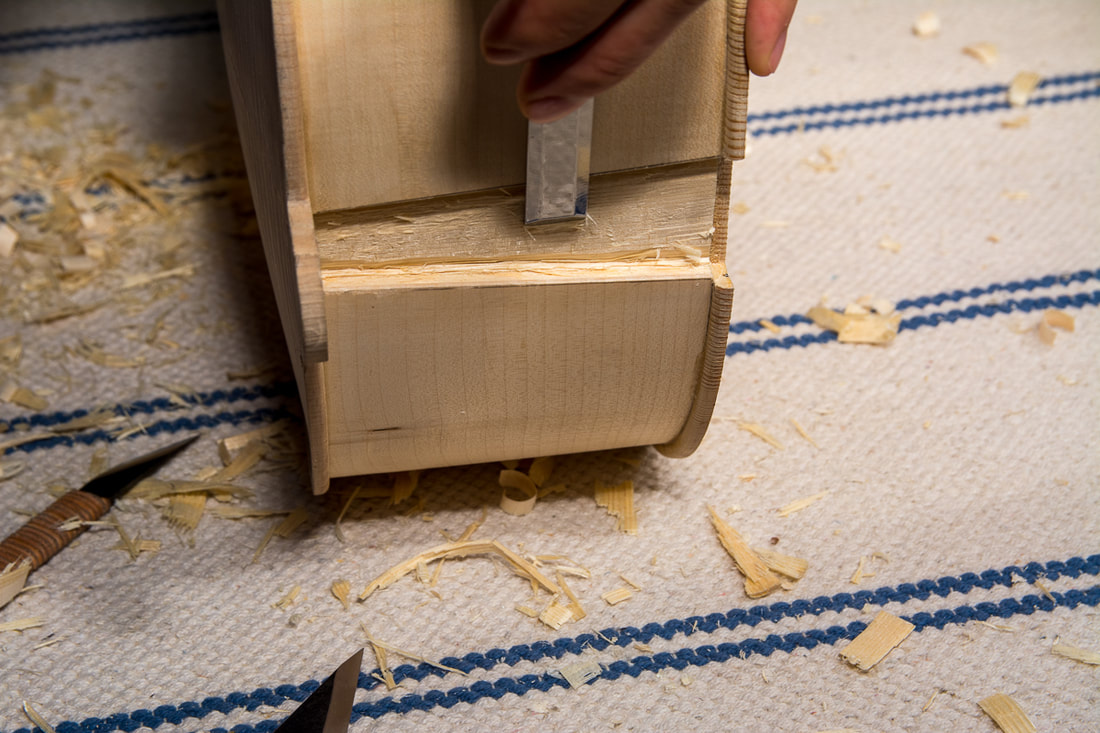
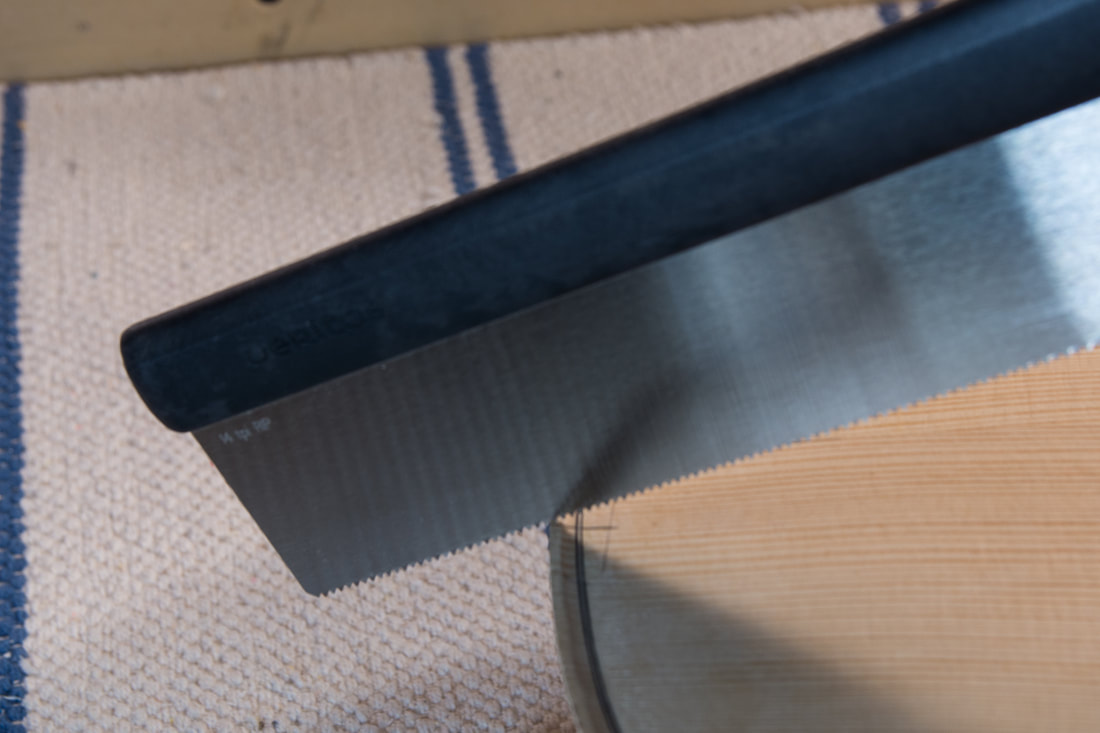
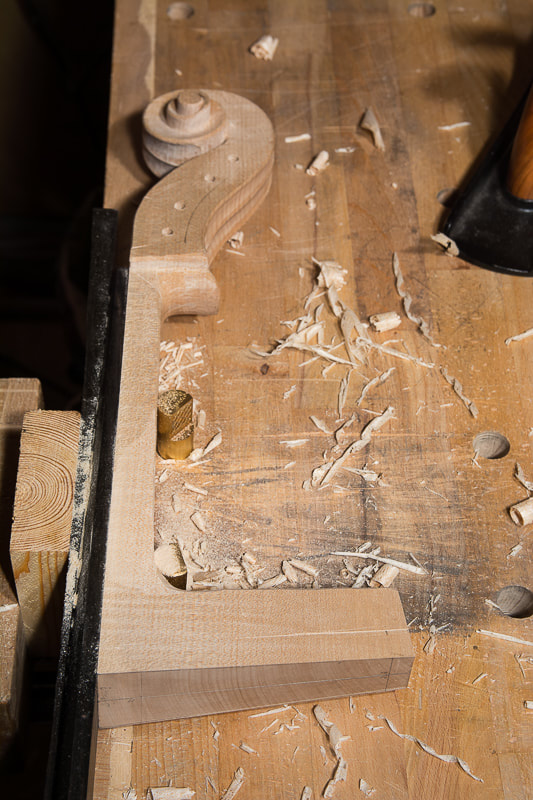
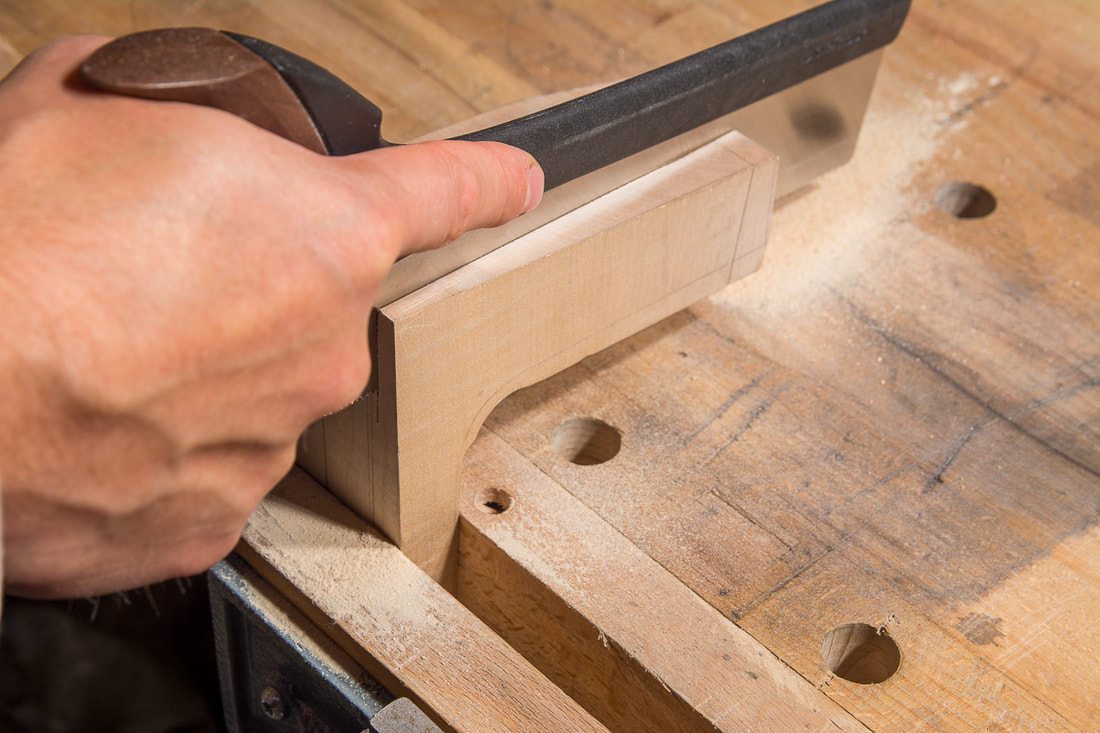
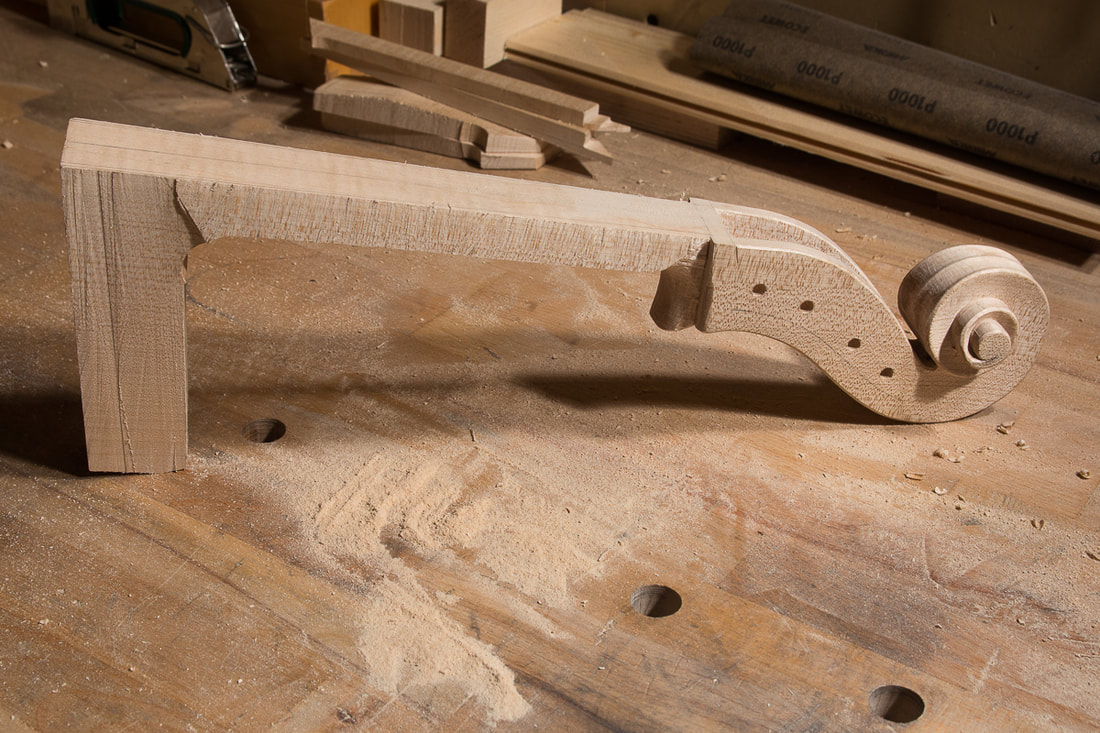
Now I started to measure the correct configuration for the neck. Based on the book by Baker, the projected height of the fingerboard at the bridge is 70 mm. I read somewhere that the height of the fingerboard usually gets a little smaller in a new cello. I am therefore aiming now at 71-72 mm so it is still something 10 mm too high. Luckily also the heel is roughly the same amount too high. This means that I don't need to try to change the angle of the neck, I just need to bring it down. I will now do the rest of the work mostly with files and the grain direction doesn't matter too much anymore. A chisel is actually also quite handy as a scraper to ensure the bottom is flat. The orientation of the neck in other ways. It all looks pretty good. No need to do major adjustments, just make the mortice a little deeper and wider, mostly to the one side. as the centre of the neck doesn't quite match the centre of the body. But it's not far off. The grain direction is pretty annoying. I figured that the best was to go across the chain carefully. At least for the bulk of the material. The fine tuning can be done with a file. I hope. I went as far as I dared today with out checking the orientation or projected height of the fingerboard etc. I still have enough wood all around the mortise to make sure the neck can be fitted as required. I noticed the problem with the block grain direction already when shaping the blocks. At the time it wasn't too much of an issue as I could shape the blocks from the the other side then. This is different now since the button on the back prevents me from coming with the chisel from the right direction. In fact I'm quite happy how few mistakes I've made until now. Well, ones I am aware of in any case. Time to fit the neck. I first marked the approximate width of the heel of the neck on the front. Leaving some space to the lines I sawed through the top and then with a knife cut the along the lines to make sure the front doesn't chip. With a chisel I then took to the edge. Now I could set the neck right on the ribs and mark the sides. Again leaving some margin I cut with a knife through the ribs. One that was done I could use a chisel to chisel out the ribs. I now realised I should have paid more attention to how the grain runs in the blocks. On the top block the grain runs slightly towards the inside of the cello. This makes is quite tricky to nicely cut the surface of the block where the neck must fit very well. If anything, the grain should run out of the cello, not into it. Will need to keep this in mind with the next cello. Anyways, even with a shallow mortice on the block, the neck now stays on its place without any external help! Started on shaping the root of the neck so that it can be fitted on the body. For that I provisionally glued the fingerboard on the neck. I then first used my big plane thinking that it will be better in creating a flat surface but in the end the small block plane was better. The root of the neck is now ready for fitting! I started to prepare the neck for attaching it to the corpus. I first thought I would leave the sides still parallel to the centre line and only remove the part that attached to the body. After having removed the excess there, I changed my mind and removed all the extra width roughly. There is a few millimetres to remove by plane from the sides still. I drilled some holes today. First I drilled the holes for the pegs. I wasn't sure about the locations. They are now on the same places (scaled) as on Strobel's template. There might be some difference in the relative locations between a 1/2 cello and 4/4 cello. On the current 1/4 my son has, the holes are more evenly spaced. I couldn't really find good literature though so I just went with the templates. The large holes are to help be cut out the neck from the block. I don't have access to a band saw which would make this all quite easy. My plan is to drill some big holes and then saw between them. Or maybe just saw lots of holes. Not sure yet. I might use a router for the scroll. I have some flush trim bit for the router which I think would work. I am not very happy with the neck block actually. The grain isn't very straight. It also twists along the block. I hope it will not cause twisting in the finished neck with time. This is the only bit of wood I bought from ebay, maybe I shouldn't do that anymore. 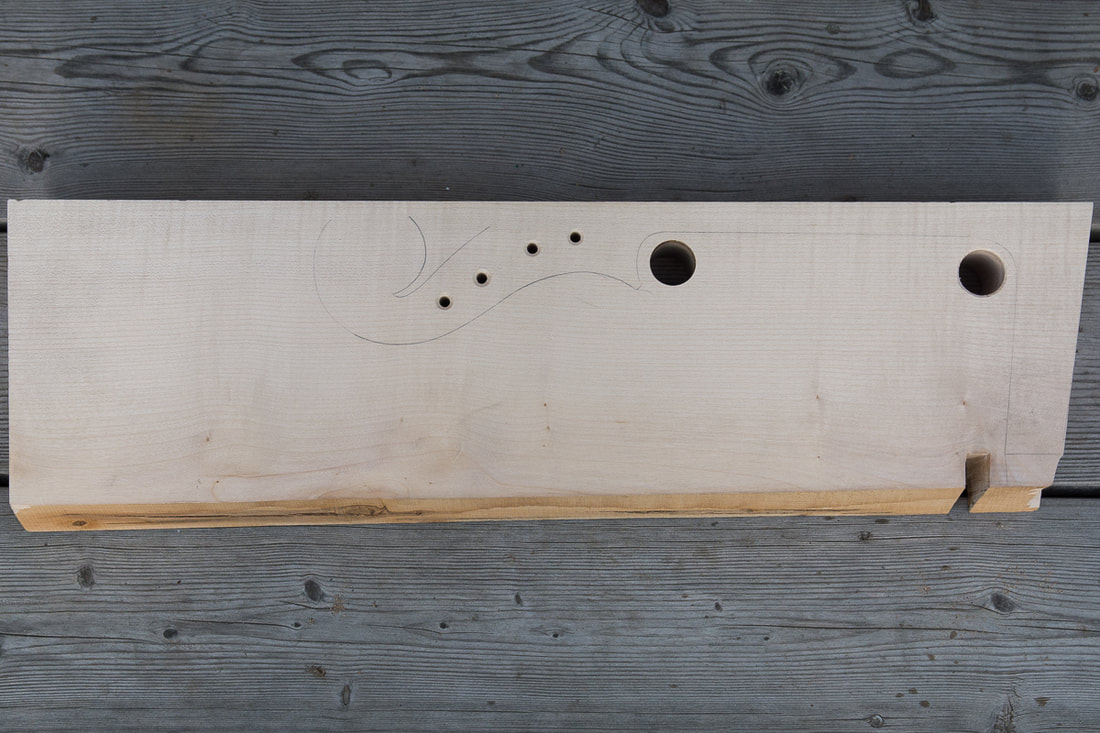 Today I started to make the neck block ready for drawing the neck on it. I flattened one of the sides and squared the face. I also started to thickness it. First now generously. The widest part of the neck is the eye of the scroll., elsewhere the neck is substantially narrower. The block of wood has quite uneven growth rings. Their orientation changes a bit and the growth has also been varying. I hope it doesn't matter too much. |