|
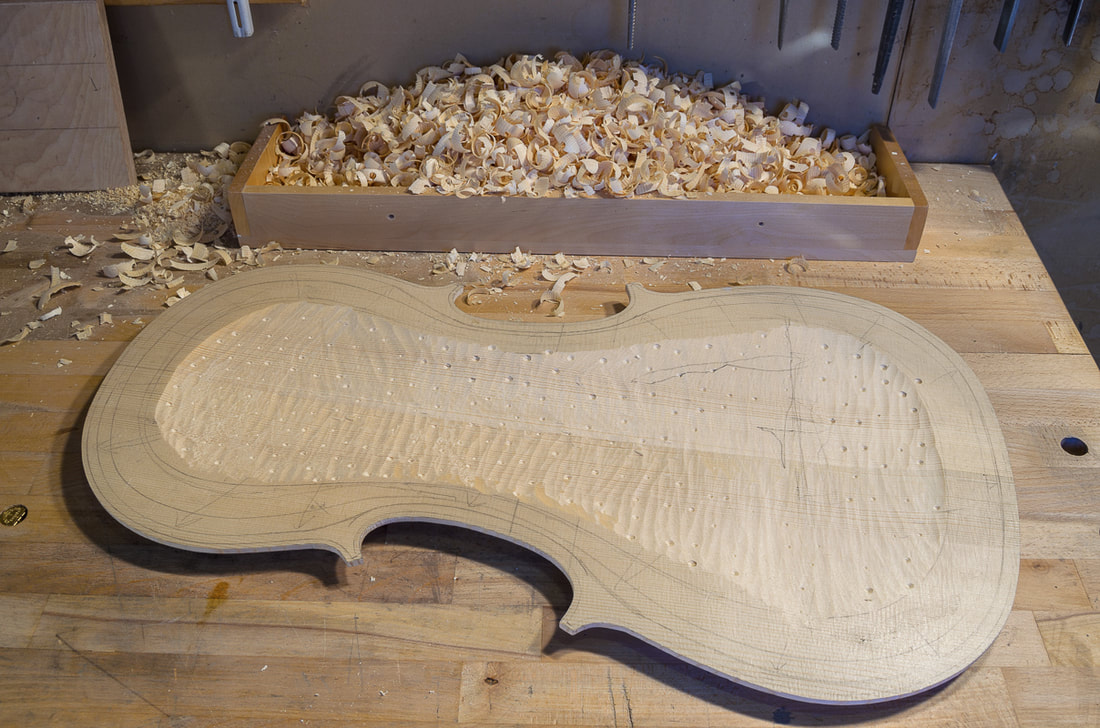
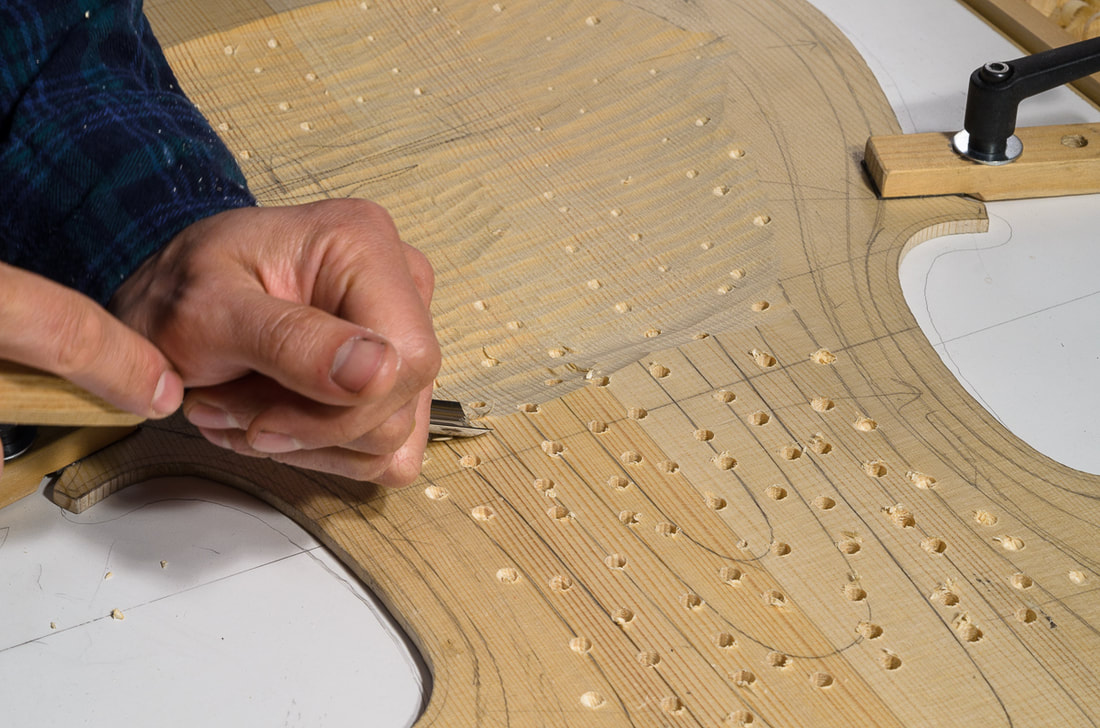
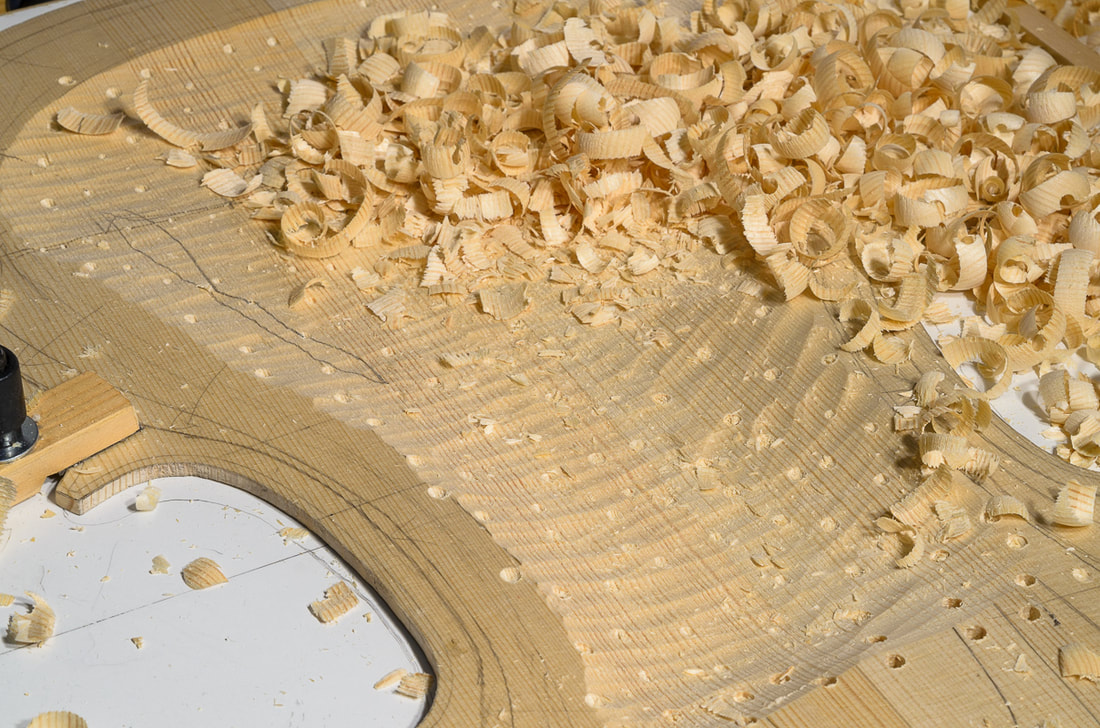
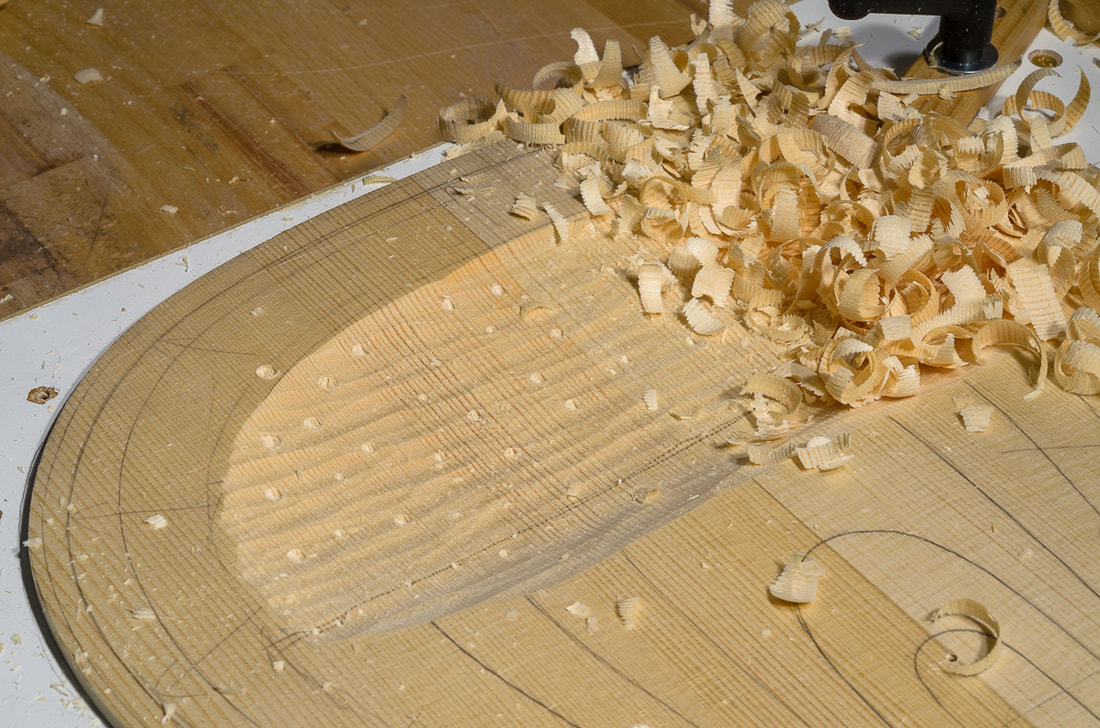
Today I tried out my new graduation punch. After punching a few holes with the graduation punch I had three kinds of marks on the plate. The larger holes still left from the drilling, the small holes from the graduation punch, and some scribbles from the pencil gauge. Using my favourite fingerplane, I removed material until almost all the marks were gone. The hollowing out is now done for the front. The thickness is still a couple of millimetres more than the final thickness. This will be reduced in the graduation phase.
0 Comments
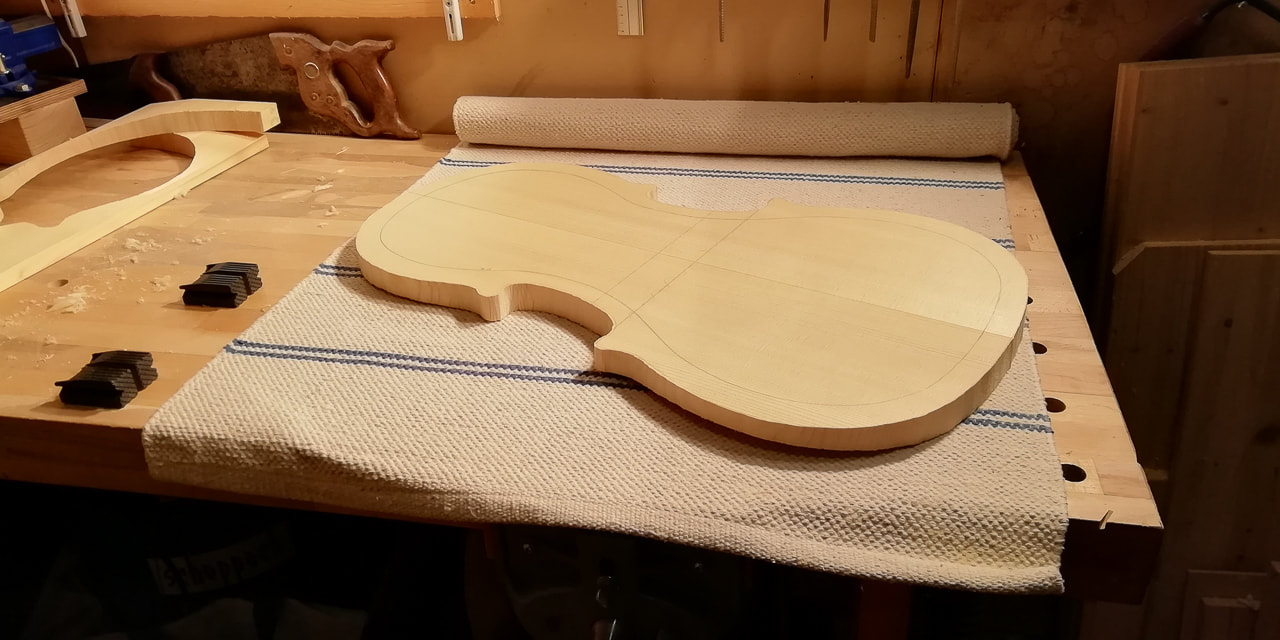
After checking my books, I decided to draw the f-holes next. I think I will still reduce the thickness of the front plate a little before actually cutting the f-holes but I thought it wouldn't hurt to mark them already now. I have been a worried if my assumption that I can just downscale a 4/4 cello uniformly by 86.8 % will work, but this time I actually got a nice validation of the approach. Barker's table for approximate measurements for a cello list for 1/2 cello:
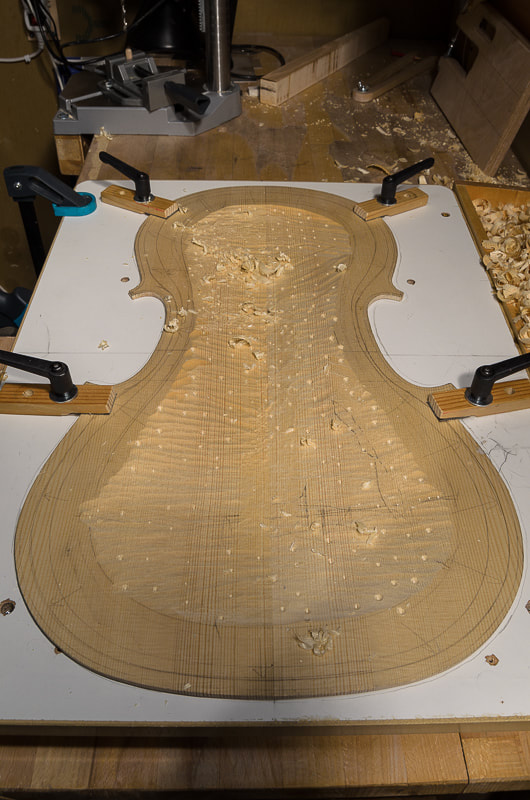
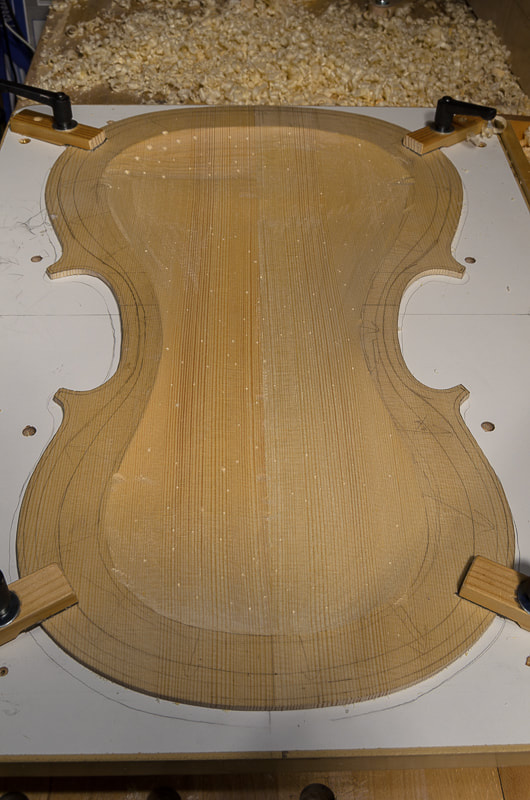
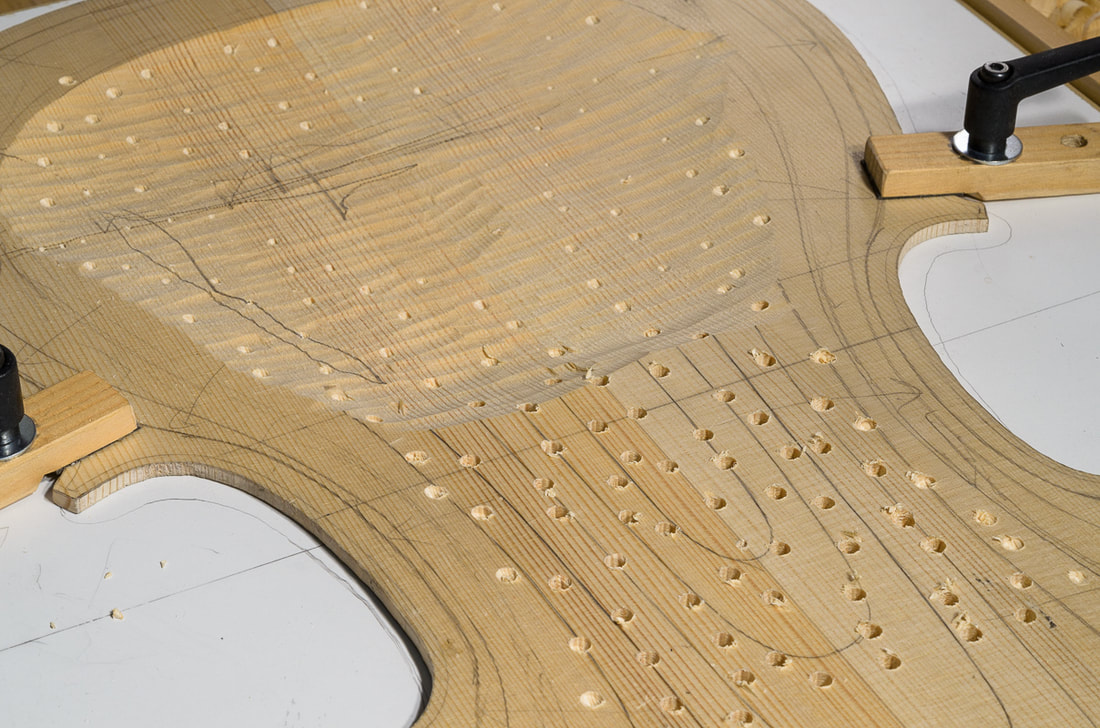
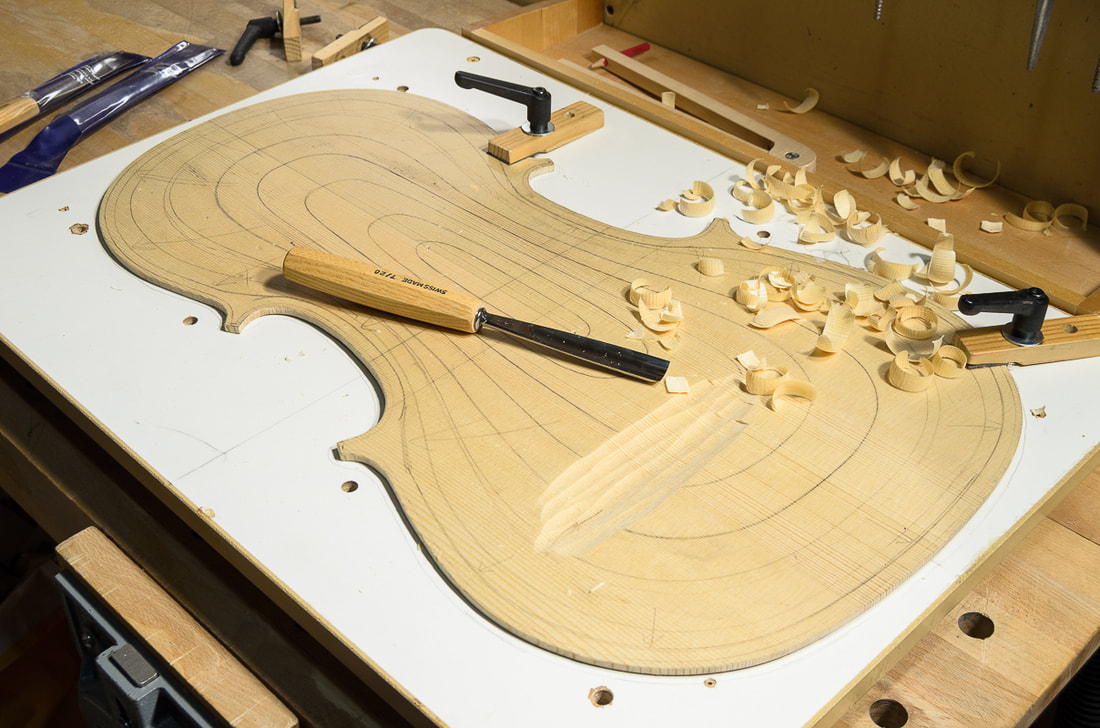
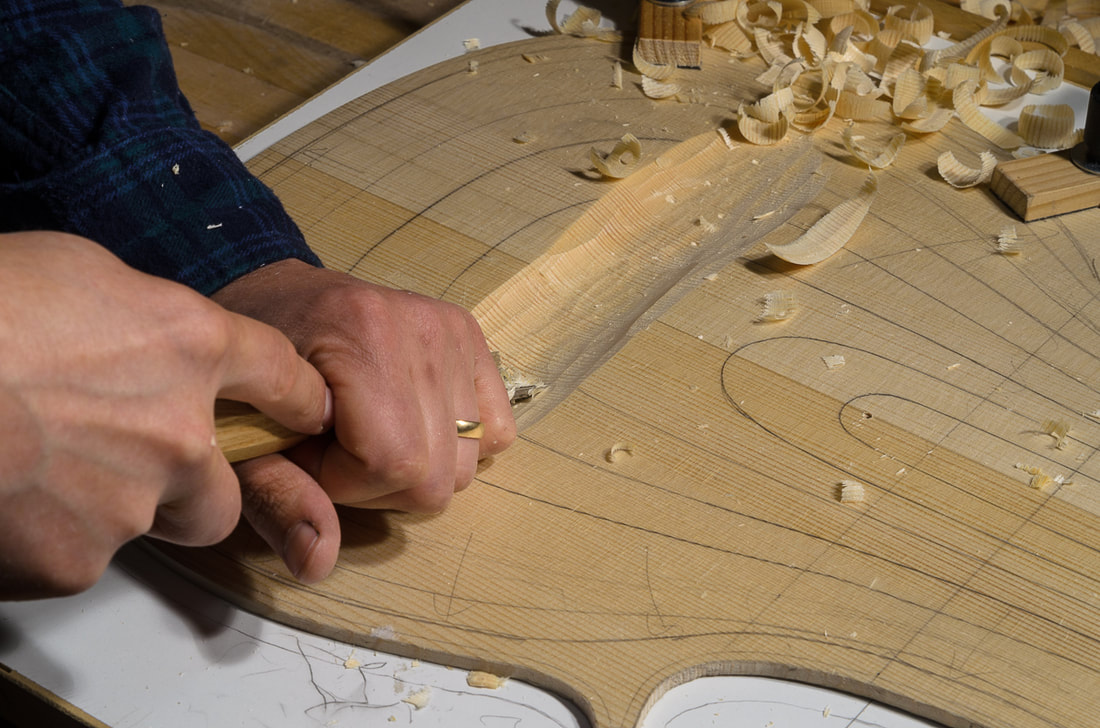
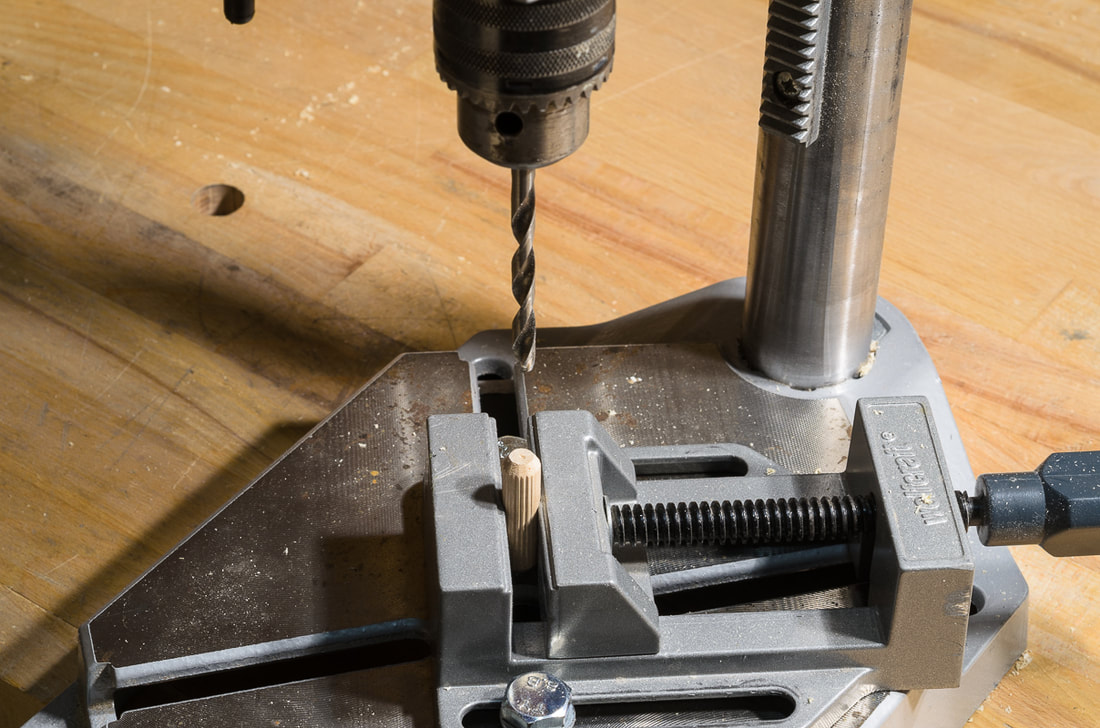
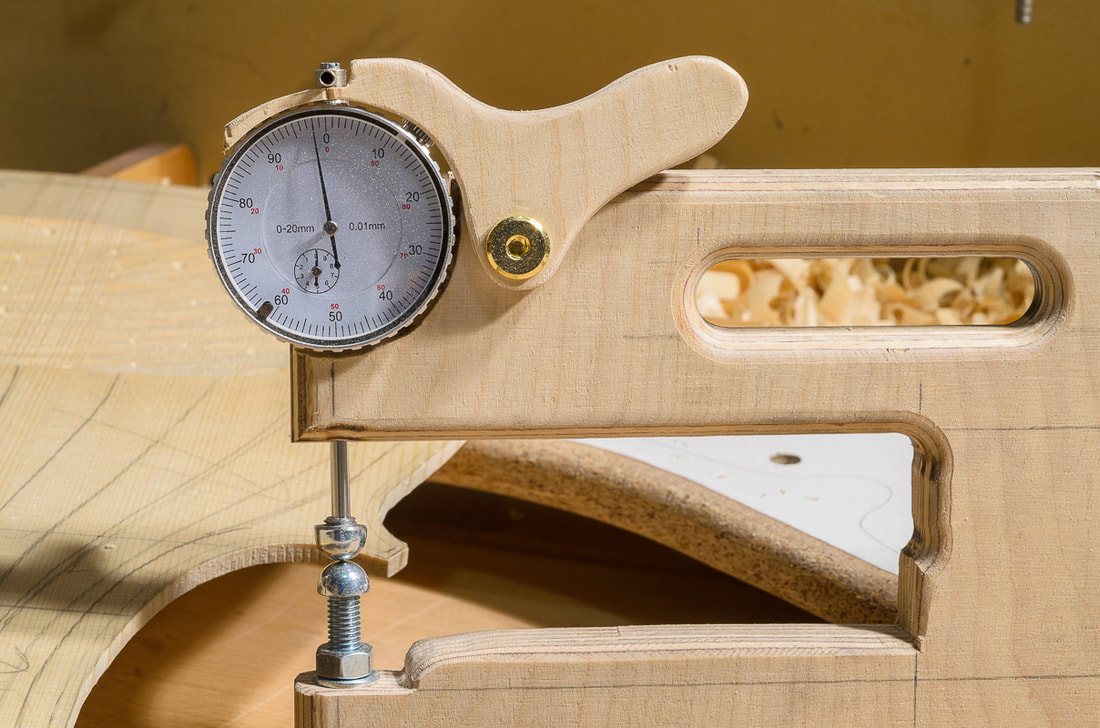
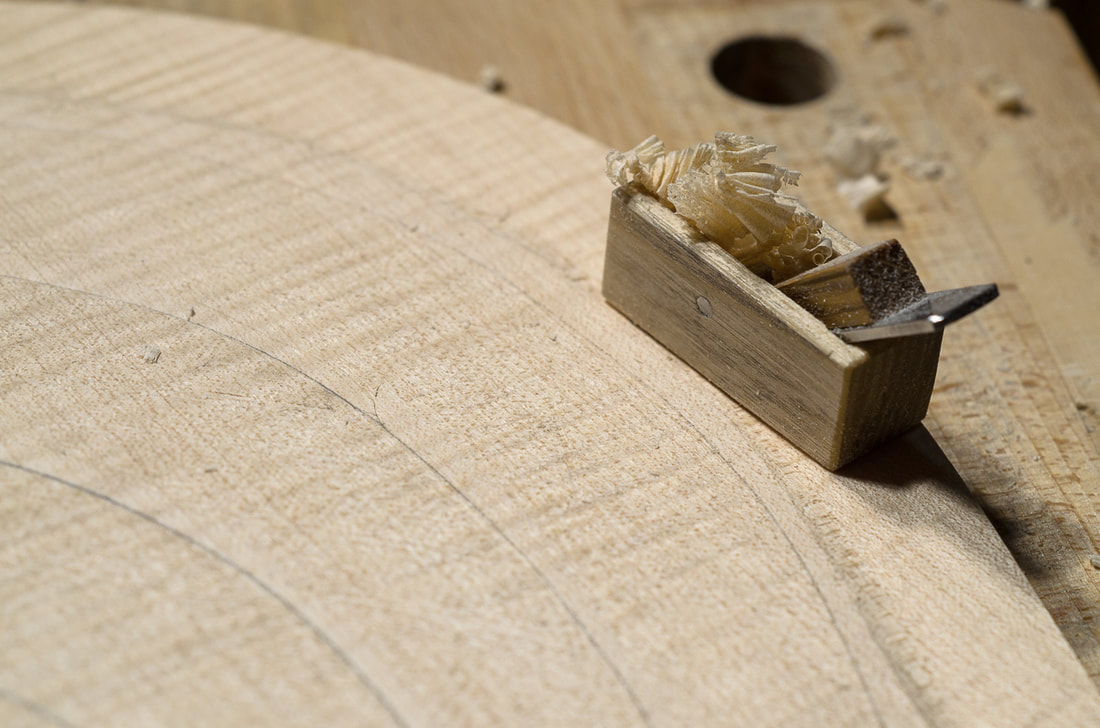
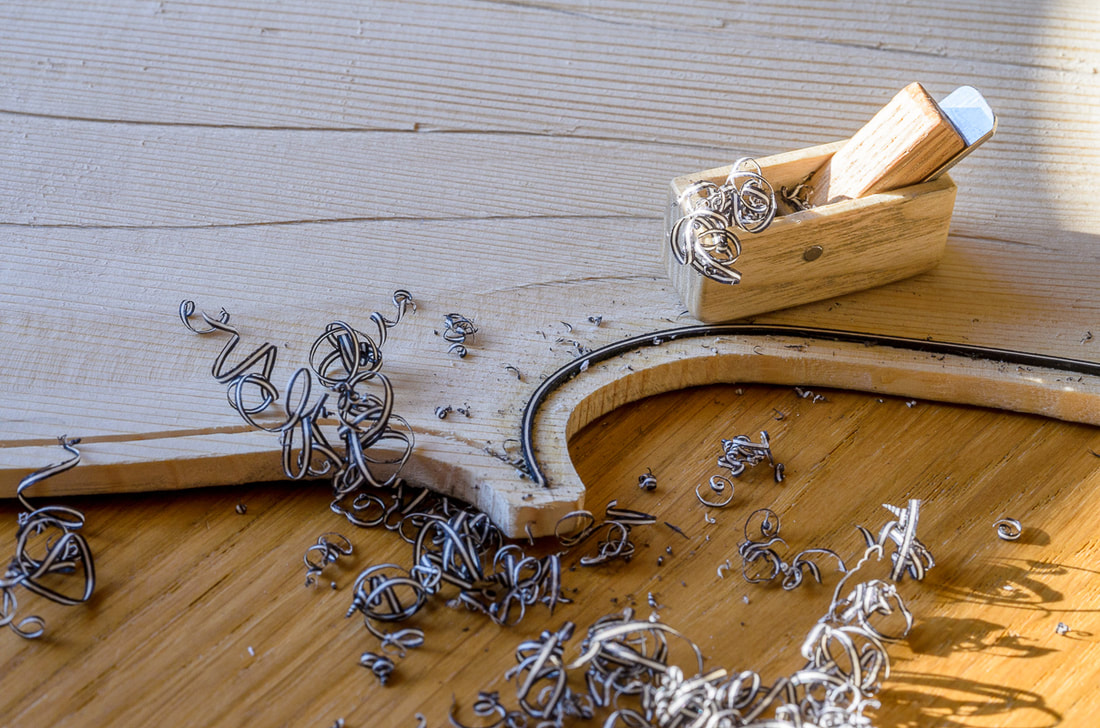
To mark the f-holes I glued the scaled f-hole from the plans to a piece of plastic sheet and cut it out. I then traced the hole on both sides symmetrically. When cutting out the f-holes the lines will need to be cut out too. I did the rough work in hollowing out the front yesterday with the drill and a gouge. Today I continued with the little fingerplane. It may be too fine at the this stage but using it is just such a joy. One should not underestimate these little planes. They might look small and harmless but they can really remove material fast. I planed the inside of the plate all over so that I could still barely see the holes from drilling. One can see on the top left of the last photo the region where the drill was setup wrongly and I drilled too deep. I did't dare to remove any more material form there at the moment. I am sure it will be fine in the end though. The front plate is now roughly 8 mm thick. I could maybe take off a little more now, or cut the f holes. Or maybe finish the purfling of the back as the new purfling arrived today in the mail. Time to consult the books. For the first time, I am writing on what has happened today. I continued with the hollowing out of the front. Nothing too special here, I drilled more holes to mark the depth and gouged the excess out. I am not going too close on the thickness now and some of the marks are still quite clear. I prefer to take things slowly so that I don't mess anything up. The front plate is starting to feel a lot lighter already. I am turning the cello around in the photos below. It might not be clear from the partial cello visible. My drill press is quite small. Or rather it is not a drill press at all, just a drill stand. I cannot reach the middle of the lower bout with it. That region I will need to do by eye. Luckily the area is pretty small. Building a cello is quite interesting. There are times when one needs to be very careful and remove only a fraction of a millimetre at a time. And just a moment later one can take large heavy shavings. I like that. Although not really clear from the photos, I managed to roughly hollow out the whole front plate. Next time I will start refining the plate thickness. The plate should be of fairly uniform thickness in the end. Just a little thicker near the sound post and the sound holes. I am catching up with the actual progress. I still haven't described how the ribs were done and that will follow, but from now on I will be telling actual progress in real time. After the final arching of the top, one needs to hollow out the inside. I started doing this by eye and using the pencil gauge to mark areas which were too thick. I set the pencil gauge to 8 mm and marked on the front plate the position where it touched the bottom of the plate. I could then hollow inwards from this position. As this is my first instrument, I had trouble trusting trust my eye which meant that I was constantly checking the thickness. Hence I decided to drill depth markers. Some use this method also to remove much of the wood. I prefer to use hand tools as much as possible. It is more pleasant with more contact with the wood. Hand tools also make less noise and dust. So I drilled as few marker holes as I thought were required. I set the depth stop of the drill press so that there remained a gap of 8 mm between the dowel and the drill bit. The photos below show my setup for the drilling. Now with the depth marked at regular intervals I could easily gouge out the wood to correct depth. It was great to remove some nice shavings! I first carved from one side and then the other. I think it would probably be better to scoop across the whole plate on go. While doing this I noticed that the holes which I had drilled last were a little too deep, about 6 mm. The depth stop must have changed during the drilling. I need fix it more securely the next time. Luckily 6 mm is still more than the final thickness of the plate which is around 4.5 mm. After I had hollowed the first patch, I checked the thickness with a self-made thickness gauge. I bought an inexpensive dial indicator and fixed it on a piece of thick plywood. The thickness gauge works great. My only criticism is that the dial indicator is too accurate. The small dial shows the millimetres, the larger one 0.01 mm. In many cases it would be enough to read the small indicator but I find that difficult. I always read both which makes it quite slow. The dial indicator itself has a travel of 20 mm but with the setup I made I can easily set the range to be 0 mm - 20 mm but also for example 10 mm - 30 mm if needed for some reason. Some good references:
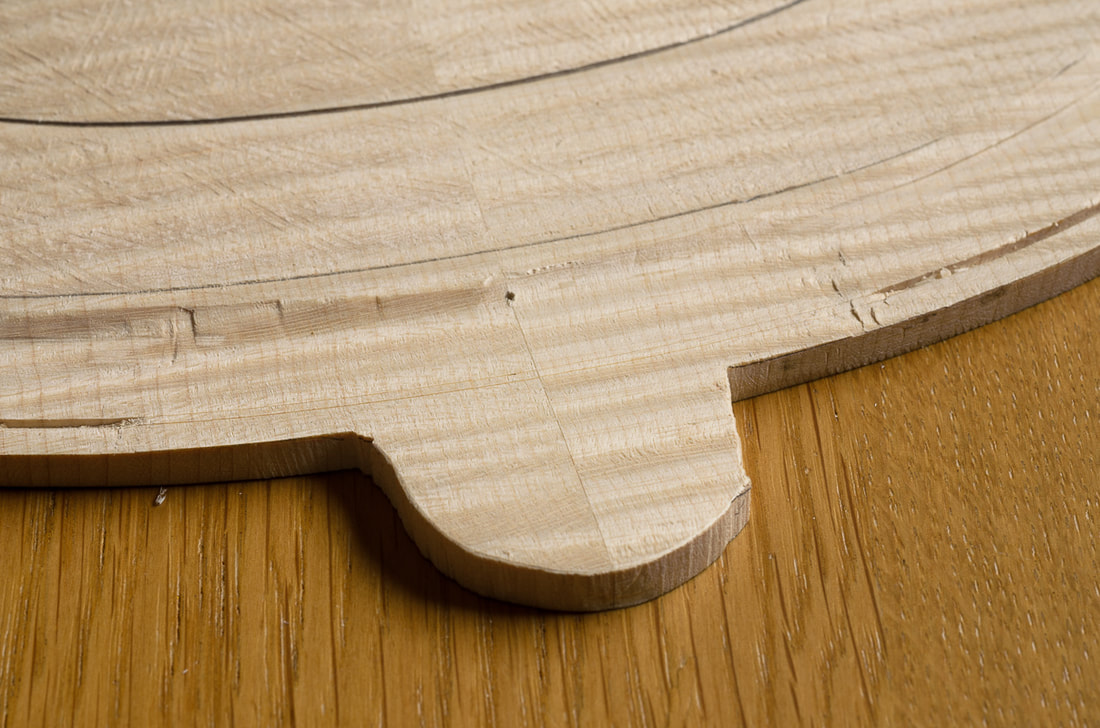
Once the purfling is in place, the outer surface of the plate can be finished. This starts with the fluting of the edge where the purfling is and smoothing out the arching. I have done this for the front. I am waiting for some more purfling to arrive so that I can finish the purfling on the back. I still have to do the upper and lower bouts. Fluting the edge means to bring it down a millimetre or so relative to the rim. I did this with gouges and the curved 10 mm fingerplane. I started with one of my old gouges but finished it with 10 mm and 20 mm sweep 7 gouges which arrived in the post the other day. After I had finished the fluting I used the arching guides to get the front plate to correct shape. This was done with the same fingerplane and scrapers. I seem not have taken many pictures of that. After the arching was good I drew some contours using a pencil gauge. I was surprised to see that the contours turned out pretty symmetric the first time and only needed a little adjustment. I made the pencil gauge from a few scraps of maple and a bolt and a wing nut. It works quite well, but I need to be careful not to push it too hard against the plate. Maybe I made it too thin and the arms flex a little. Some good references:
Purfling is a thin laminated strip of wood going round the edge of both the back and the front plates. Its purpose is both decorative and functional. The length wise grain of the purling strengths the edges of the plates. There is some variation as to when the purfling is done. It seems to be most common to do the purfling after the rough arching so that's what I will also do. Since the purfling is at a constant distance from the finished edge, the ribs (sides) need to have been done at this stage. I have done those, but I will probably describe the process in detail after I have finished the top plate as this is what I am doing at the moment. I hope this little discontinuity won't be confusing. I used the ribs to draw the outline of the cello on the back and the top plates and then removed most of the extra material using a saw and brought the outline to the marked line using a file. Once the plate has the correct shape, adding the purfling itself can start. The first step is to prepare a flat surface all around the edge of the plate. I first marked the width of the flat surface with a pair of compasses and then flattened the edge using a small plane and a file. As I didn't take many photos when working on the front, the photos below are a mixture from making the back and the front. After this, the purfling groove is marked with a special pufrling marker. The flat edge helps to do this accurately. I built a purfling marker from a bit maple I had extra from the back, and some nuts and bolts I had available. The blade is from a small knife. First both sides of the purfling are marked lightly with the marker, and then cut carefully deeper using a sharp knife. The width of the groove should of course match the thickness of the purling used. Once the edges have been cut to sufficient depth, the groove can be excavated using a purfling picker. I again made my own from a small chisel I had lying around. There are a few places which need extra attention. The first are the corners where the purfling from the c-bouts meet the ones from the upper and lower bouts. I made these so that the purfling in the c-bout stays a constant distance from the edge and purfling from the upper and lower bouts come to meet them. This means that the distance of the purfling from the edge is larger for the upper and lower bouts near the corners. The second place which needs to be handled differently is at the top of the back plate where the button is. This cannot be marked using the purfling marker. I made a template from the front plate and used that to mark the purfling groove of the back. The photos below also show another little tool I made. It is just a small block of oak with a short piece from the end of a hacksaw screwed in. The oak block makes sure the bit of saw blade stays perpendicular and also that it doesn't cut too deep. With this little helper it was quite easy to make the purfling groove the same depth everywhere. The blade needs to be short so that it can be used also in the tighter parts of the curves. Once the groove has been made, the purfling can be bent to follow the shape of the groove. I don't have fancy bending iron so I used an aluminium pipe and a blowtorch to heat it up. The pipe stayed hot quite long so I didn't need to have the blowtorch on while bending. Working this way I could bend the purfling for a couple of grooves before needing to heat the pipe up again. Once the purfling had the correct shape it could be cut to size. I glued in first the purflings in the c-bouts, trimmed them to the level of the plate surface and prepared the end for a nice joint with the purfling from the upper and lower bouts. The purfling wasn't long enough for the lower bout so I had to splice it. I did it widthwise and later read somewhere that one should do it in up/down direction. I think it worked out pretty nicely like this too, and actually the one I made was on the front which will anyways be cut out since the saddle comes where the splice was. I haven't yet done the purfling of the lower bout of the back so I can still make that one correctly. Some good references:
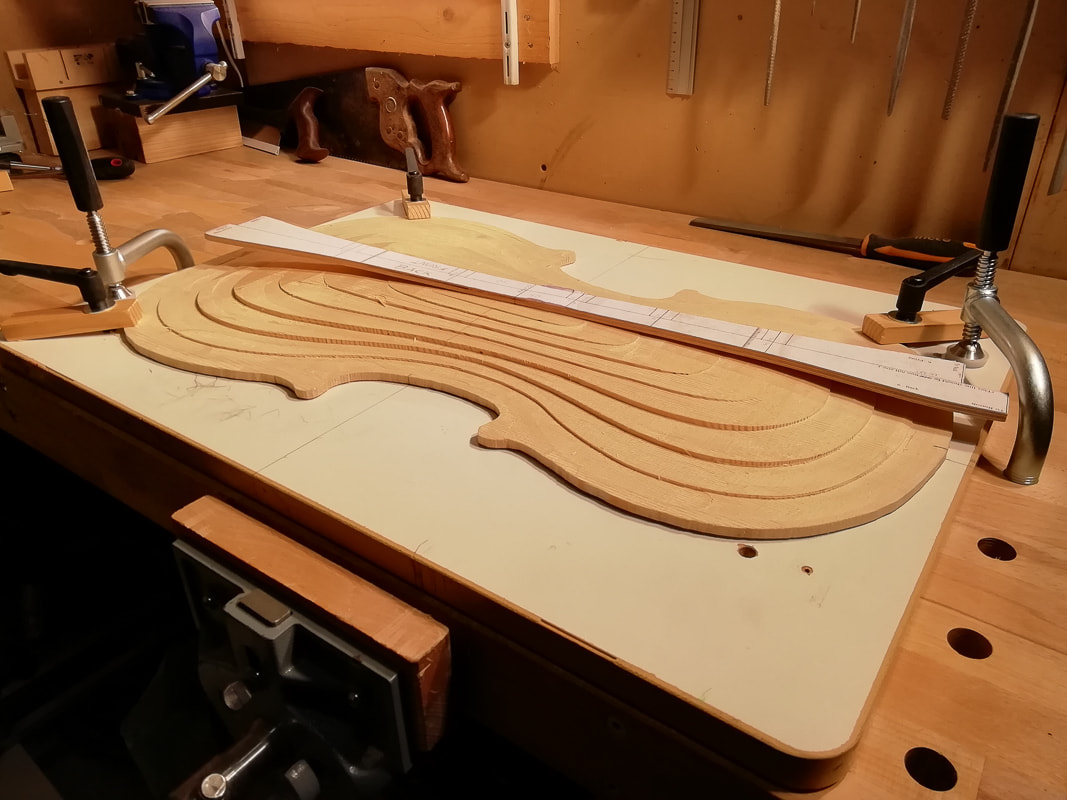
I opted to do the rough arching using the overhead router method described in Henry Strobel's books. It seemed like an easy way to quickly remove material accurately. I wasn't too concerned about the speed but since I have never built an instrument, I wanted to get it done right. The idea is pretty simple. Using the provided templates and a router, one cuts the back and front to the specified height in the given regions. The trick is to have a pin on the supporting surface which matches the size of the router bit. The templates are then attached to the bottom of the plate and the pin prevents one from pushing the back or front too far. One then progresses from template to template while adjusting the height of the overhead router. I used my drill stand for that since my router fitted nicely on that one. I started with the largest template (lowest). I attached it to the bottom of the front using double sided tape and small screws. I then gradually lowered the router until the front had the correct thickness for the contour leaving a little the front a little too thick at this stage. This results in a terraced front which I then smoothed with a gouge. Maybe it is easier to grasp this with some photos. Some good references:
Because the cello is so large, the back and front are made from two bookmatched pieces. That means that the two pieces come from a single large wedge which is split lengthwise and then opened up like a book. As a result the left and right sides are mirror images of each other. One sees this very clearly on the figured maple back, but not really on the spruce front. I started taking photos regularly only a little later so for this stage I don't have too much content. Preparing the spruce front I first planed roughly the underside of both pieces flat (no photo) and then prepared the edges for jointing (left). After the glueing was done, I flattened the bottom surface and brought the thickness of the top plate down (right). I had decided to do the rough arching using the overhead router method described in Henry Strobel's Cello Making and I wanted to have a fairly flat top surface for that. One could have left the top as it was. Preparing the maple back The back was done in the same way as the front. I first prepared the joint and after glueing, flattened the surfaces. The maple is quite a bit more difficult to work with since it is a lot harder, and it has a lot of figure which makes it tear up more easily. The last picture shows the figure of the maple back nicely. Some good references:
|