|
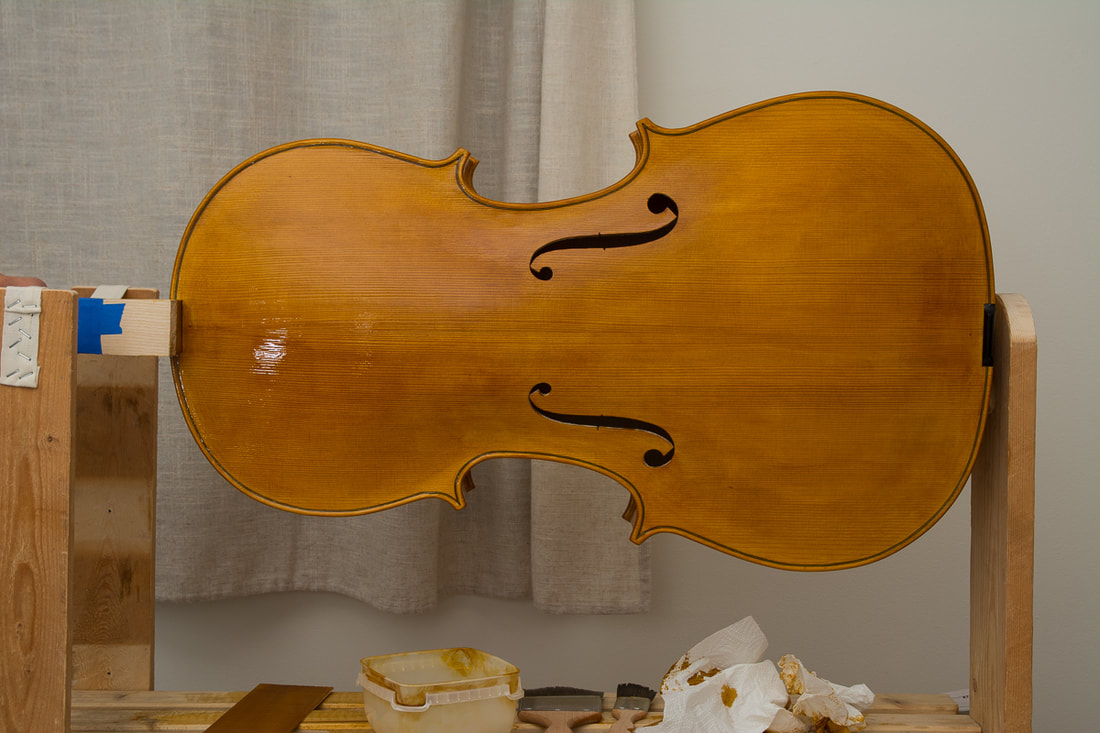
This just might be the last layer! The instruction says to put at least 2-3 top coats. There are now three. I accidentally touched one spot after having varnished it. It could be the surface isn't quite as good there as elsewhere. On the other hand the surface will still be polished later. There are a total of 10 coats now. I suppose I will tomorrow check how good the surface now is and then decide how to continue. After the last layer of varnish, the varnish should dry for 2-4 weeks before the final polishing with rottenstone and oil. So the cello may just get finished this year still!
0 Comments
The end is close. The top coats are going on quite easy. I don't have very good lighting in the room where I varnish. I have plenty of it but somehow not well. It is sometimes difficult for me to see where I have already varnished and how thick the new layer of varnish is. This time I think I put it on a little too thickly near the left ff-hole. The front has some nice grain structure and now in one spot it is almost disappearing due to the too thick a layer of varnish. I don't dare try to fix it anymore. I need to figure out a better lighting for the next time. I did the thumb check and since there was no fingerprint left anywhere I proceeded with the first layer of clear top coat. Nothing special here, I first went over the surface with rottenstone on a linen cloth, then cleaned that up, and put first a coat of varnish on the neck, then did the rest to avoid any issues in the corners. I am again confident in varnishing and that helps to get nice results. Once again, practice makes perfect (or at least better). I think I managed to fix the blotched part as well as I could for now. So I put the fifth layer of coloured varnish on today. I will now let this dry and then see how everything looks. I am tending towards allowing this to be the last coat of coloured varnish and starting next with the top coats. But let's see. I removed most/all of the thick layers of varnish and sanded the rest down a little. Then I very carefully added varnish to the lightest patches. That seemed to work pretty well and I am now again hopefully and can make the varnish look fairly good, phew. 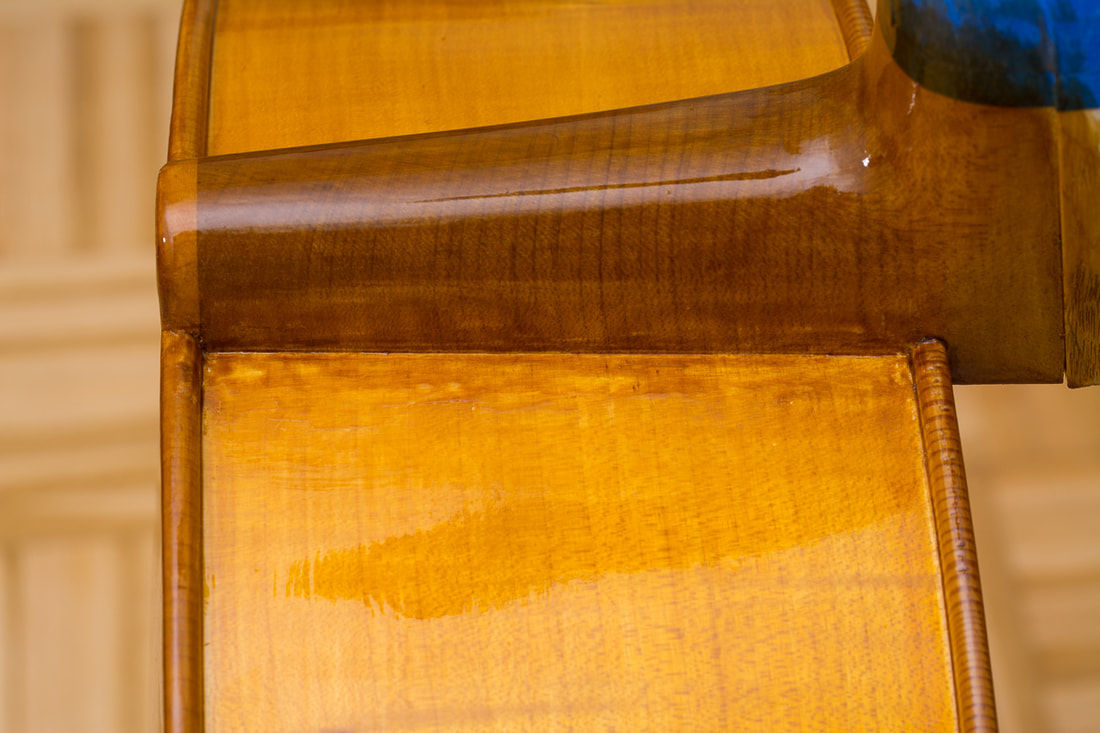 I'm having trouble with the one side of the neck. One side I am very happy about, but the other once is not behaving. I suppose I have touched the corner too many times at some point. The corners are tricky because varnishing easily collects in the corner. In addition, I have always first varnished the neck, and then a little later the sides. For some reason on one side I have managed to not mess it up but this other one is getting bad. And I feel the more I try to fix it the worse it gets. I think I was too impatient in my initial fix attempts and tried to put too many layers on too quickly. Now I am slowing down and hopefully that helps. I am now trying to get the edge back to the same shade as the rest, and then carefully sand the dark parts down. After that it will be the final coat of coloured varnish before the 2-3 top clear ones. I will put now as few layers on as possible to minise the risk of messing the varnish any more. Another day, another layer of varnish. The colour is not yet quite where I want it to be. Maybe I will put more than the 5 coloured layers mentioned in the instructions. Let's see how the cello looks like tomorrow after the 5th coat. The colour is blotchy in places, I am figuring out how to improve that. |