|
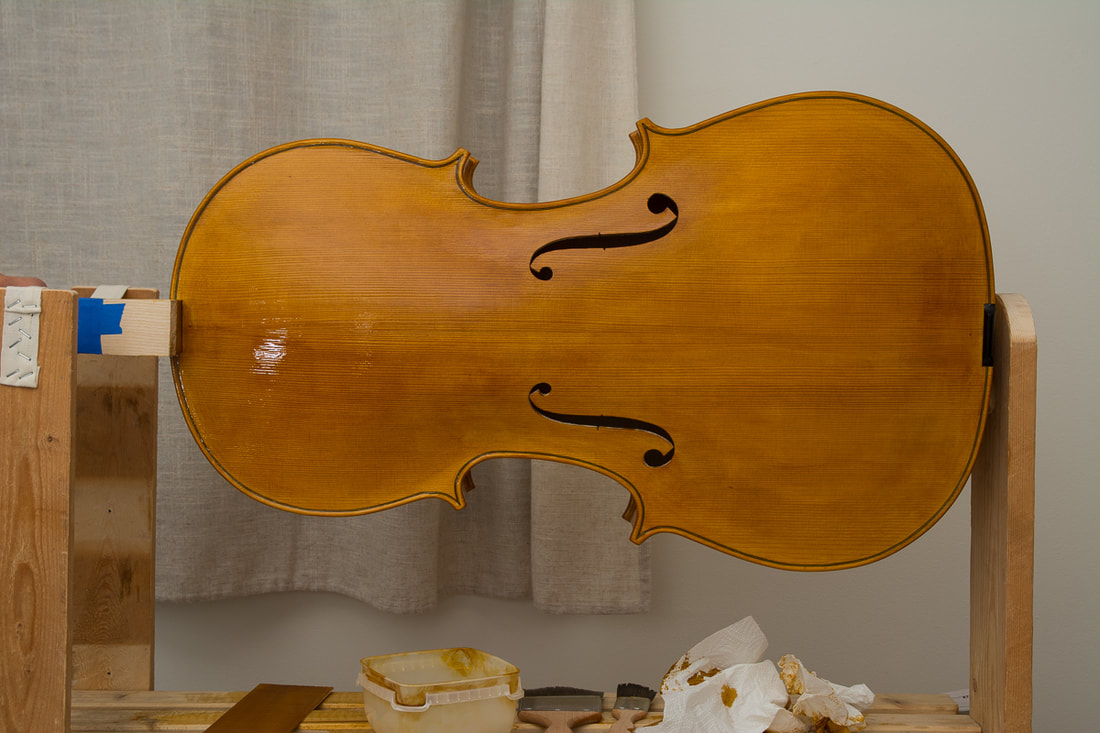
I think I managed to fix the blotched part as well as I could for now. So I put the fifth layer of coloured varnish on today. I will now let this dry and then see how everything looks. I am tending towards allowing this to be the last coat of coloured varnish and starting next with the top coats. But let's see.
0 Comments
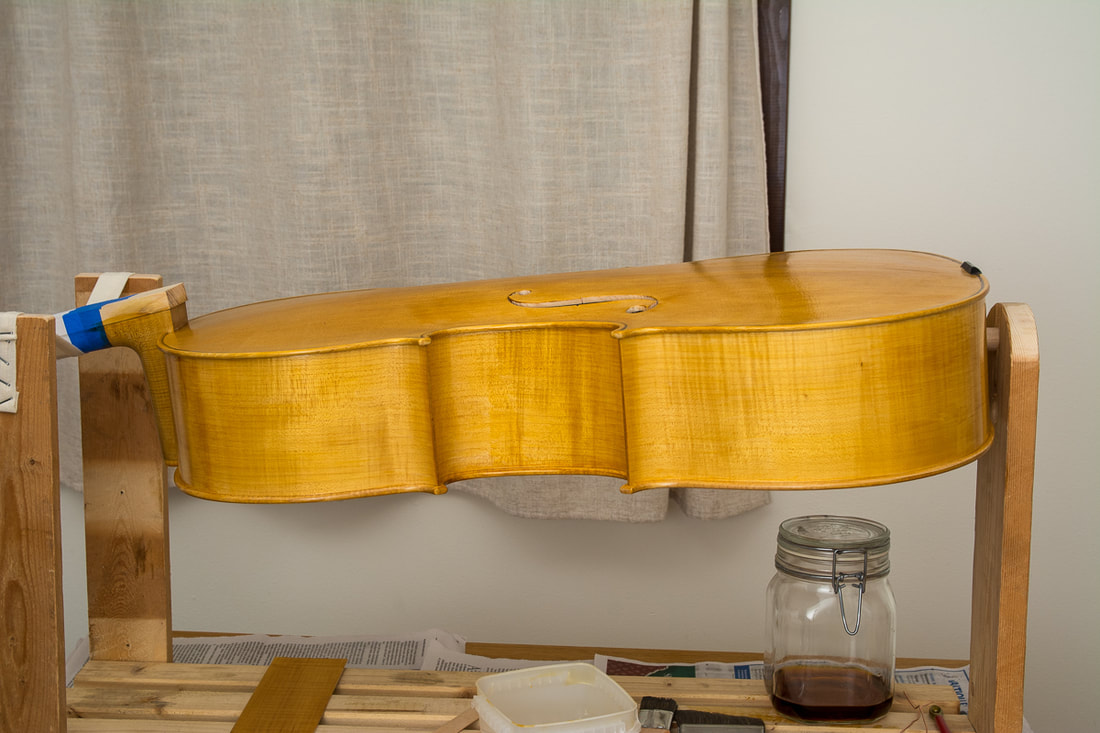
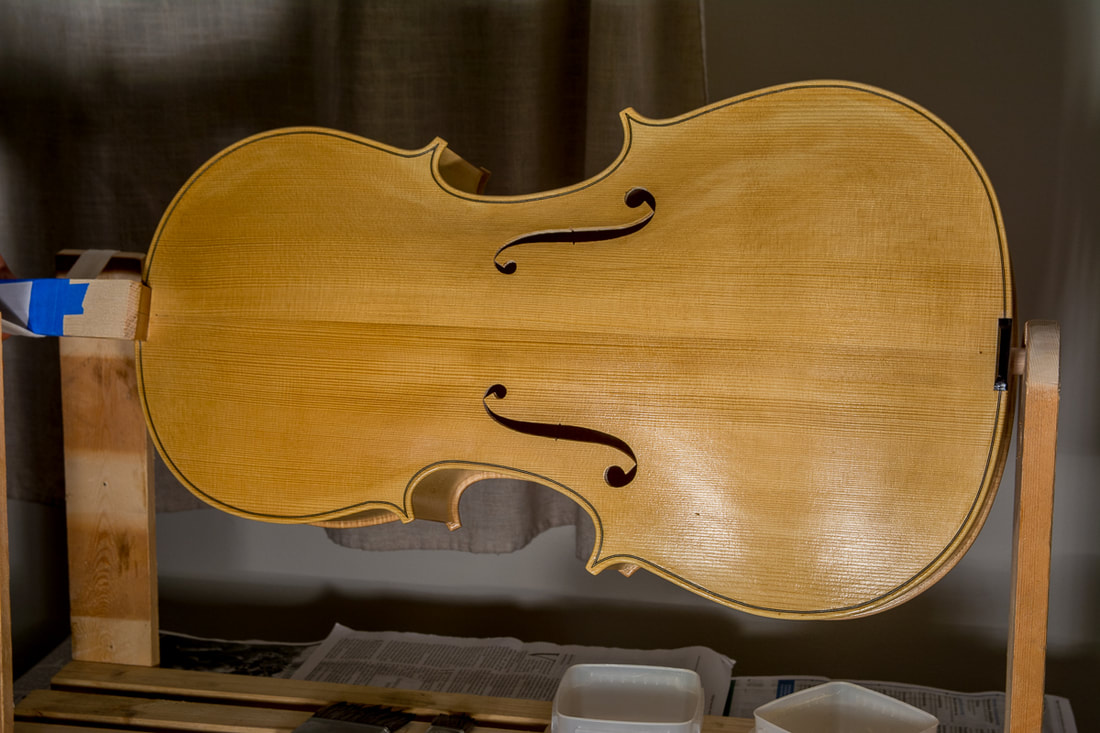
I removed most/all of the thick layers of varnish and sanded the rest down a little. Then I very carefully added varnish to the lightest patches. That seemed to work pretty well and I am now again hopefully and can make the varnish look fairly good, phew. 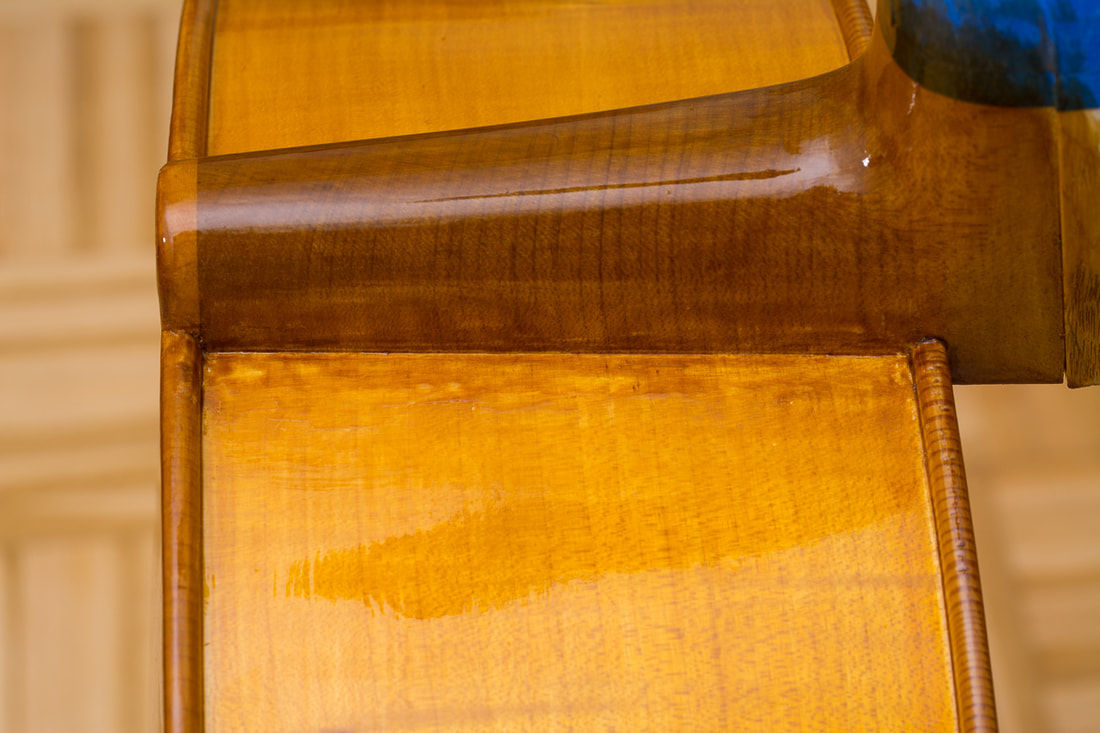 I'm having trouble with the one side of the neck. One side I am very happy about, but the other once is not behaving. I suppose I have touched the corner too many times at some point. The corners are tricky because varnishing easily collects in the corner. In addition, I have always first varnished the neck, and then a little later the sides. For some reason on one side I have managed to not mess it up but this other one is getting bad. And I feel the more I try to fix it the worse it gets. I think I was too impatient in my initial fix attempts and tried to put too many layers on too quickly. Now I am slowing down and hopefully that helps. I am now trying to get the edge back to the same shade as the rest, and then carefully sand the dark parts down. After that it will be the final coat of coloured varnish before the 2-3 top clear ones. I will put now as few layers on as possible to minise the risk of messing the varnish any more. Another day, another layer of varnish. The colour is not yet quite where I want it to be. Maybe I will put more than the 5 coloured layers mentioned in the instructions. Let's see how the cello looks like tomorrow after the 5th coat. The colour is blotchy in places, I am figuring out how to improve that. I will try to put a coat per day now. The varnish really seems to dry almost instantly but I don't dare to put more than one a day, at least yet. The colour is getting better all the time. Now with three coloured layers one can still nicely see the figure of the wood so I am not too worried about the varnish covering up too much. After a couple of days of waiting I could continue again. As usual, I first sanded down the first coloured layer with with a linen cloth dipped in water and then in rottenstone. Then the second layer of coloured varnish went on. I think the colour is shifting toward a browner shade which is nice. I am struggling a little with the evenness of the colour, I hope adding more layers will help with that. The first coloured layer is on! I had chosen amber as the colour for the varnish. I hope it gets a lot browner later on like the amber example on Hammerl website. I started by sanding the cello with a linen cloth dipped in water and then in rottenstone powder. It was trickier than I though. The paste got stuck in some places and was a little tricky to get away. Maybe I used too much of it. The coloured varnish also was tricker than the clearer primer. With a couple of more coloured layers I hope it will all look good. Now it needs to dry for a few days before the next layer can be put on. This is also something I do not quite understand. The instructions mention a thumb test where one presses on the varnish with a finger and if one can see a finger print, the varnish hasn't dried enough. Now with just a few coats the varnish is dry in a few hours already. On the other hand it also mentions 2-3 days. Anyways, I will now let it dry properly, maybe with the next layers I will not wait so long. The first layer of primer needed to dry 12 hours. Before putting the second layer on, I sanded the whole cello with the included sandpaper (400 grit). The second layer went on pretty well. But it does dry very quickly and trying to correct anything later on is not possible. Luckily I didn't need to, I just noticed that very shortly the varnish is a sticky film and should be left alone. Already the first layers of varnish have made the surface nice and shiny which really bring out the nice flaming of the back. The front has a little uneven colour. I think it was a bit visible already before, but I couldn't get rid of it. I hope the coloured varnish will hide the imperfections. Before the first coloured layer can go on, I need to smoothen the surface with rottenstone powder and water first. Today I managed to put the stain and the first layer of varnish (primer). The stain is put on and then the cello is left in the sun light for 2-10 hours according to the instructions. The colour of the stain changes in the light and once the desired colour has been achieved the first layer of varnish is on. I assume that the layer of varnish stops the stain from changing colour. I left the cello by the window for 6 hours. I actually didn't see too much change in the colour after the first 20 minutes. Maybe the winter sun in Finland just isn't strong enough. Anyways, I thought it would be better to have too light a colour than too strong. The varnish wasn't too bad to put on. I have read so much about the difficulty of spirit varnish that I was expecting it to be a lot trickier. The first layers of primer are pretty clear so that probably also makes it easier. Anyways, I managed to put the first layer on without it running or needing to go over the same spot many times. I am glad I still have another layer of the primer to put on to practice my varnishing skill. I started with the varnishing today. As I mentioned already in an earlier post, I am using the Spirit varnish kit from Hammerl, and will follow the instructions as is. The first step in varnishing is the "ground". There seem to be very many ways to do this. The kit includes a small pouch of gelatine which is dissolved in water. First the gelatine is mixed with water and let to stand for a while. Then it is gently heated until the gelatine has completely dissolved and then thinly applied on the cello. Now the cello needs to dry. The next step is to stain the cello. 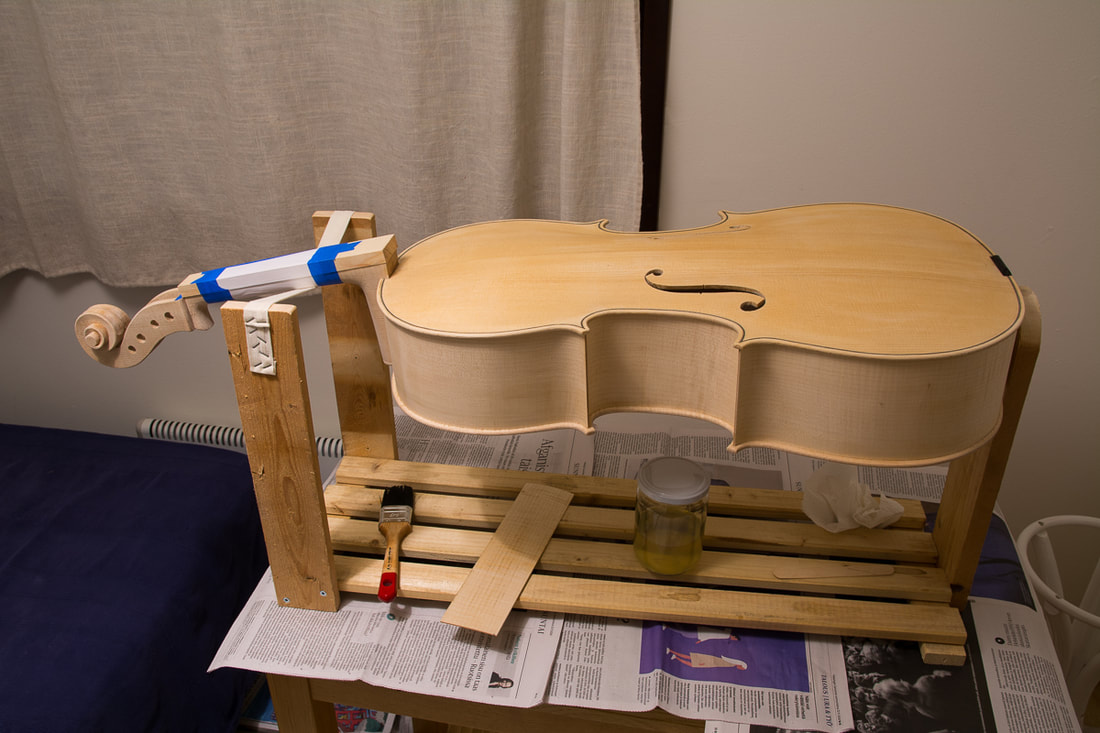 |