|
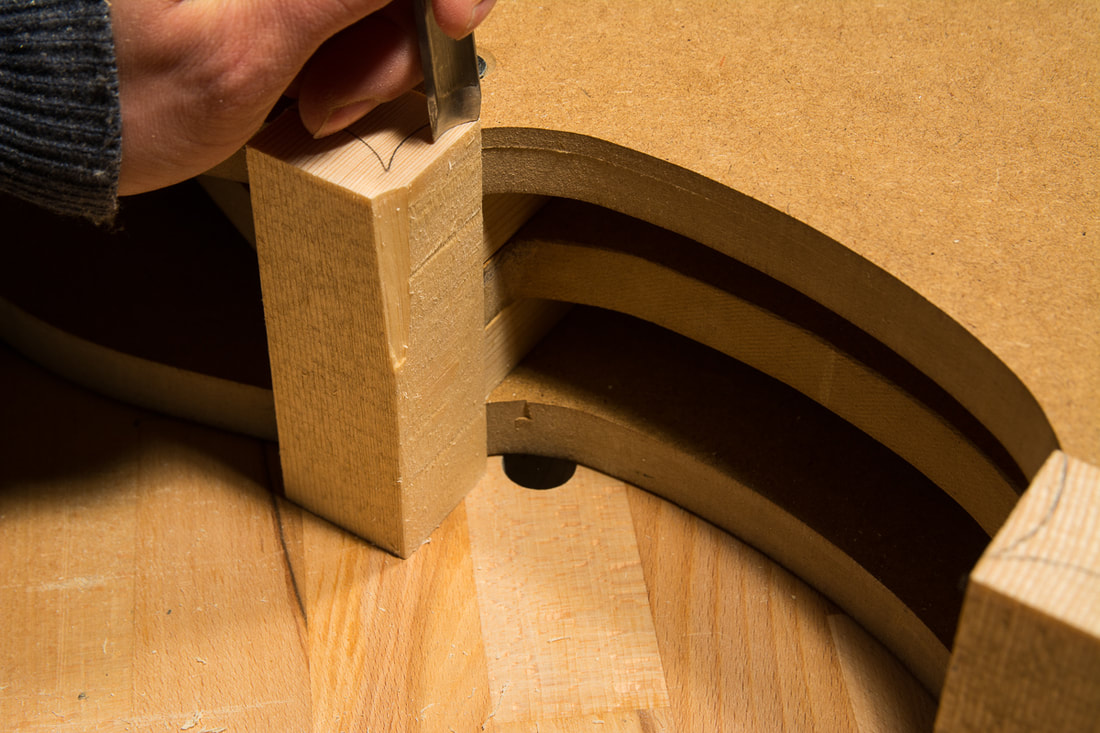
I trimmed the corner blocks to be flush with the front and back plates of the mould. I used a a piece of paper under the saw to ensure I don't cut to much off with the saw. I then used the block plane to make the blocks flush with the plates.
0 Comments
My workshop is a small (<5 m2) unheated storage room. But I feel there isn't a lot I can't do there. I haven't tried (yet) to do any large furniture. And of course there isn't space for any larger power tools. Although it is small and cold in the winter it brings me such joy to be able to work there.  I started cutting the blocks today. I cut the upper and lower blocks to their final shape. Compared to last time it was so easy going with the split wood. I could go pretty close to the line with the chisel I finished the surface with a block plane and sandpaper. In the end I sawed and planed the blocks to be flush with the mould front and back. I also started with the corner blocks. These I gouged only roughly to the line with a gouge that had the bevel on the inside. Here again the work so easy going compared to last time. It really pays to prepare the wood so that the grain goes nicely. Before finishing the corner blocks I will first make them flush with the mould front and back, scribe the shape on them again and only then finish the shape. This is because I want to have the blocks flush with the mould before I put the C ribs on, but the other side of the corner blocks will be done only after the C ribs are on. This is something I did wrong the last time. I re-read the chapter in Strobel's book and there he also says one should only do the one side before the C ribs. I didn't read the instructions properly and paid for it later. It was quite tricky to get ribs meet nicely in the corner when both sides of the corner blocks have been cut before hand. The hardboard wasn't such a great material for the template.after all. Even though I had left the corners large and unfinished, they still lost their shape so that I couldn't use them for marking the corner blocks. I made new templates just for the corners out of some clear plastic I had lying around. Using a small square to push the templates against I could nicely mark the corner blocks. Slow day today. I marked the outline on the upper and lower blocks on both the front and back sides. That's it. I prepared the blocks and glued them on today. For the corner blocks I had some smaller stock which I just planed square on two sides and the ends. The top and bottom blocks I split from a larger bit of wood. The third photo shows clearly how differently the wood might be sawn. This was the problem I had with the first cello. I just used the wood as it was sawn and glued it on place. As I hadn't thought about the grain orientation, it was going in just the wrong way for the neck mortice. The grain was running into the cello and not out of it, which made it difficult to make the mortice as the grain was driving the chisels deeper into the wood than I wanted. This time I split the wood and before glueing the blocks on, I also made a test to ensure the grain is running in the right direction. The photo is taken with the front on the table top so the grain is indeed running out of the cello from the front towards the back. I found a violin maker locally who also sells tone wood. In addition to selling me the wood, he gave me some feedback on the first cello which will help me to make this one better. Now that the mould is ready and I have the wood for the blocks I can soon start with the actual cello build. I was wondering at some point a while back that do I really want to start building a second cello. Now I am very excited again and can't wait to go through all the steps again. I am very hopeful that with the experience from the first one, some good feedback and the book I bought (The Art of Violin Making by Chris Johnson and Roy Courtnall) this second one will indeed be an improvement over the first one. 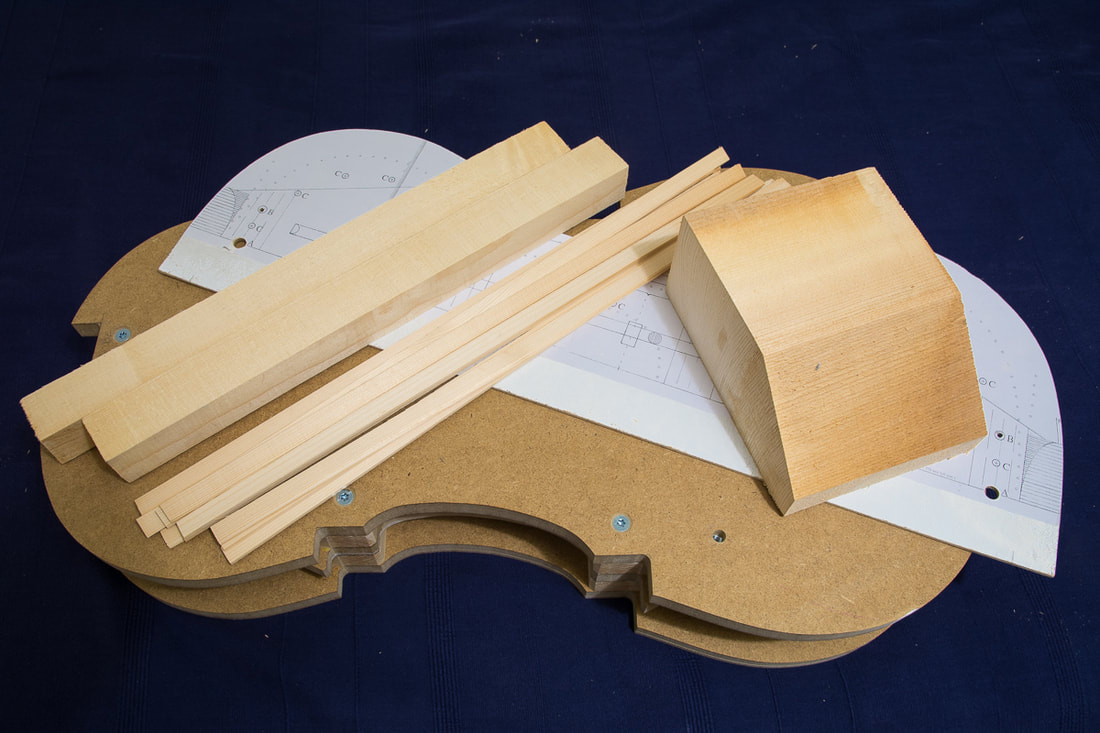 I found a YouTube channel by violin maker Lucas Fabro, www.youtube.com/c/LucasFabro. He also has a couple of videos specifically on cello making, although it looks like he either never finished the cello, or stopped filming. The first two videos relate to blocks. The mould I have is different as the layers extend all the way to the edge of the ribs. I found it pretty easy to use a plane to get the ends of the blocks flush with the mould. Lucas needs to do a lot of sanding to get the blocks the right height.
Here some other links related to the blocks: www.derekroberts.co.uk/making/blocks.htm osnesviolins.com/4.Mold%20set%20up.htm guitars.davidalabaster.com/cello-week-3-the-ribs/ www.makingtheviolin.com/Mould |
AuthorElias keeps growing so a bigger cello will be needed eventually. With the previous cello I had to hurry up a little as Elias needed it already. With this one I want to avoid the pressure. Archives
April 2022
Categories
All
|


 RSS Feed