|
I printed the outline of the cello today at 91.4 %. I also bought some 19 mm MDF which I will use to build the mould from. I used MDF in the first mould also and it is stable against changes in moisture and so on. First I will glue the paper on a piece of hardboard and shape the outline on that. I will then copy the shape onto the MDF with a trim bit on a router. The hardboard template is done only for one half of the cello and this way both left and right side of the mould will be identical. 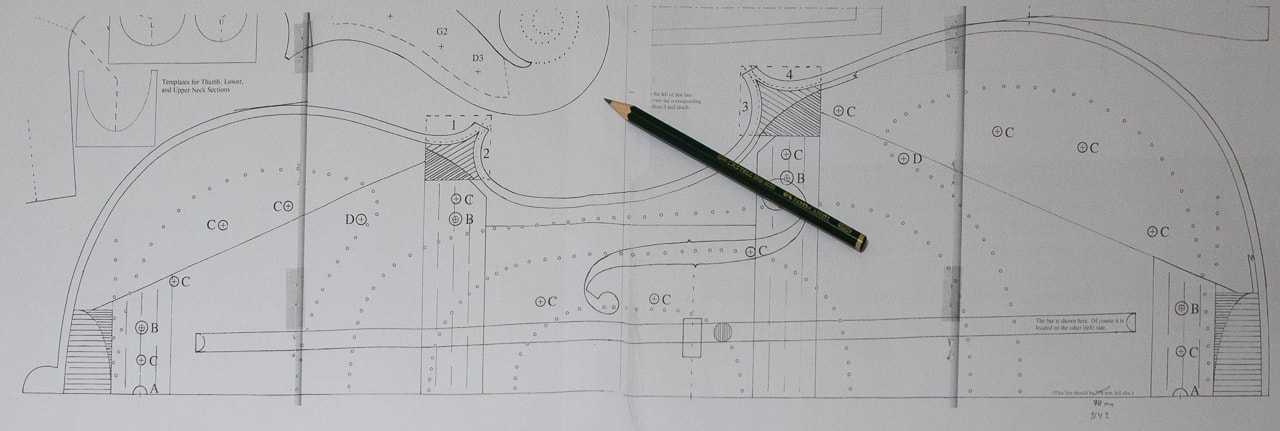
0 Comments
I am starting to build the second cello now. Slowly. This 1/2 cello should be good for a couple of years. I am going for the 3/4 cello. It could be that Elias doesn't need it for very long before he can move to full cello, but I thought he might need it and it would be good for me to practice with a few cellos before aiming for the final one. Should he continue to play the cello of course.
I got the wood already a while ago from www.kollitz.de. It has been waiting for me to decide what to do with it. It feels good to have decided to go for a 3/4 cello. My idea is to more or less repeat what I did with the first 1/2 cell and plans from Strobel's Cello Making book. The cello body for that one is 755 mm long. In order to get the body length of 690 mm for a 3/4 cello I will scale all measurements by 91.4 % in stead of the 86.8 % I used for the 1/2 cello. The sizes refer to volume and 0.914 = 0.76 ≈ 3/4 so that matches. The first thing to do is to build the mould for the ribs. |
AuthorElias keeps growing so a bigger cello will be needed eventually. With the previous cello I had to hurry up a little as Elias needed it already. With this one I want to avoid the pressure. Archives
April 2022
Categories
All
|
 RSS Feed