|
I can move to the other side now. Removing screws and pulling the mould plate out should be easy right. Well, it still requires care. Unfortunately I wasn't being careful. One of the ribs had gotten glued to the plate and cracked as I removed the plate. I only noticed this afterwards. Had I being careful I might have noticed this earlier and been able to loosen the glued by heating the area up. Luckily the crack is on the edge of the rib and I think it wont be an issue at all once the linings are installed as the lining is just about wide enough to cover the whole crack.
0 Comments
The mould has almost served its purpose. Time to remove the top of the mould so that I can install the linings. Both sides of the mould have T-nuts on the underside so that the mould can be lifted using some bolts. I also had managed not to glue the plate to the sides so this was very easy. Before I removed the top of the mould I used a pencil to mark where there was a bit of a gap between the sides and the mould so that I can ry to correct that with the linings. I managed to get pretty far today with the mould. I thicknessed the spacers on the back side to make the ribs 105 mm high at the neck and and 108 mm at the button end. I have put all the taper now at the back end. The ribs are perpendicular to the front plate and have a slight angle at the back. I also made the spacers flush with the mould surfaces where the blocks are glued. Some work still needs to be done.before I can start on the blocks and then the ribs. 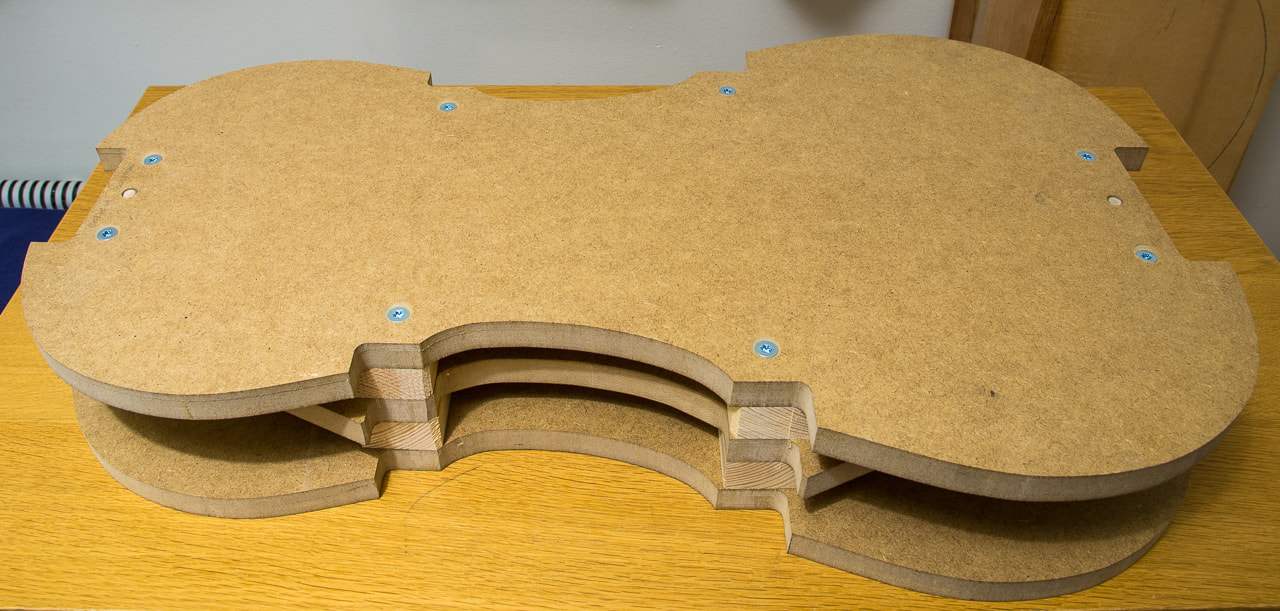 Continued with the mould today. First I reduced the thickness of the spacers I had glued on yesterday. Initially I had planned to thin them only from one side, but that would have left the spacers very different thicknesses. So I decided to remove 10 mm from both sides. After having fixed the thickness of the spacers on the front side, I glued on the spacers on the back side. 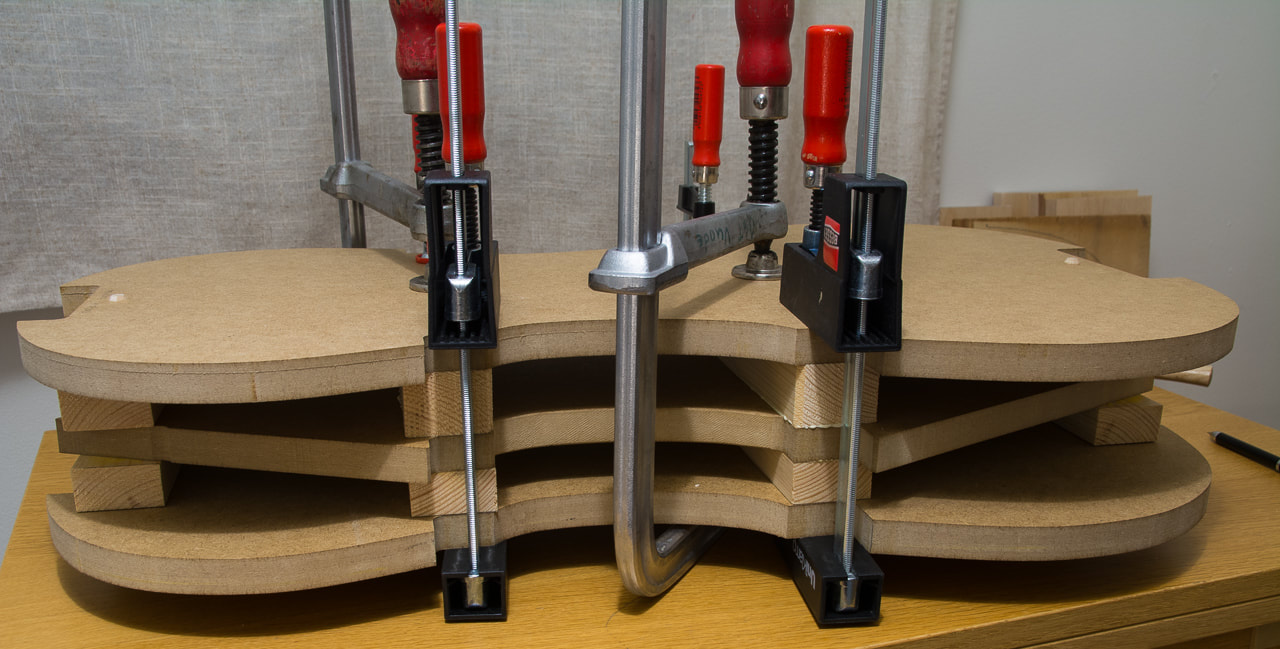 I made the central layer of the mould today and started to glue on the spacers. The central layer only touches the blocks. It would not be possible to remove the mould from the inside after the linings have been glued to the ribs otherwise. In order to align the different layers accurately, I had already drilled holes in all the plates before routing them to match. The spacers also have holes drilled through them to align the plates well. In addition I checked all the surfaces where the blocks will be glued that they indeed match. Which they did. I changed the order of making the plates a little. Today I made the bottom plate to match the top one (here stacked the other way round). The side view here nicely shows the slight taper in the height of the ribs. Next is the middle plate and then the spacers to make the mould the correct height for the ribs.  Like last time, I will start by building the mould. If I keep building a size bigger I never get to use a mould more than once. The mould is used to provide the shape for the ribs. I first glued the plan onto the 3 mm hardboard. Last time I used 6 mm plywood but I thought it had warped a little due to changing weather so I thought hardboard would be a better choice. It probably is but 3 mm is too thin. I had some issues a couple of times when copying the shape to the MDF. The 3 mm is not quite enough to comfortably work with the trim bit. I made two templates on hardboard. One that has the full shape for the ribs including the blocks. And a second where I cut out the notches for the blocks. For the mould I need the one with the notches so that I can later glue the blocks on to the mould. The full shape I will use later to scribe the correct shape once the blocks have been glued on. The mould I have has 3 layers. I managed to make the first one today. The next one is sort of a spacer and doesn't have the ribs, but it is still glued to the blocks. Last layer is not parallel to the other layers as the ribs of a cello do not have a constant height. They have small taper so that the ribs are ~3 mm taller at the button. In order to get matching vertical edges on all layers I will use the first layer as a template for the last with some spacers at both ends. I add them to both ends so that the layers do not rock side to side. The spacers have different thicknesses matching the difference in rib height from top to bottom. I am now starting to see the benefit of having built a cello already. It is so nice not to need to find out all the details for each step. I should be careful and try not to go too fast and mess something up. I am not too worried at this stage though as the earlier mould worked just fine. It's nice to do something again. I think I needed the 2 month break I had. But now I am keen to do something again. |
AuthorElias keeps growing so a bigger cello will be needed eventually. With the previous cello I had to hurry up a little as Elias needed it already. With this one I want to avoid the pressure. Archives
April 2022
Categories
All
|


 RSS Feed