|
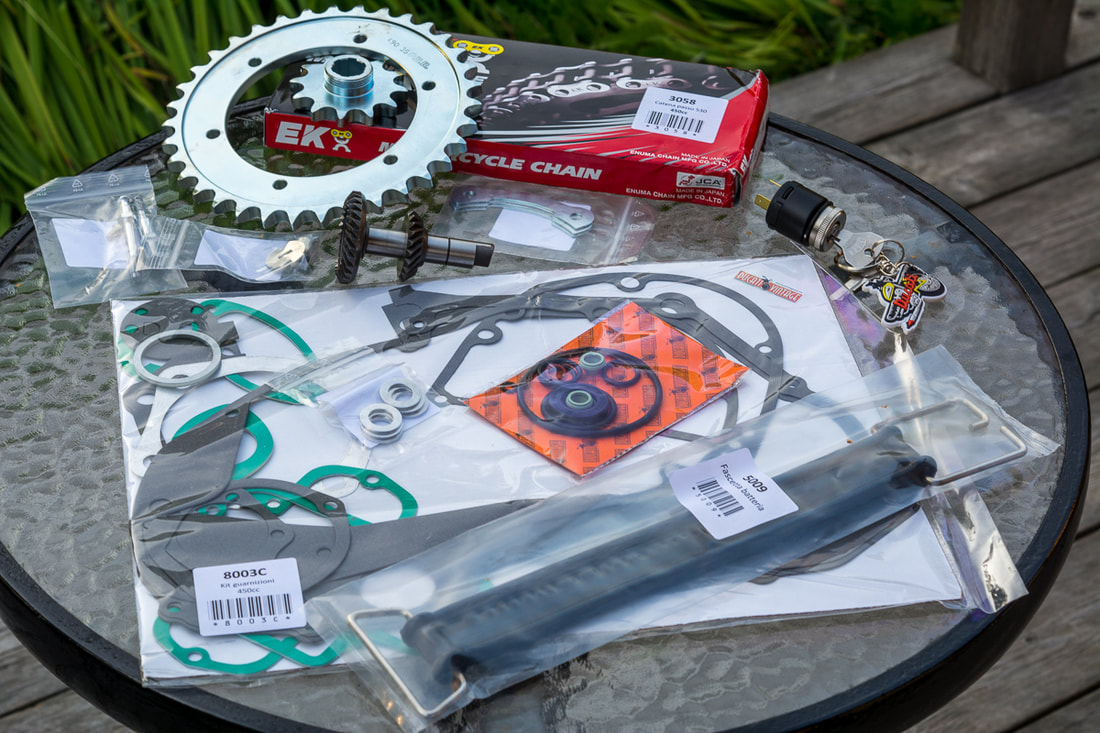
I got the last delivery I have been expecting today. It contained some washers and a nut for the engine and some parts for the carburetor. I tightened and secured a couple of nuts and also cleaned and changes the gaskets on the carburetor. The engine is pretty much ready to go on the frame again.
0 Comments
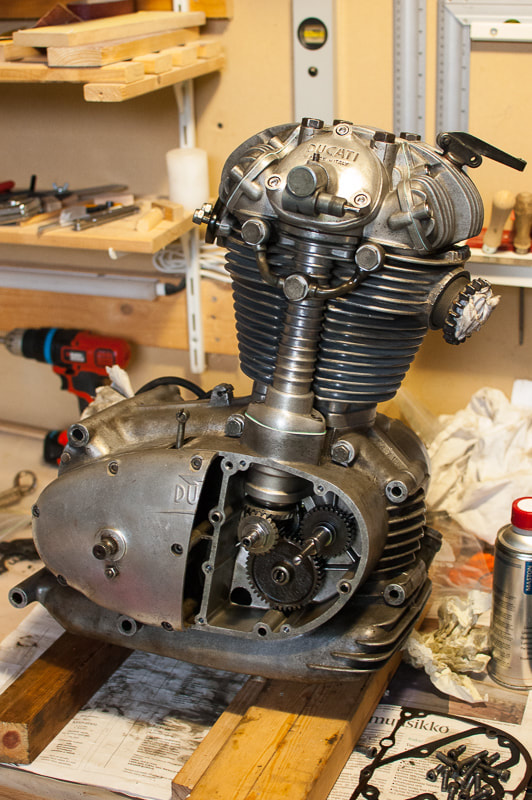
The engine is starting to look like an engine again. Today I put the cylinder and cylinder head back on their places again. I renewed all the gaskets on the way. At this stage it is important to align all the gears connecting the valves to the ignition to ensure correct timing of the ignition. The last gear which controls the ignition has a dot and a line. The line is for this 450 cc model, the dot is for all other models I believe. I bought some more washers etc. which should arrive tomorrow. Once they come I can tighten all the remaining nuts, renew the final gaskets and close the engine for now. I am not quite ready to start the engine though. The battery I bought has not yet arrived. I changed the oil pump gasket today. The screws are secured by a locking wire which scared me at first but I thought that since I have a new gasket I should change it. The pump seemed in good condition so I only changed the gasket. I didn't measure any tolerances etc. but I hope the visual inspection is enough. The long awaited part arrived today! It is used but in good shape. It came with the gear and spring. The spring on mine seems to be in better shape so I took the spring from the old one but used the gear from the new part. I can almost put the engine together again. I am still missing third order for some small parts like nuts and washers and a few bits (seals etc.) for the carburetor. I checked and adjusted the valves today. I have two different sources for the valve clearances. One says 0.05 - 0.10 mm for both valves, the other 0.08 mm for inlet and 0.13 mm for the outlet. I followed now the looser ones as I have understood that having the clearances too small is worse and too large. Both valves were a little too tight so I used my diamond bench stone I use to sharpen my tools to get a bit off the shims. I also changed the valve seals. They were included in the set of o-rings and other seals I got with my order yesterday. The old ones were hard and very brittle. I first thought they are metal or something but they broke easily. Definitely the time to change the seals. The package contained lots of seals and I don't quite know where they all belong. Need to figure that one out. One is for the ignition cover, and the one I really wanted is for the camshaft tube flange. Anyways, good that I bought the whole set. I wouldn't have thought about the valve seals otherwise. I have been doing quite a a lot recently although I haven't really kept up with these blog posts or even photos. I soldered the fuel tank. I might still line the tank with something like Por 15 or similar to prevent it from rusting and helping to fix the leak. I've also done a lot of cleaning of various parts. Yesterday I took the valves out and cleaned and lapped them. Next up is to tune the valve clearances. Both of the valves have too small clearances which I should be able to fix by just carefully sanding a little of the shims with fine sand paper.
The fuel tank has two fuel taps, one on either side. Unfortunately there are leaks around both of them. Last time I tried to just fill them with some epoxy putty. Unfortunately that didn't work. Now that I am waiting for the spare part for the engine I am trying to fix the leaks for good. I first cleaned up the putty. In the photo below you can just about see the hair crack. I will solder the cracks and hope that works. I will not paint the tank before I have used the bike again for a while to ensure the fix really works. 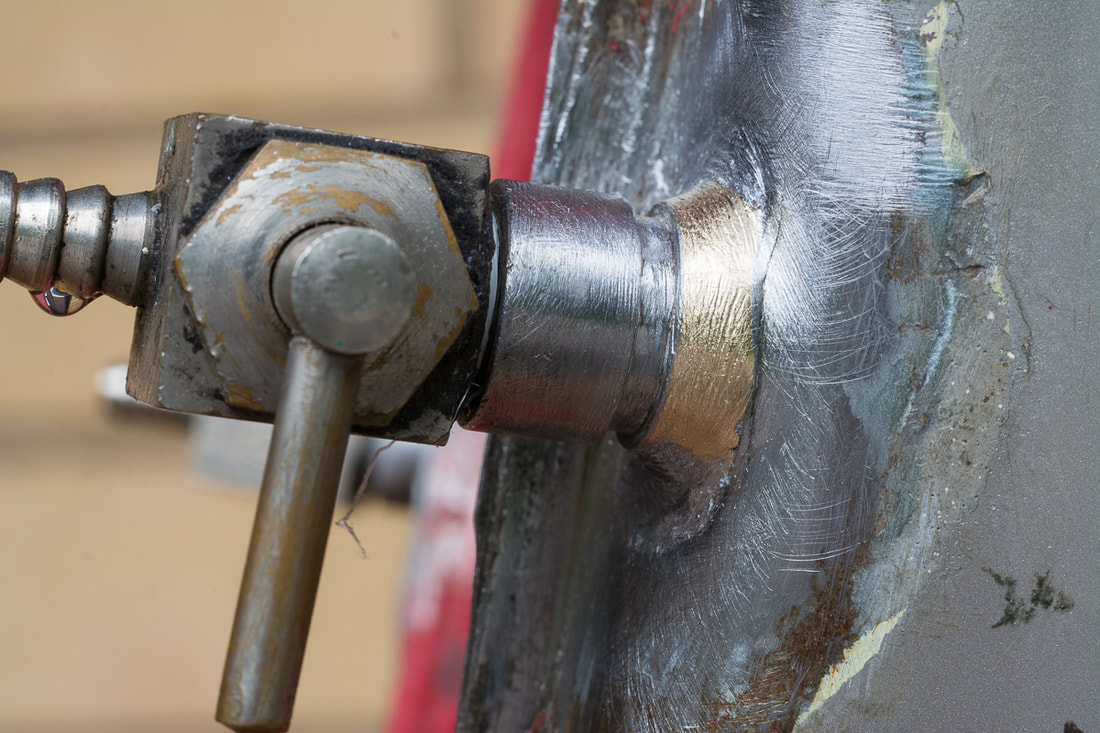 |
Ducati 450 Mark 3Fixing an old Ducati motorbike from 1971. ArchivesCategories |


 RSS Feed