|
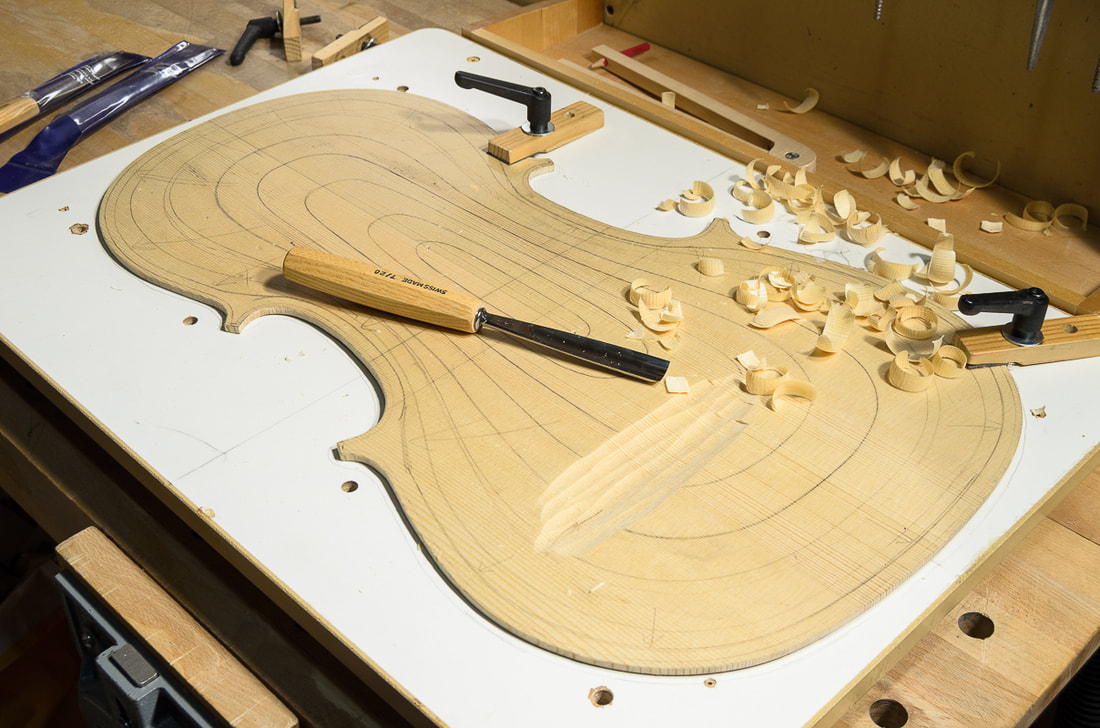
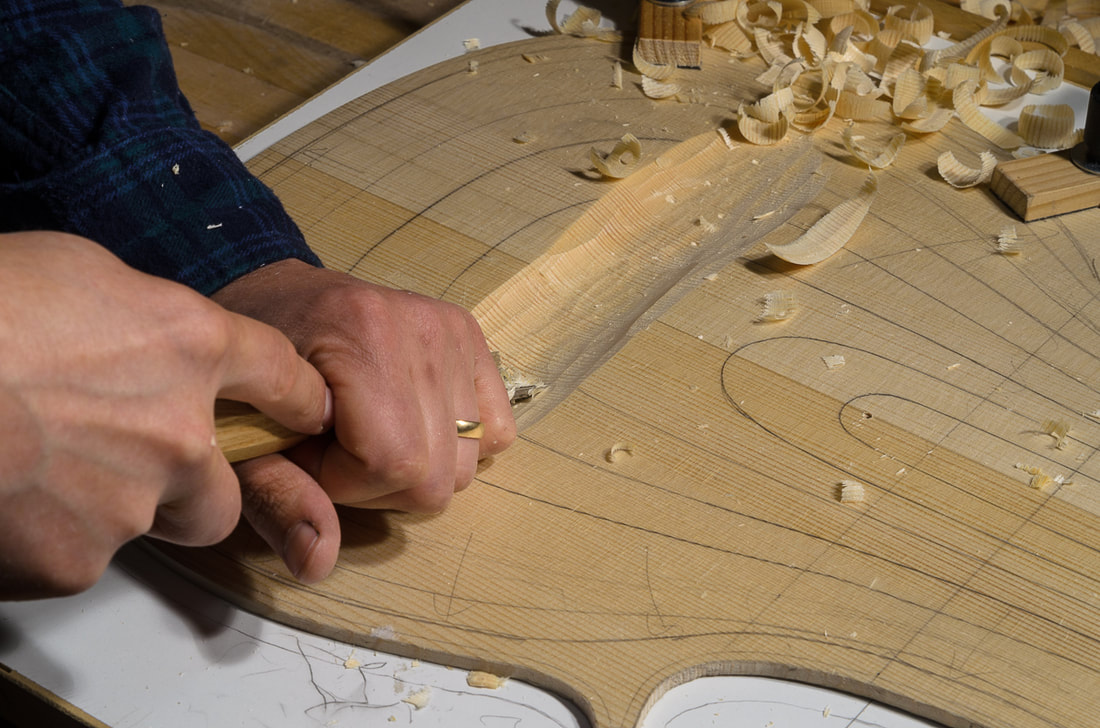
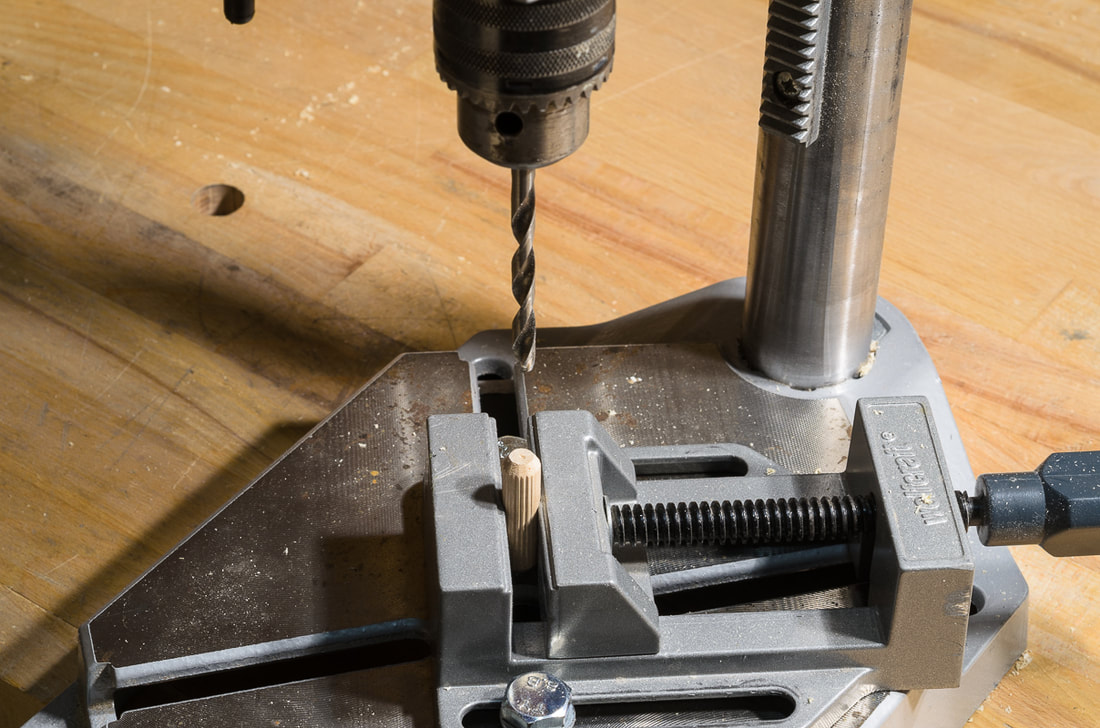
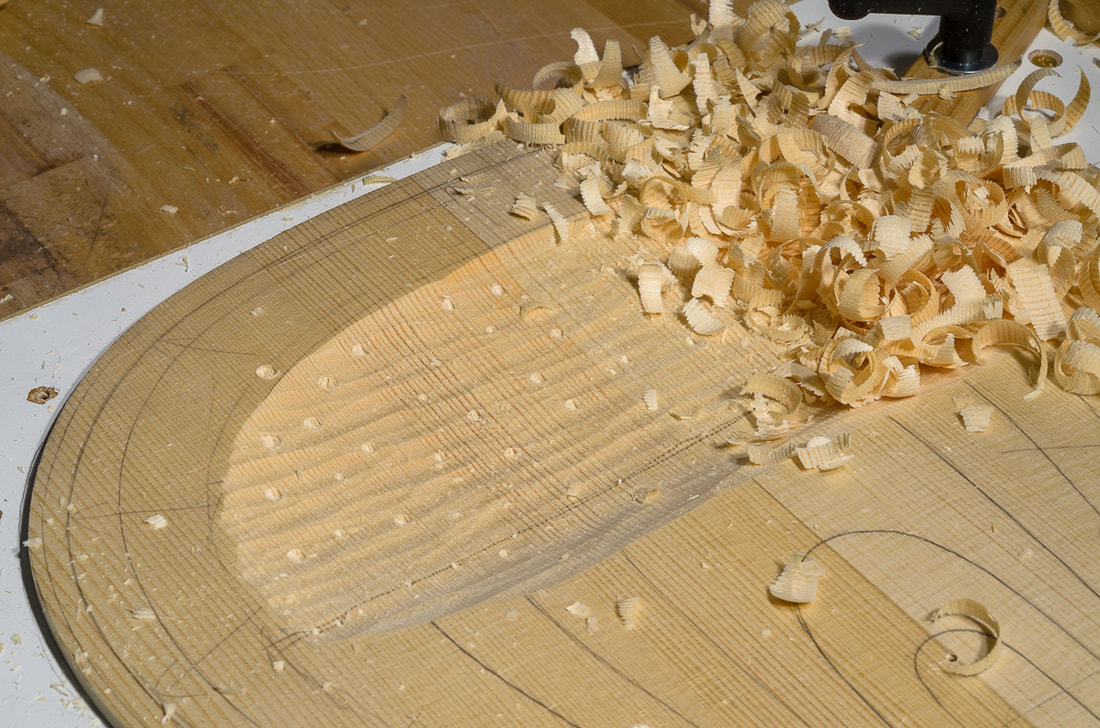
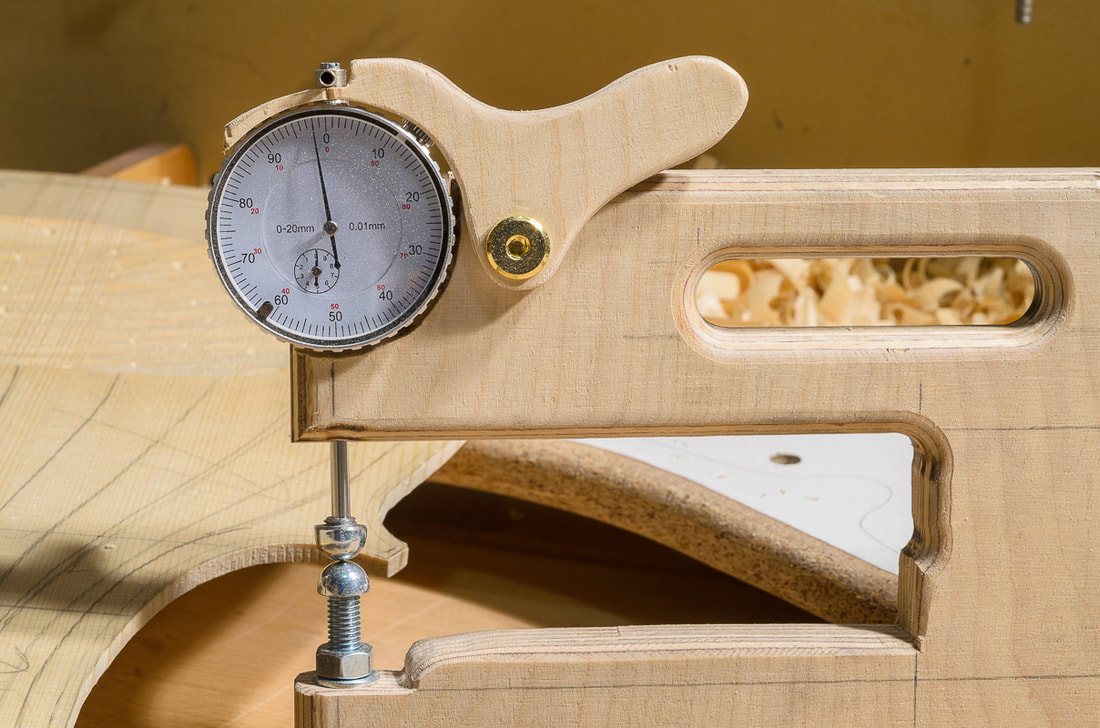
I am catching up with the actual progress. I still haven't described how the ribs were done and that will follow, but from now on I will be telling actual progress in real time. After the final arching of the top, one needs to hollow out the inside. I started doing this by eye and using the pencil gauge to mark areas which were too thick. I set the pencil gauge to 8 mm and marked on the front plate the position where it touched the bottom of the plate. I could then hollow inwards from this position. As this is my first instrument, I had trouble trusting trust my eye which meant that I was constantly checking the thickness. Hence I decided to drill depth markers. Some use this method also to remove much of the wood. I prefer to use hand tools as much as possible. It is more pleasant with more contact with the wood. Hand tools also make less noise and dust. So I drilled as few marker holes as I thought were required. I set the depth stop of the drill press so that there remained a gap of 8 mm between the dowel and the drill bit. The photos below show my setup for the drilling. Now with the depth marked at regular intervals I could easily gouge out the wood to correct depth. It was great to remove some nice shavings! I first carved from one side and then the other. I think it would probably be better to scoop across the whole plate on go. While doing this I noticed that the holes which I had drilled last were a little too deep, about 6 mm. The depth stop must have changed during the drilling. I need fix it more securely the next time. Luckily 6 mm is still more than the final thickness of the plate which is around 4.5 mm. After I had hollowed the first patch, I checked the thickness with a self-made thickness gauge. I bought an inexpensive dial indicator and fixed it on a piece of thick plywood. The thickness gauge works great. My only criticism is that the dial indicator is too accurate. The small dial shows the millimetres, the larger one 0.01 mm. In many cases it would be enough to read the small indicator but I find that difficult. I always read both which makes it quite slow. The dial indicator itself has a travel of 20 mm but with the setup I made I can easily set the range to be 0 mm - 20 mm but also for example 10 mm - 30 mm if needed for some reason. Some good references:
0 Comments
Leave a Reply. |